
Get branding tips and expert advice delivered straight to your inbox.
What You Need to Know About Brandfolder's Collections
At Brandfolder, we’re constantly thinking of ways to bring our users greater returns on their digital asset management needs, which is why we created Collections. When you just want to organize files, tagging can do the trick, but what when you need a more segmented and dynamic organization solution, a more powerful tool is required.
A subset of your Brandfolder, Collections is an enterprise-only feature that includes many of the attributes you can find in your main Brandfolder — sections, searching, sharing, permissioning, bulk actions, and more. So, whether you need further organization, access control for a subset of your Brandfolder, or a place to house audience or campaign-specific content, Collections may be just what you’ve been looking for.
When do you need a Collection?
Collections can be and are used for all sorts of things, but how do you know when Collections are right for you? Here are some of the ways you can implement Collections for your benefit:
- Provide the right assets to the right audience: Allow certain people to be able to access a subset of your Brandfolder or hide assets from certain Brandfolder users, ensuring users see only what’s pertinent to them.
- Allow for further organization of your Brandfolder: Organize groups of assets across sections for press releases, marketing campaigns, or audiences.
- Control who can see what: Make some assets of your Brandfolder public, while keeping the rest of your Brandfolder private.
- Embed a subset of your Brandfolder: Showcase some assets of your Brandfolder on your website, while hiding the rest.
Creating a Collection
Creating and using Collections is easy. Just follow these simple steps:
1. Select your assets. Start by selecting any number of assets from your Brandfolder.

2. Click the plus icon next to the word Collection which will be in the lower right corner of your screen.

3. Select +Create Collection from the dropdown menu.
4. Give your Collection a name by inputting it into the Collection Name textbox.
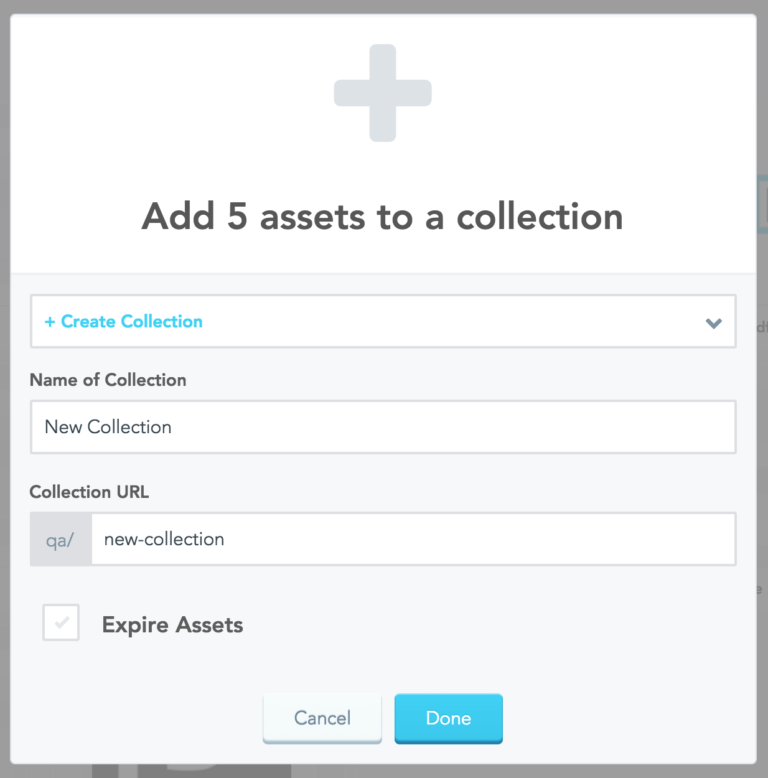
5. Give your Collection a custom URL address where it can be found.
6. Optional: If you only want the assets you’ve selected to be available for a limited time, you can set an expiration date on the assets. This will remove selected assets from the Collection, but not the Brandfolder itself.

7. Click “Done”. This will redirect you to your new Collection.
Voilá. Just like that, you’ve created a Collection.
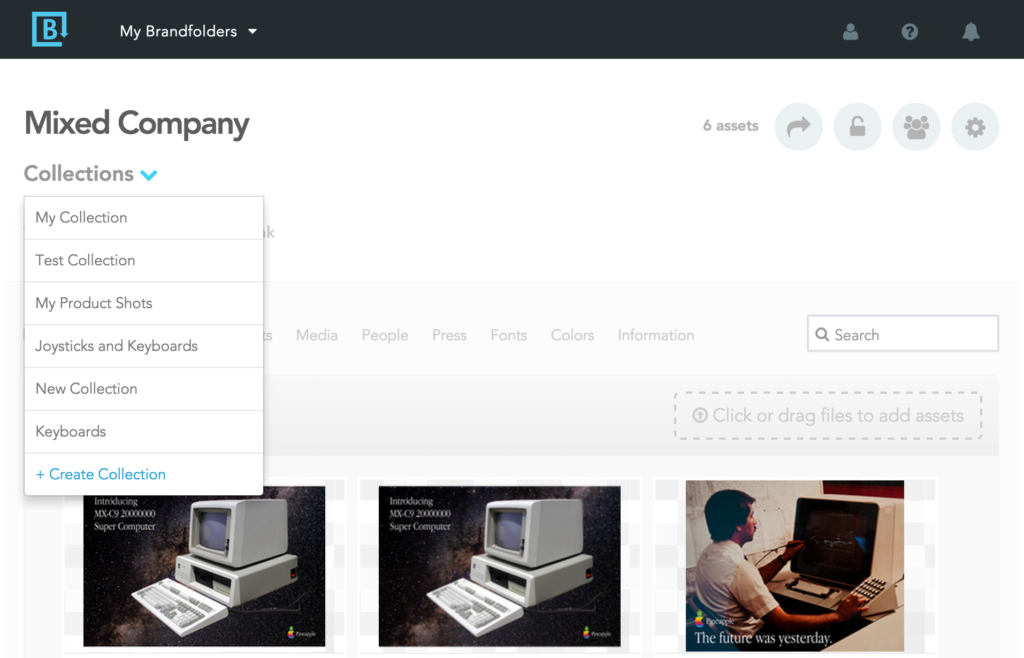
Don’t know what assets you’ll need yet? No worries. Just select +Create Collection from the Collections dropdown you can find below your Brandfolder’s title.
Actions You Can Take On Collections
Once inside your Collection, you’ll notice that it’s structured similarly to your Brandfolder. Since the majority of the functionality parodies what you can already do in your Brandfolder, the actions here will be intuitive if you’re an existing user. Here’s all the stuff you can do with your new Collection.
- Add a header image.
- Manage users.
- Search for Assets.
- Share your Collection.
- Control privacy settings.
- Get an embed code and embed your Collection on a website.
- Add Assets from your Brandfolder.
- Remove Assets from your Collection (they will still be available in your Brandfolder).
- Make bulk actions on Assets: tag, move, share, download, remove.
- Edit Assets. (Edits on Collection Assets will be reflected wherever the Asset exists, whether in your Brandfolder or in other Collections).
For more detailed information on Collections, head to our knowledge base page about how to use Collections.
If you’re interested in using Collections with your existing Brandfolder, please contact us sales@brandfolder.com to learn more. Get more out of your Brandfolder and start using Collections today.