Do you want to learn how to configure Brevo with WP Mail SMTP?
WP Mail SMTP is a popular choice for many WordPress users who want to improve their email’s deliverability rates.
It’s easy to use, simple to set up and makes sure your emails go where they belong: in your customers’ inbox.
Plus, if you’re using Brevo for email marketing, things are even easier. That’s because you can hook up Brevo with WP Mail SMTP in just a few minutes.
And in today’s post, we’re going to show you exactly how.
Let’s dive straight into the tutorial.
Sync Brevo With WP Mail SMTP
Before we begin, you’ll need to get started with your free Brevo account:
Brevo is an all-in-one marketing solution that helps you with email and SMS marketing. They have stunning campaigns that anyone can create in minutes, and you don’t need to be a professional developer or marketer to send high-converting email sequences.
And when you hook up Brevo with WP Mail SMTP, you’ll be able to send transactional emails to your WordPress visitors, too.
Transactional emails are important notifications that keep customers updated. When someone makes a purchase on your site, for example, they usually get a confirmation email shortly after.
That would be considered a transactional email.
The problem with most transactional emails is that they can sometimes be sent to your client’s spam folder or be blocked altogether.
That’s why you also need a plugin like WP Mail SMTP:
WP Mail SMTP is the world’s most popular SMTP and PHP mailer plugin. It helps ensure that your emails go to your customers’ inbox rather than to their spam folder.
It uses proper authentication methods for your emails to boost deliverability rates and provide you with more reliable email marketing.
This is important when using WordPress because your site will send transactional emails for things like:
- New account registrations
- Email/login recovery information
- Confirmation of purchases
- And much more…
WP Mail SMTP gives you a solution for delivering these important messages to your customer’s inbox.
Before we get started, make sure to:
These are all the tools you need to make sure your emails go where they belong.
Now let’s dive into the tutorial.
Step 1) Verify Your Domain With Brevo
To set up Brevo with WP Mail SMTP, you’ll first need to verify your domain with your Brevo account.
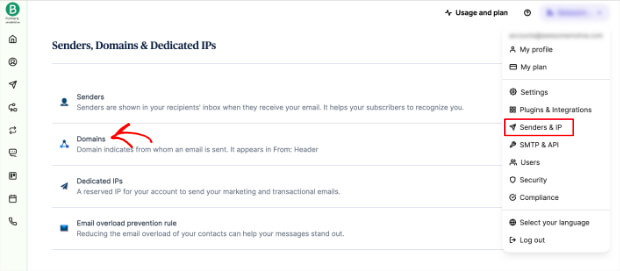
This can be done under your Senders & IP tab from your Brevo dashboard. Click on the Domains tab:
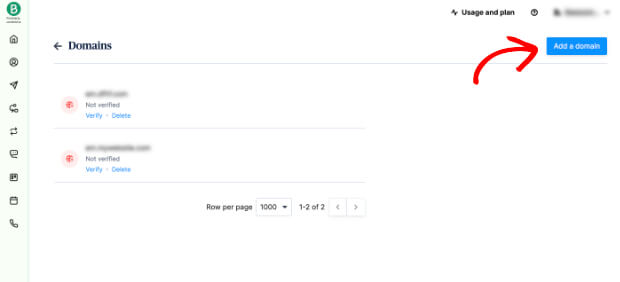
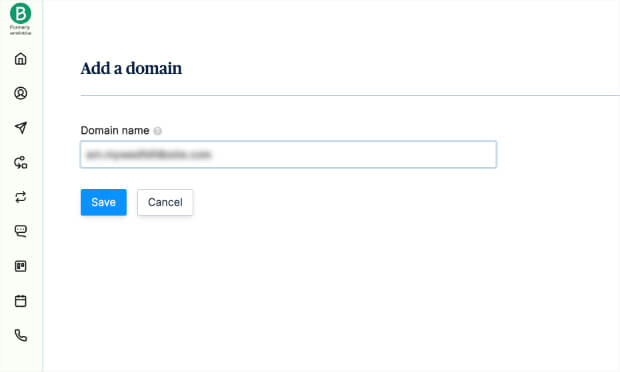
In the upper right-hand corner, click Add A Domain:
Now you’ll need to enter a subdomain of your website.
This is where most people get hung up, but don’t be intimidated.
A subdomain is simply something that replaces the “www” part of your website’s URL. You might have seen this before with a URL like the following example:
blog.mywebsite.com
In this case, “blog” would replace “www,” and the URL “blog.mywebsite.com” would be a subdomain of “www.mywebsite.com.”
This is adding a separate section or directory to your WordPress site and is used to send emails with Brevo (but won’t appear on your actual site).
But you might be wondering, “Why use a subdomain in the first place?”
The biggest reason is to protect your main domain’s reputation, which will have a big impact on your deliverability rates. While there’s a lot of technical reasoning behind this, here’s what you really need to know:
Using a subdomain with Brevo to send your emails increases deliverability rates.
Another thing to keep in mind is that your subdomain will appear in email header details, so you’ll want to keep it simple.
We recommend going with something like em.mywebsite.com.
Click Save, and now you’re ready to move on to the next step.
Step 2) Adding DNS Records With Your Web Host
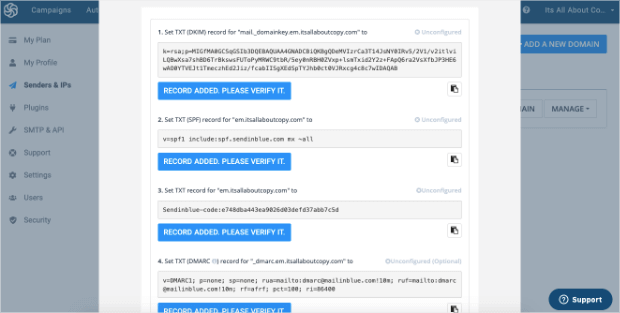
Once you saved your progress from the last step, a popup will appear with lots of information. These are DNS records that you’ll need to configure with your web host:
In other words, this is the information you’ll need to authorize your domain as a way of protecting yourself and your client’s data.
In a separate browser, log into your web host to find where to add your TXT files (provided in the Brevo popup) to your DNS records.
The exact steps of setting this up will change depending on your web host, but here are instructions for the most popular options:
Once you find where you need to add the TXT files, the rest is just a matter of copying and pasting. Plus, we’ll walk you through it.
You’ll need to add 3 TXT files to your DNS records to connect Brevo with WP Mail SMTP:
1) TXT (DKIM) Record
Host Name/Record: The subdomain you’re using (example: em.yoursite.com)
Record Type: TXT
TTL: 24 hours or 1 day/86400 seconds, depending on your host’s options
Text/Data: Copy this from the Brevo popup (in the image above)
Note that if you’re using GoDaddy, you’ll need to set the TTL to 1 hour for each of these TXT files.
2) TXT (SPF) Record
Host Name/Record: The root of your subdomain. If your subdomain is “em.yoursite.com,” then you’d enter “em” here.
Record Type: TXT
TTL: 24 hours or 1 day/86400 seconds, depending on your host’s options
Text/Data: v=spf1 include:spf.sendinblue.com mx ~all
3) TXT Record (Brevo code)
Host Name/Record: The root of your subdomain. If your subdomain is “em.yoursite.com,” then you’d enter “em” here.
Record Type: TXT
TTL: 24 hours or 1 day/86400 seconds, depending on your host’s options
Text/Data: Copy from your Brevo popup (from the image above) as each code will be unique for each domain.
Underneath these options, you’ll also see information for DMARC. Unless you’re an experienced developer, we don’t recommend adding this to your DNS records.
Fortunately, you don’t have to! You can simply skip to verifying your configuration.
Step 3) Verifying Your DNS Records
Once you’ve added your TXT files to your site’s DNS records, go back to the Brevo popup that originally had your TXT files.
Click Record Added, Please Verify It:
Do this for each of the 3 TXT files you added to your DNS records.
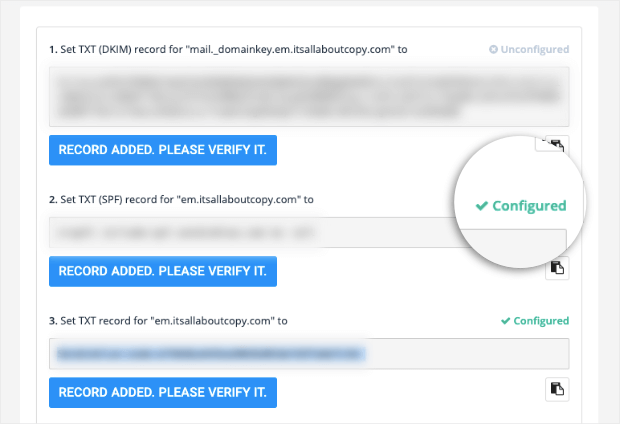
Keep in mind that it can take 24 – 48 hours for these records to be verified, though some will show the Configured status much more quickly.
Here’s what our setup looked like immediately after updating the host’s DNS files:
Note that the DKIM file is the only one that wasn’t configured right away. It will take 1-2 days, so don’t worry if the same happens to you.
Step 4) Set up WP Mail SMTP
In your WordPress dashboard, head over to WP Mail SMTP » Settings.
You’ll need to configure a few things here, starting with your From email.
1. From Email
This will be the email address that all of your site’s emails are sent with. You can also click the Force From Email option.
That will ensure the email address you use in the From email field box will be used regardless of what other plugin configurations are set to.
We also highly recommend using a domain-specific email address (@yourwebsite.com).
2. From Name
By default, this will be your website’s name, though you can change it to something else if you prefer:
You can also check Force From Name. Like we saw earlier, this will force the From Name to be the same regardless of what other plugins have configured.
3. Mailer
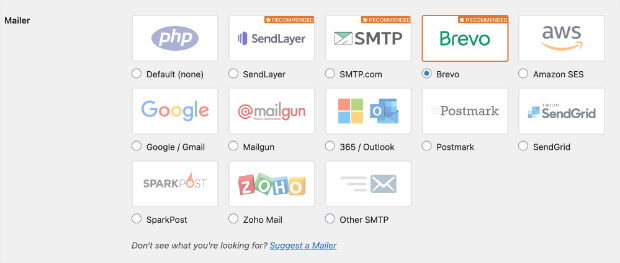
Next, you’ll need to select your mailer. For this tutorial, select Brevo:
4. Add Your Brevo API Key
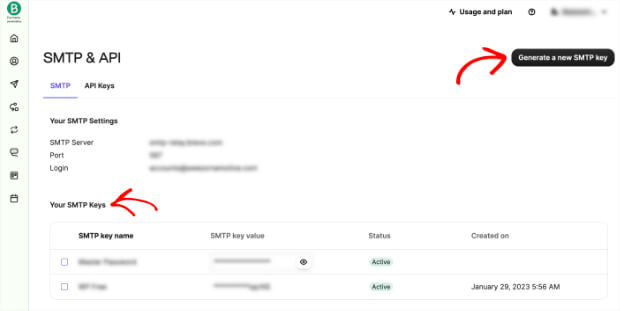
Next, you’ll need to enter your Brevo account’s API key. You can find that from your Brevo dashboard under the SMTP & API tab:
You can also click Generate a New API Key if you’ve never generated one for your account yet.
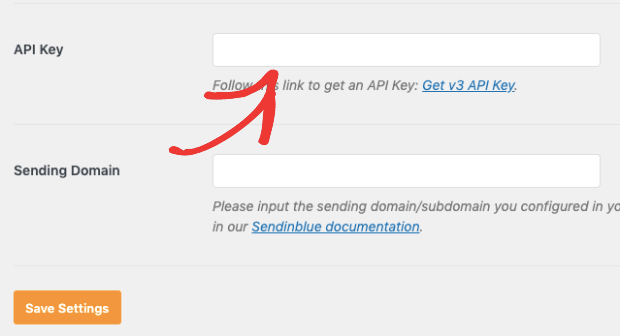
Copy this key and paste it in your WP Mail SMTP API Key field:
You can also enter the Sending Domain, which is simply the subdomain you authorized with Brevo from earlier in the tutorial.
That part is optional, but it helps WP Mail SMTP check for any domain-side problems with your Brevo configuration.
When you’re done, click Save Settings.
Step 5) Send an Email Test
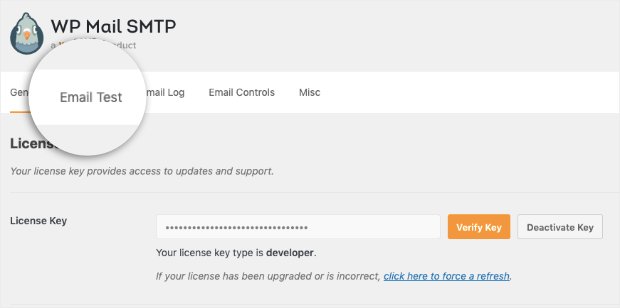
From your WP Mail SMTP dashboard, click Email Test from the menu at the top:
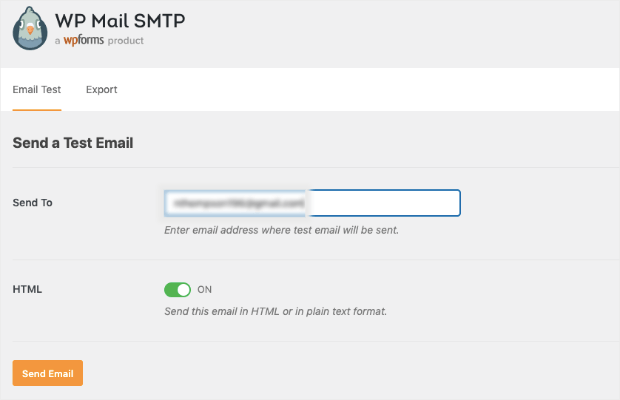
Then enter the email address you’d like to send this test email to and click Send Test Email:
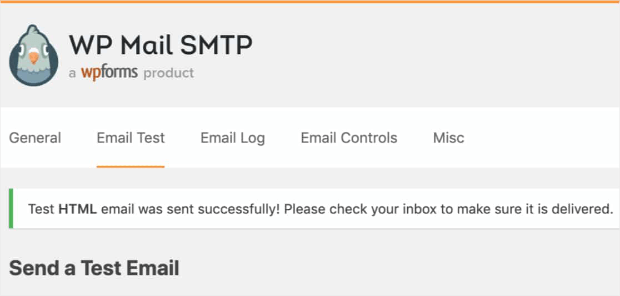
When completed, you’ll get a success message that looks like this:
Check your inbox to be sure that the mail successfully came through.
And that’s it! You’ve now configured Brevo with WP Mail SMTP.
We hope you enjoyed this post. If you did, you might want to check out the following resources:
- Best SMTP Services for Reliable Email Marketing
- What Is a Transactional Article (+10 Stunning Examples)
- Email Scrubbing: Why & How to Clean Your List
These articles have even more information on SMTP and how you can improve deliverability rates through your email marketing efforts.
Disclosure: Our content is reader-supported. This means if you click on some of our links, then we may earn a commission. We only recommend products that we believe will add value to our readers.
