With our AI headline generator tool, you can create enticing, click-worthy titles for your articles, product pages, social media captions, content tags, and more. You can also customize AI prompts to manage your content production in one location with our OpenAI integration.
RebelMouse’s AI-powered tools help you save time searching for what you need to support traffic-generating content. This article covers how to create AI prompts for your editorial pages and customize your own AI tabs for specialized content.
How to Customize Headline Prompts in Entry Editor
If you have a specific request for our headline generator, crafting a prompt can help instruct the AI toward your desired output.
Follow these steps to create a headline prompt in Entry Editor:
- Click the Edit Prompt button to customize the current prompt.
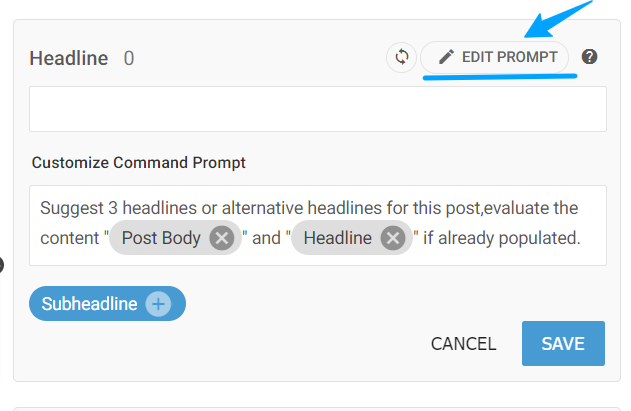
2. After customizing your prompt, click Save.
How to Create and Customize Site-Wide AI Prompts
You can manually modify the headline generator prompt for each article, or create a comprehensive AI prompt that will work across all of your desired content. This feature is helpful if you want to avoid typing requests into the AI, or have content that adheres to a particular format.
All users can benefit from AI-generated headlines tailored to your website or brand's unique tone and feel. You can customize Entry Editor's default prompts for your site or specific pages.
Follow these steps to customize your site-wide AI prompts:
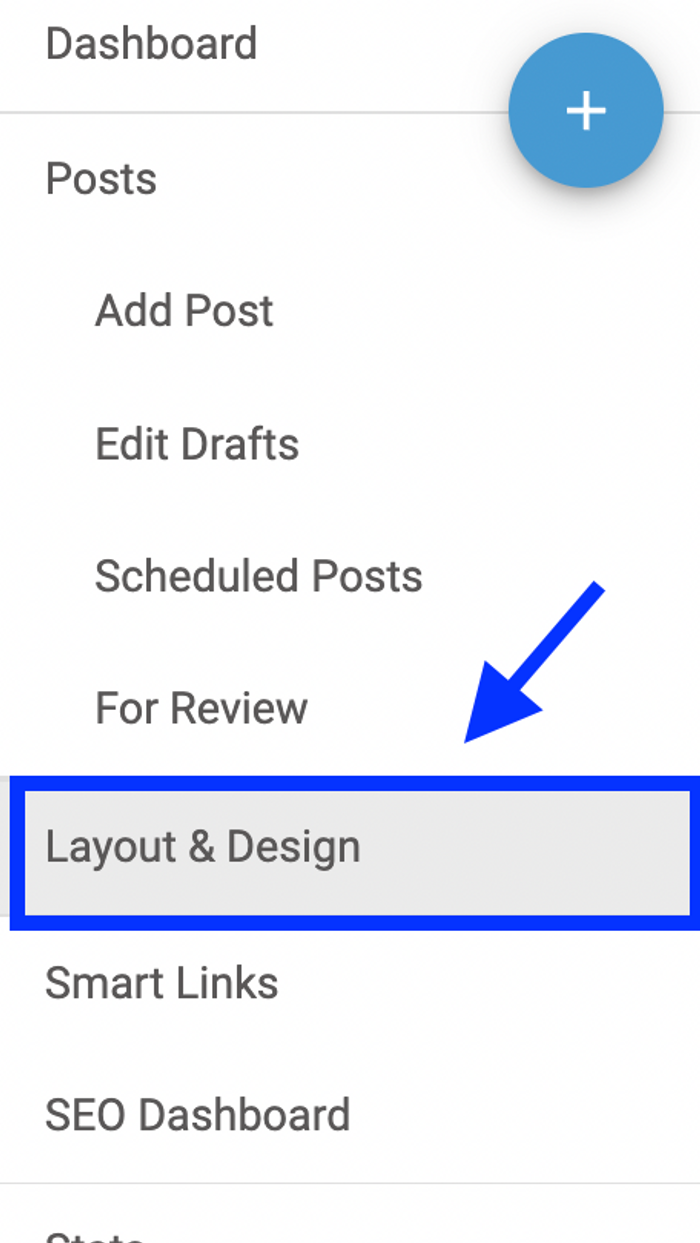
1. Click the hamburger menu (☰) in the upper-left corner of your Posts Dashboard and select Layout & Design Tool.
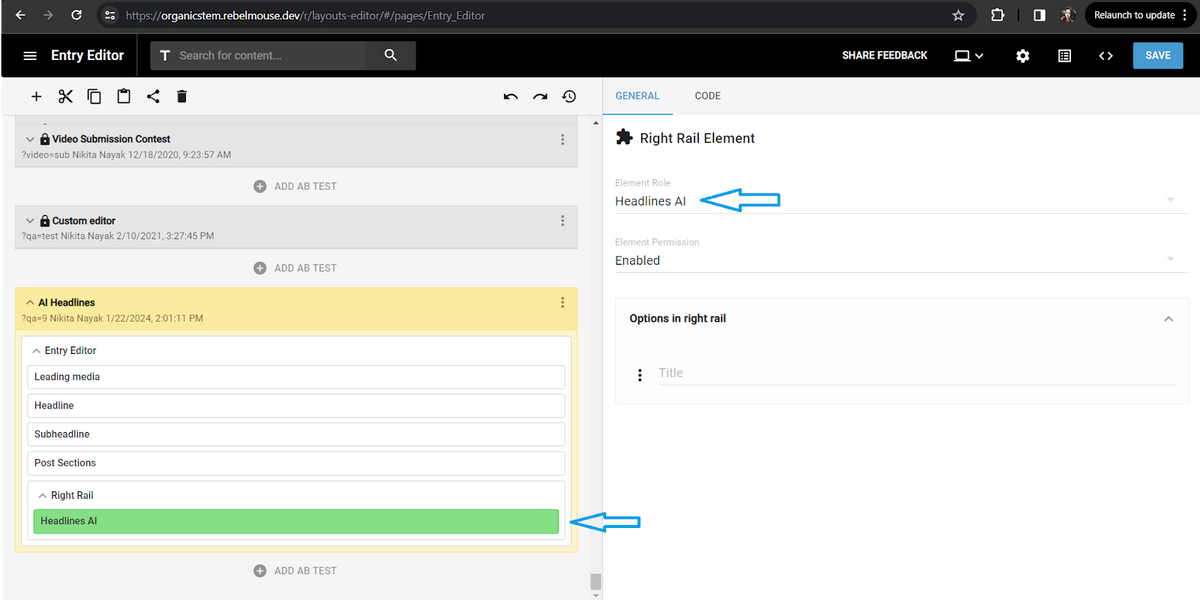
2. Then, click the hamburger menu under Global Settings, select Pages, and click Entry Editor.

3. Next, find the AI Headlines menu. Use the drop-down menu to add Headline AI as a Right Rail element to an Entry Editor layout.
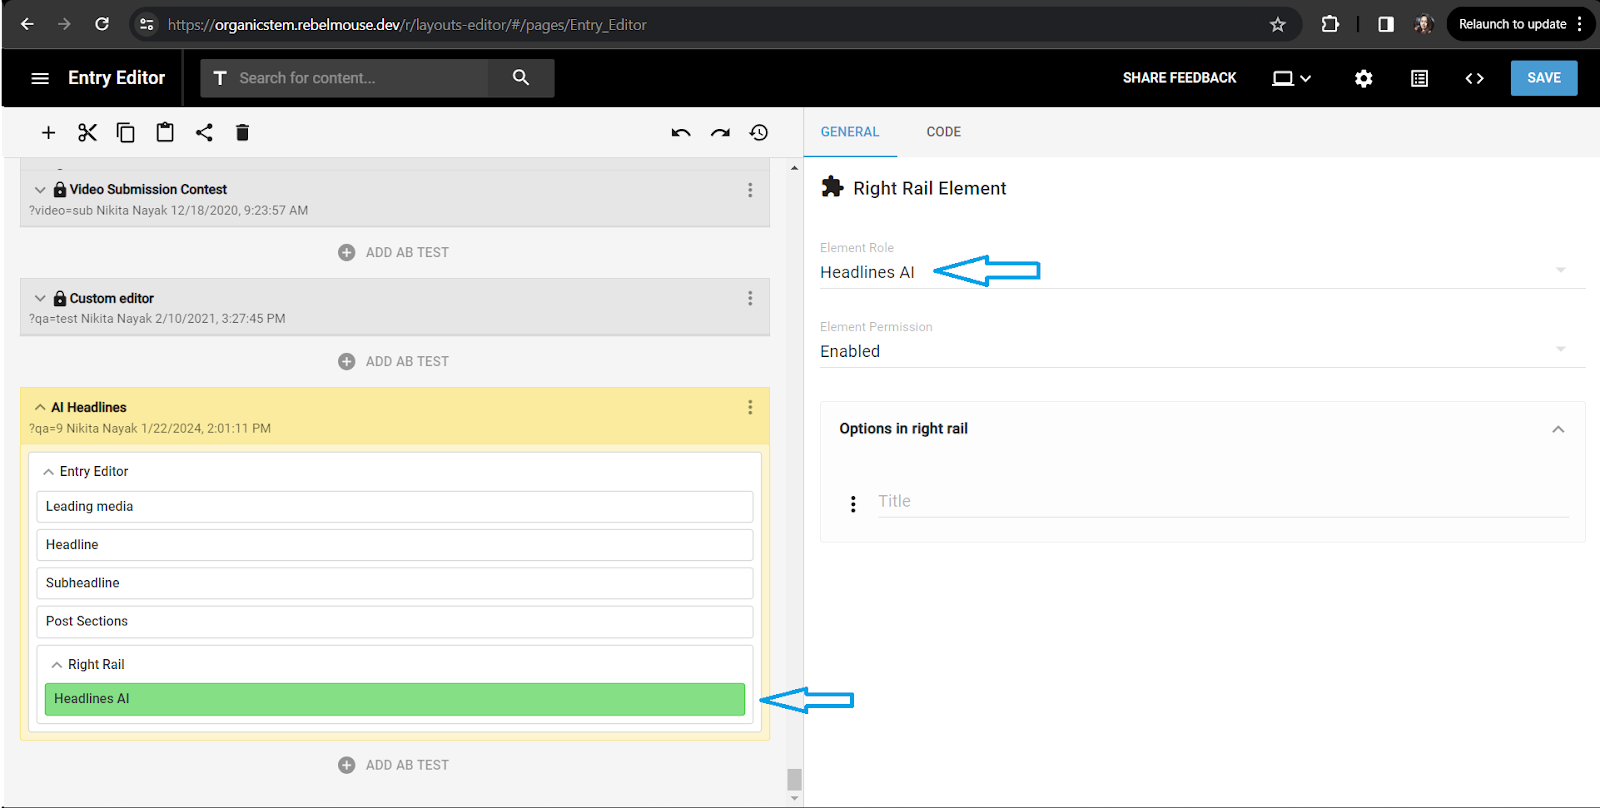
All your filled-in fields, such as the headline, social headline, and teaser headline should be in the Headline AI Right Rail element and ready for editing. If any fields are missing, you can use an Optimizer Field to add and customize them.
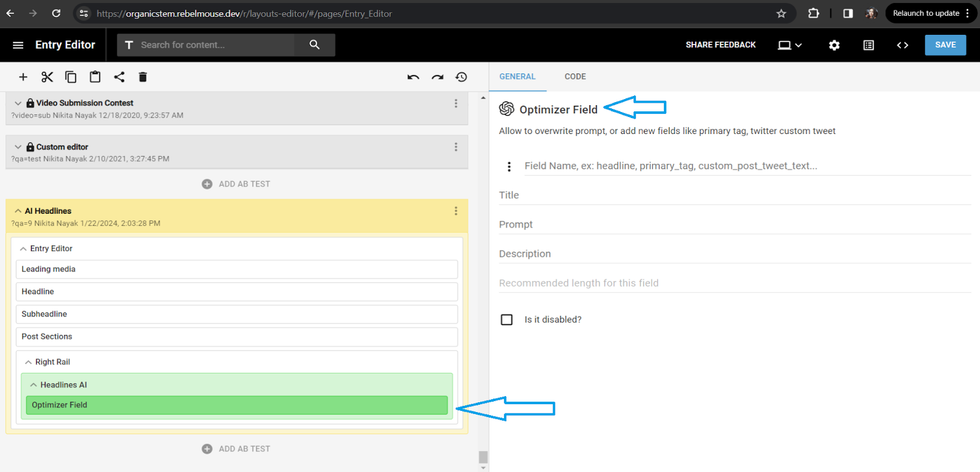
4. To add an Optimizer Field, follow this visual tutorial:

You can add as many field sections as you like to the headline generator using the Optimizer Field. In the example below, we chose the Primary Tag as an additional field.
In Entry Editor, the Primary Tag field will appear as follows in the Headlines tab:

Best Practices for Creating an AI Prompt
The AI prompt is compatible with any field, but it specifically considers the {{postBody}}, which contains the text for the body and listicle sections. Other components such as {{headline}}, {{subheadline}}, and {{primary_tag}} should be specified inside brackets.
How to Create a Custom AI Tab for Entry Editor
Your custom AI button personalizes your content creation and can be added to Entry Editor as an independent tab from the headline generator. If you want everything in one location, you can also add these fields under the Headlines tab.
Follow these steps to create a custom AI tab:
1. Click the hamburger menu (☰) in the upper-left corner of your Posts Dashboard and select Layout & Design Tool.
2. Then, click the hamburger menu under Global Settings, select Pages, and click Entry Editor.

3. Next, find the AI Headlines menu. Use the drop-down menu to add Headline AI as a Right Rail element to an Entry Editor layout.
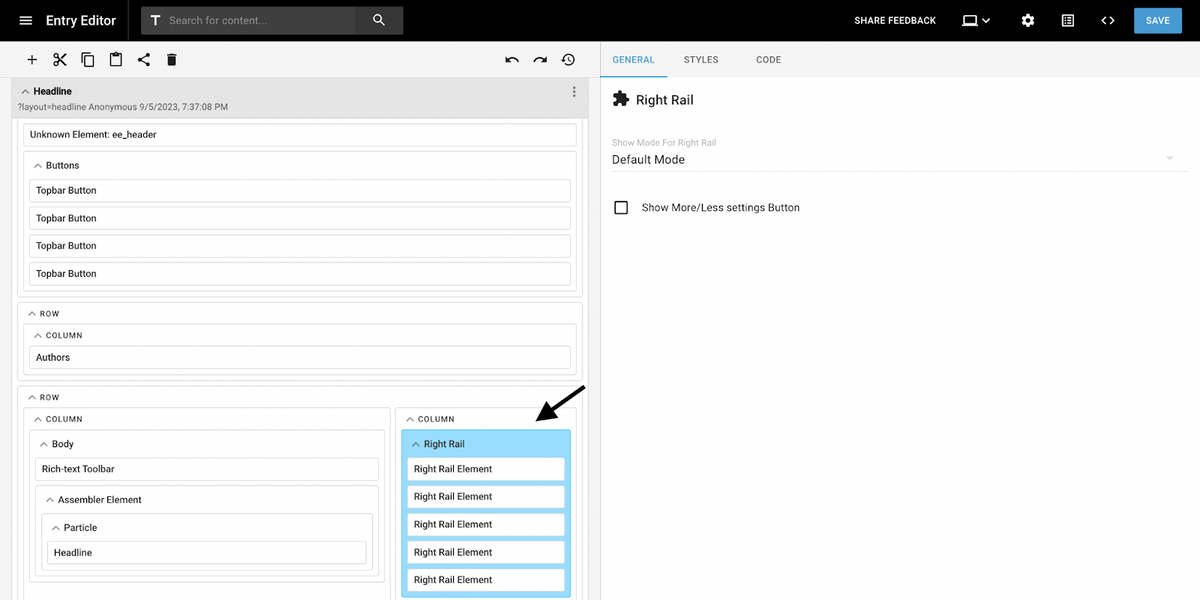
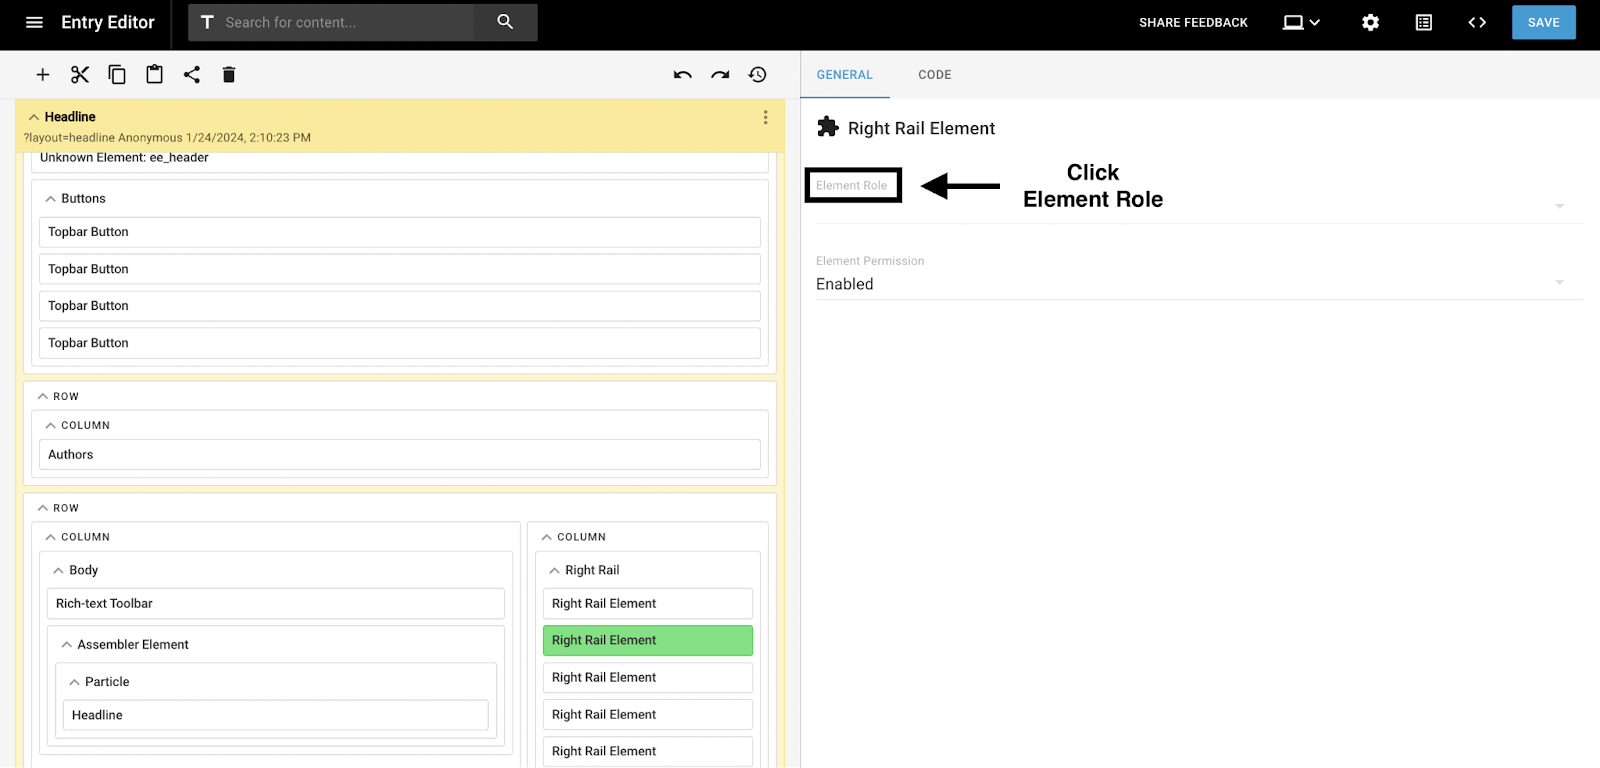
4. Click the Right Rail section under a B-test in the Entry Editor layout, which should then be highlighted in blue. (Each user's version of this element will appear differently.)
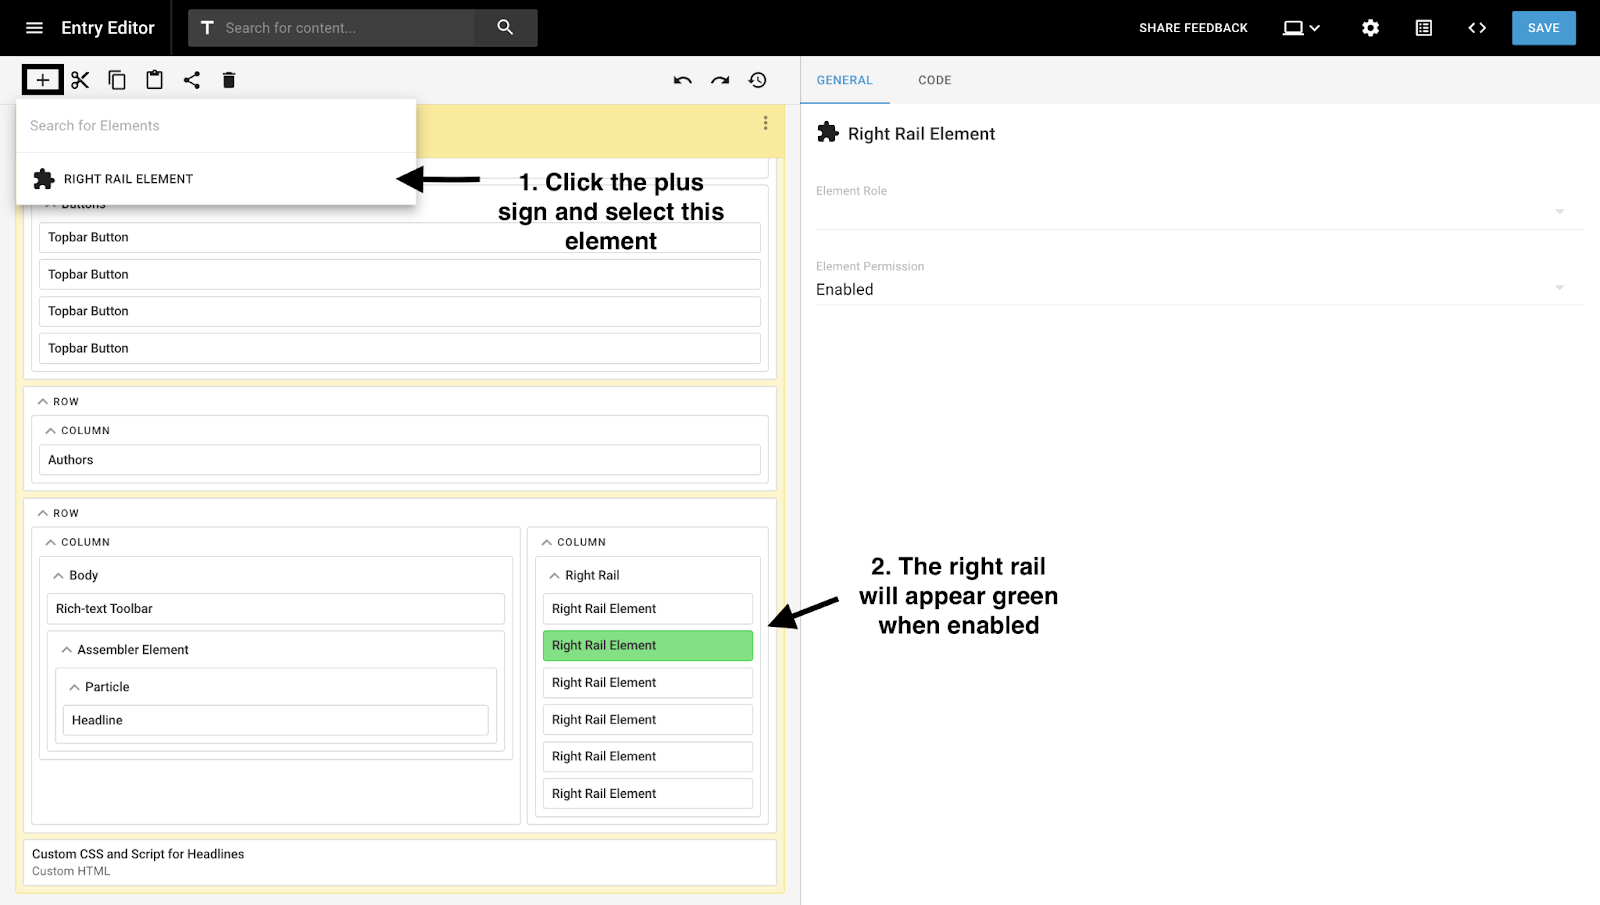
5. Click the plus icon (+) in the upper-left corner and select the Right Rail element. This will enable it for customization.
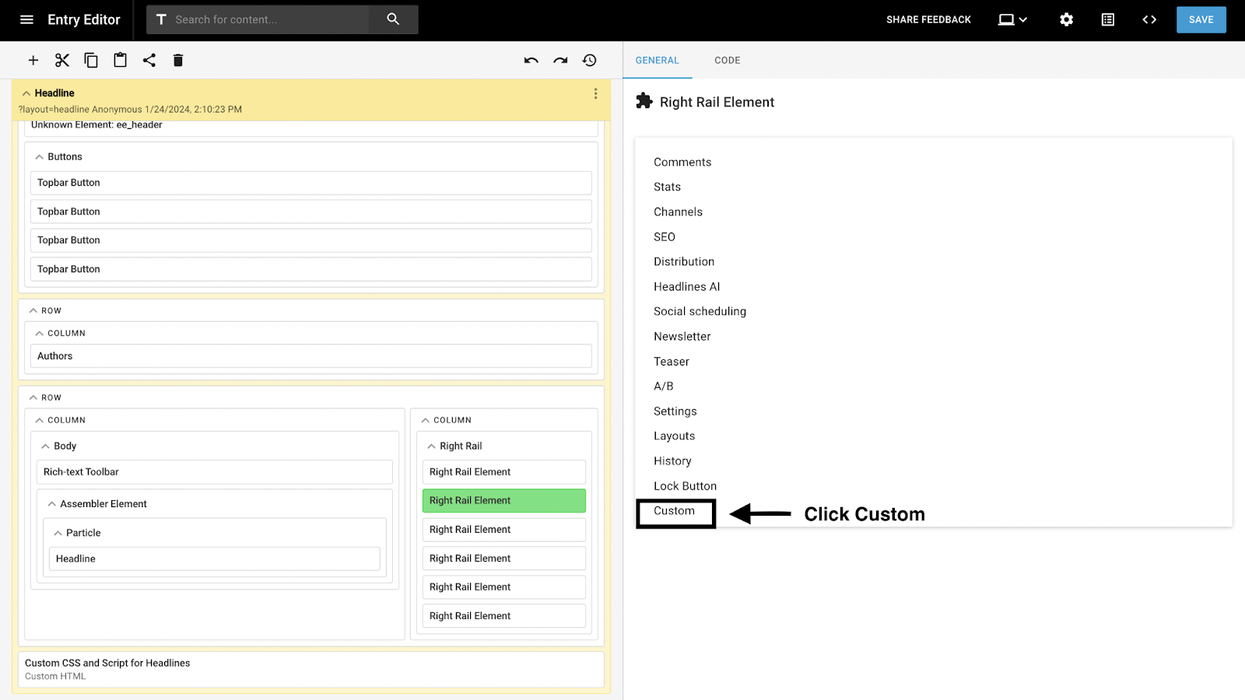
6. In the element settings on the right-hand side of the interface, click Element Role to access the drop-down menu and choose the Custom button at the bottom of the list.
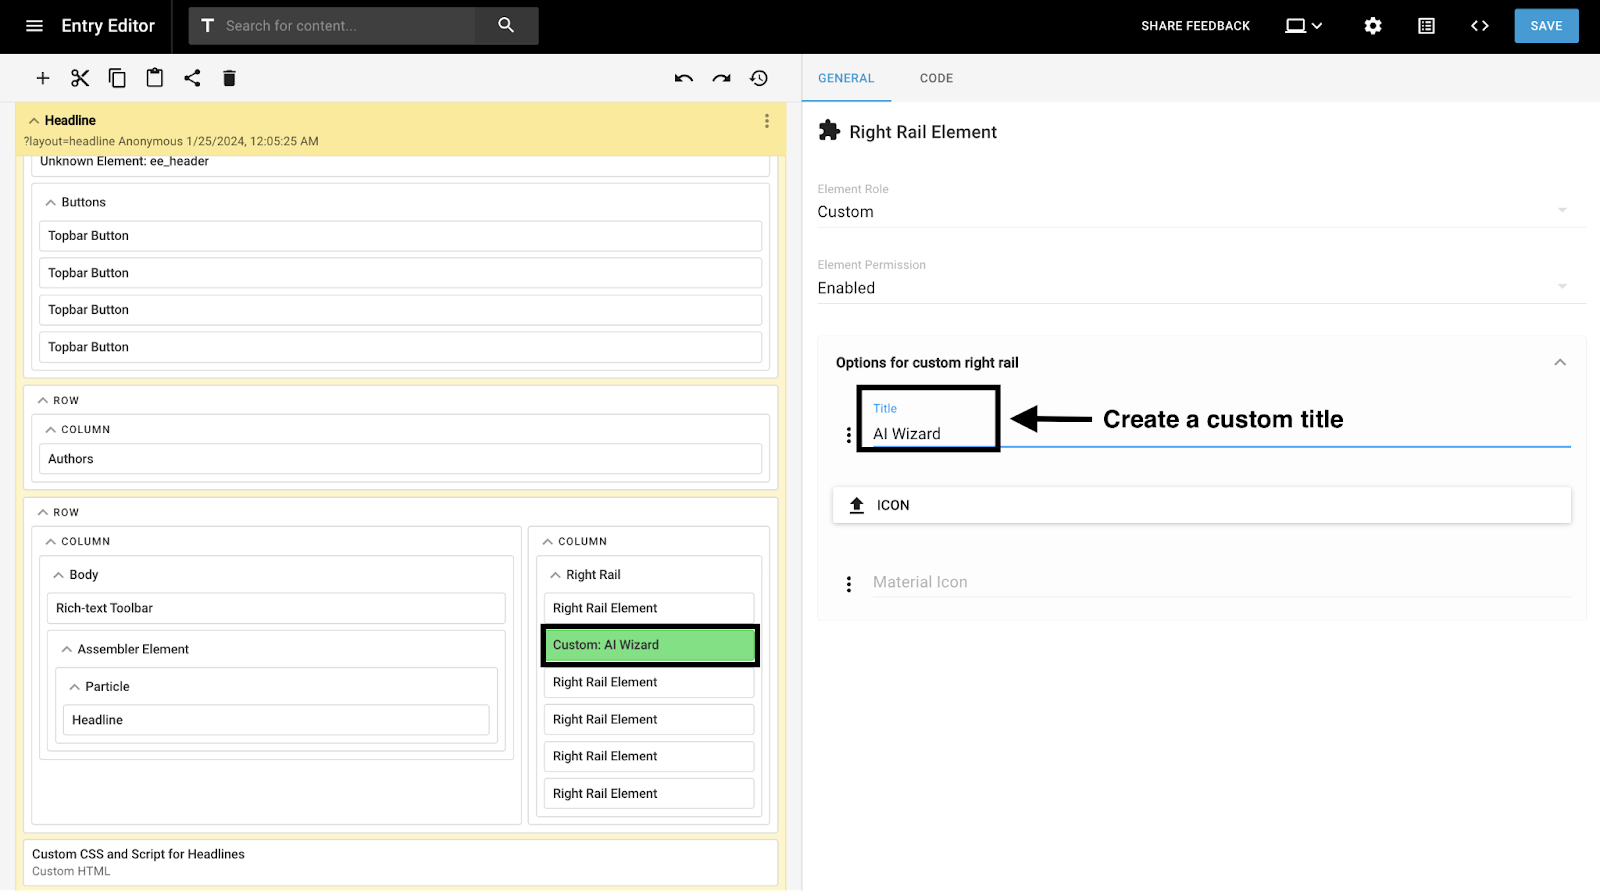
7. Under the Options for Custom Right Rail section, create a title. The custom Entry Editor tab in this example is called “AI Wizard.”
8. You can optimize your custom AI tab with various subject fields, such as primary tags, social headlines, custom tweets, and more, using the optimizer box. After choosing your fields, input your desired AI prompts to generate content for your website more quickly.
Continue following the instructions below to name your fields and create your prompts using the optimizer box.
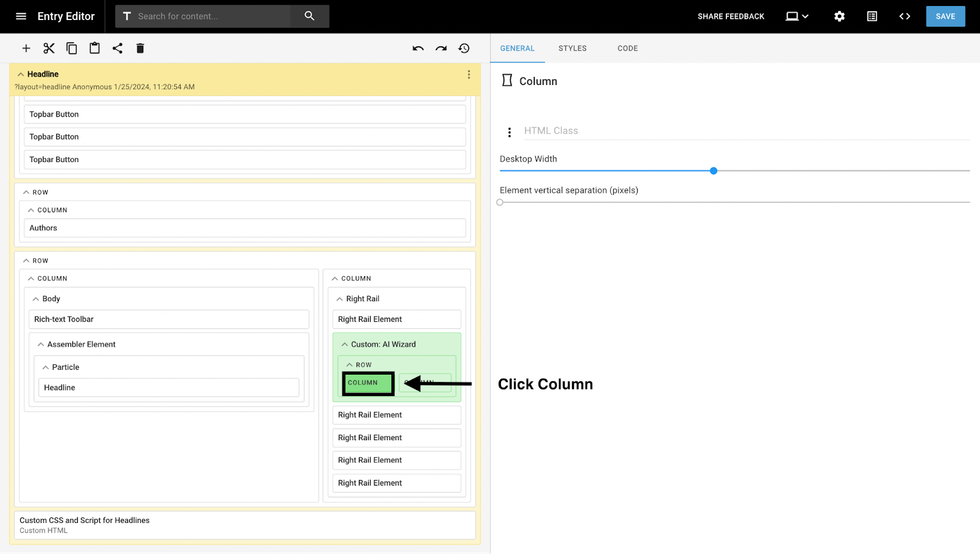
9. Click the plus icon (+) in the upper-left corner of the interface and select Row.
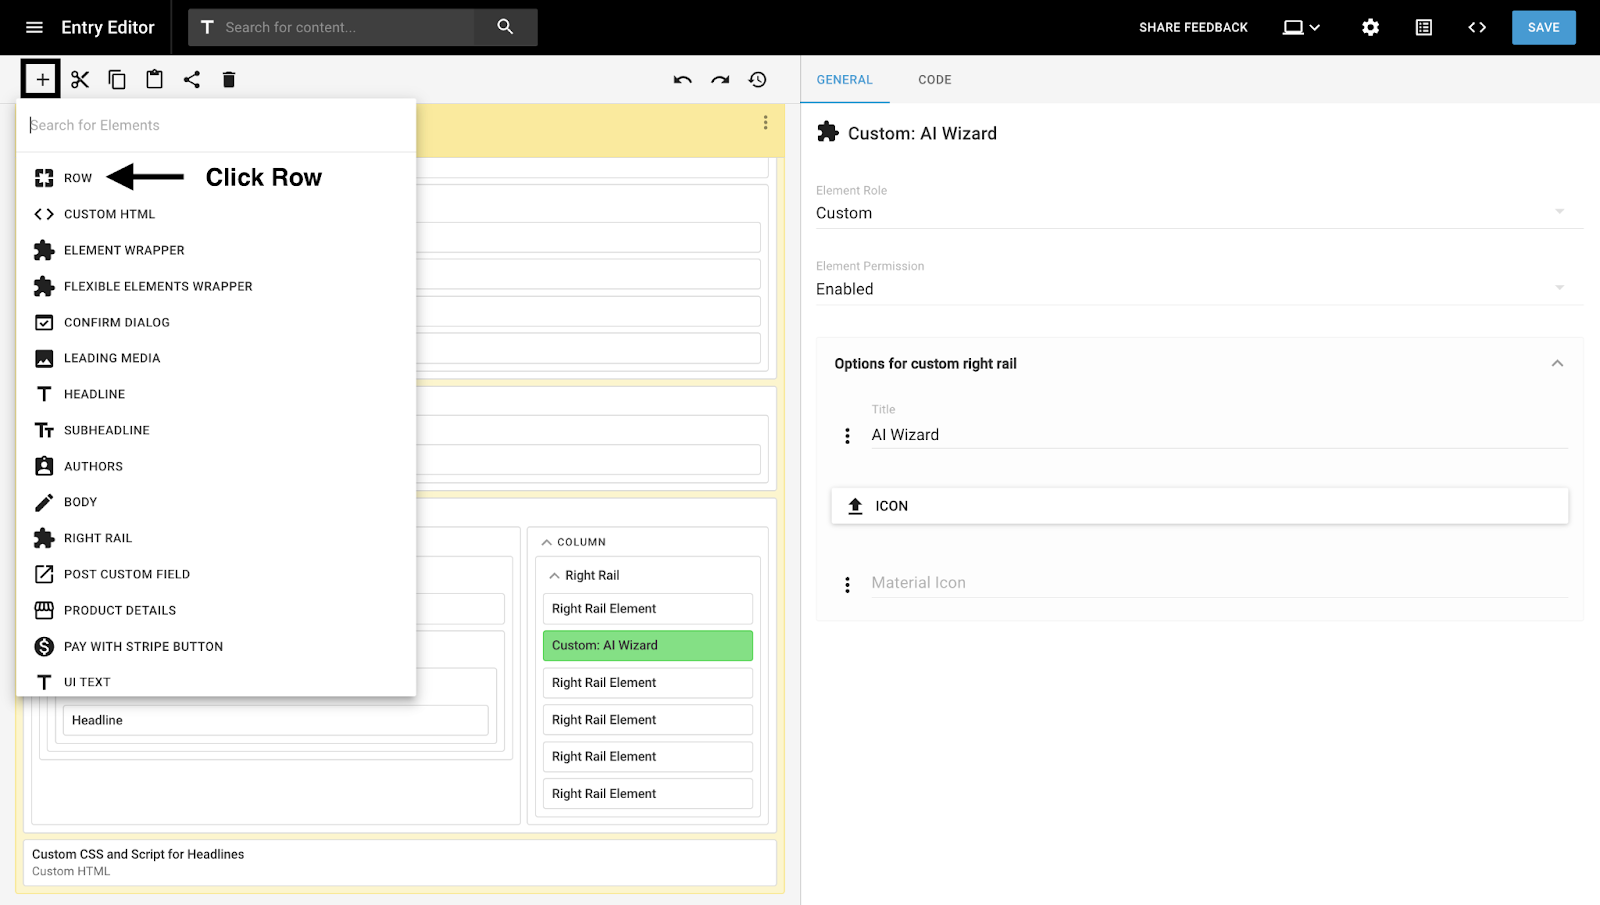
10. Select the Column section under the Custom: AI Wizard tab after choosing Row. It will be highlighted in green.
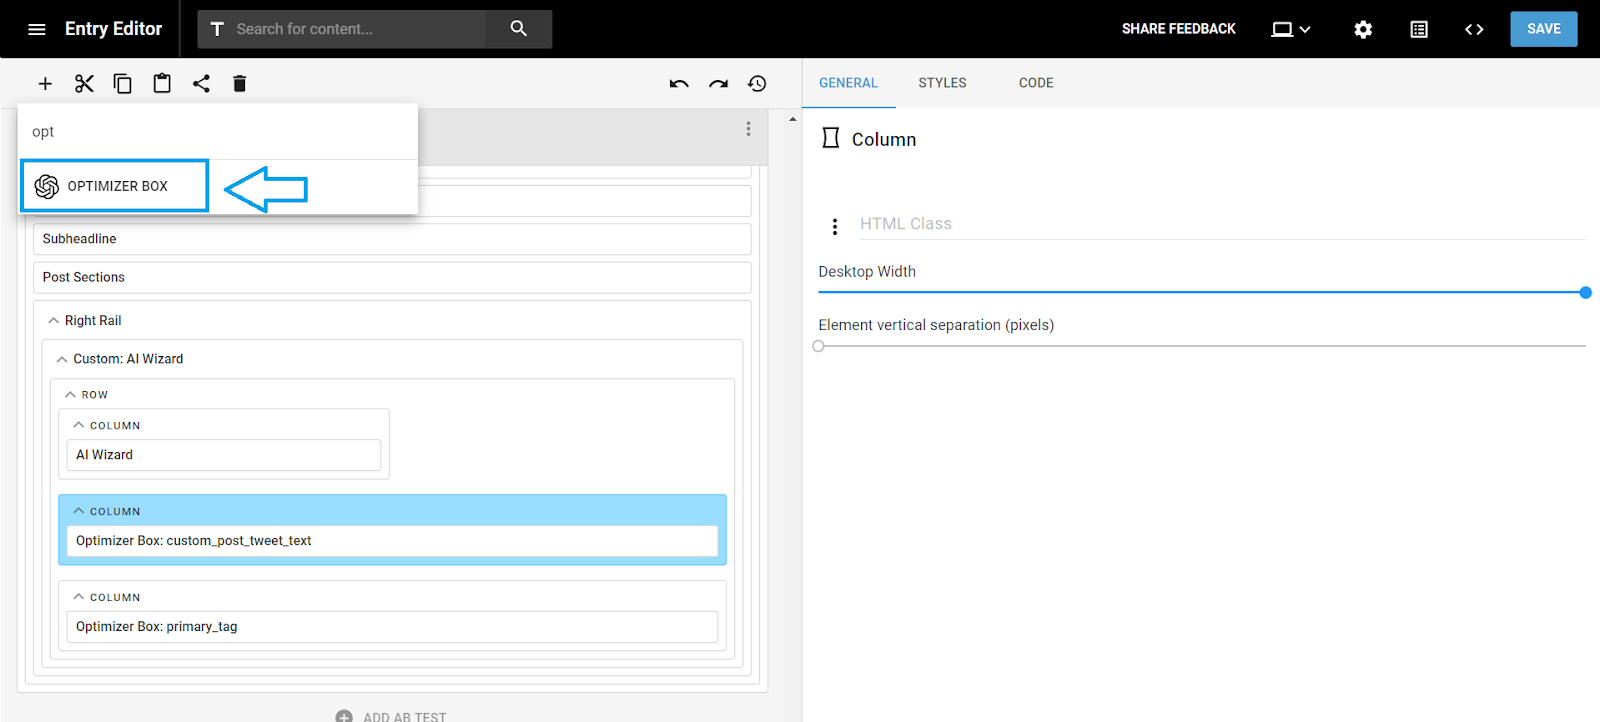
11. Click the plus icon (+) in the upper-left corner of the interface to access the drop-down menu. Type in “optimizer box” in the search field and select it. The optimizer box is a useful tool you can use to direct and instruct the AI while it creates and refines content.
12. The optimizer box will appear on the right side of the screen, where you can input your field name, title, prompt, and description.
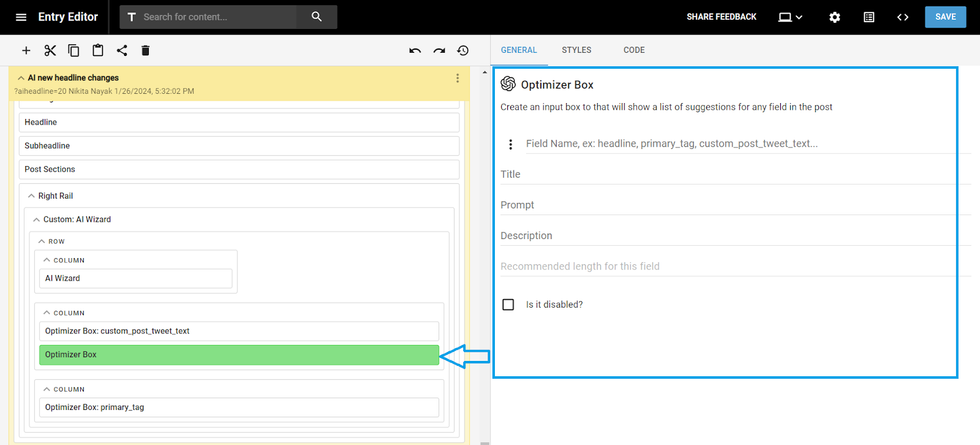
13. Click the kebab menu icon (three vertical dots) next to Field Name to access the drop-down menu and choose a desired field.
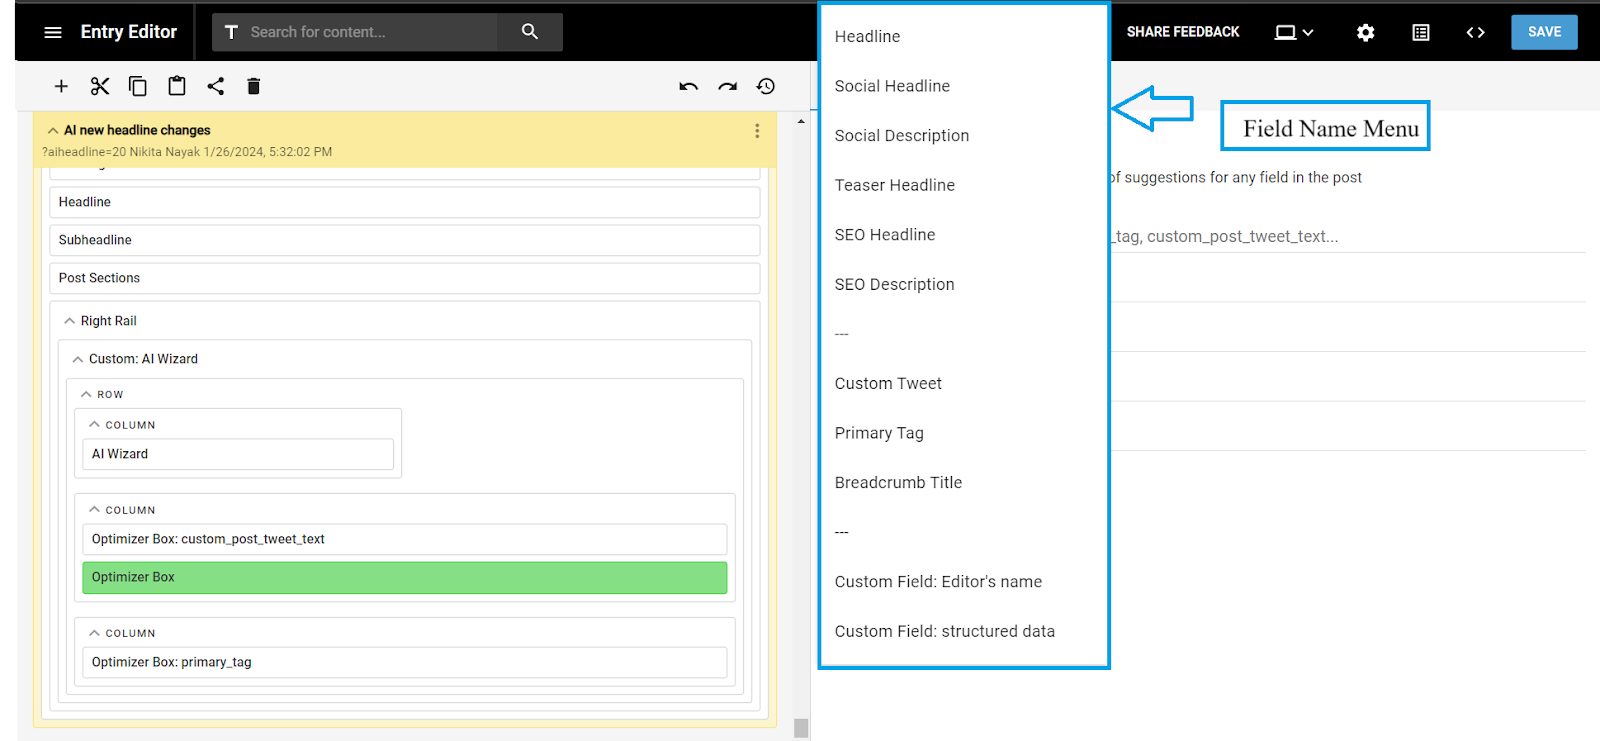
In this example, we chose Custom Tweet.
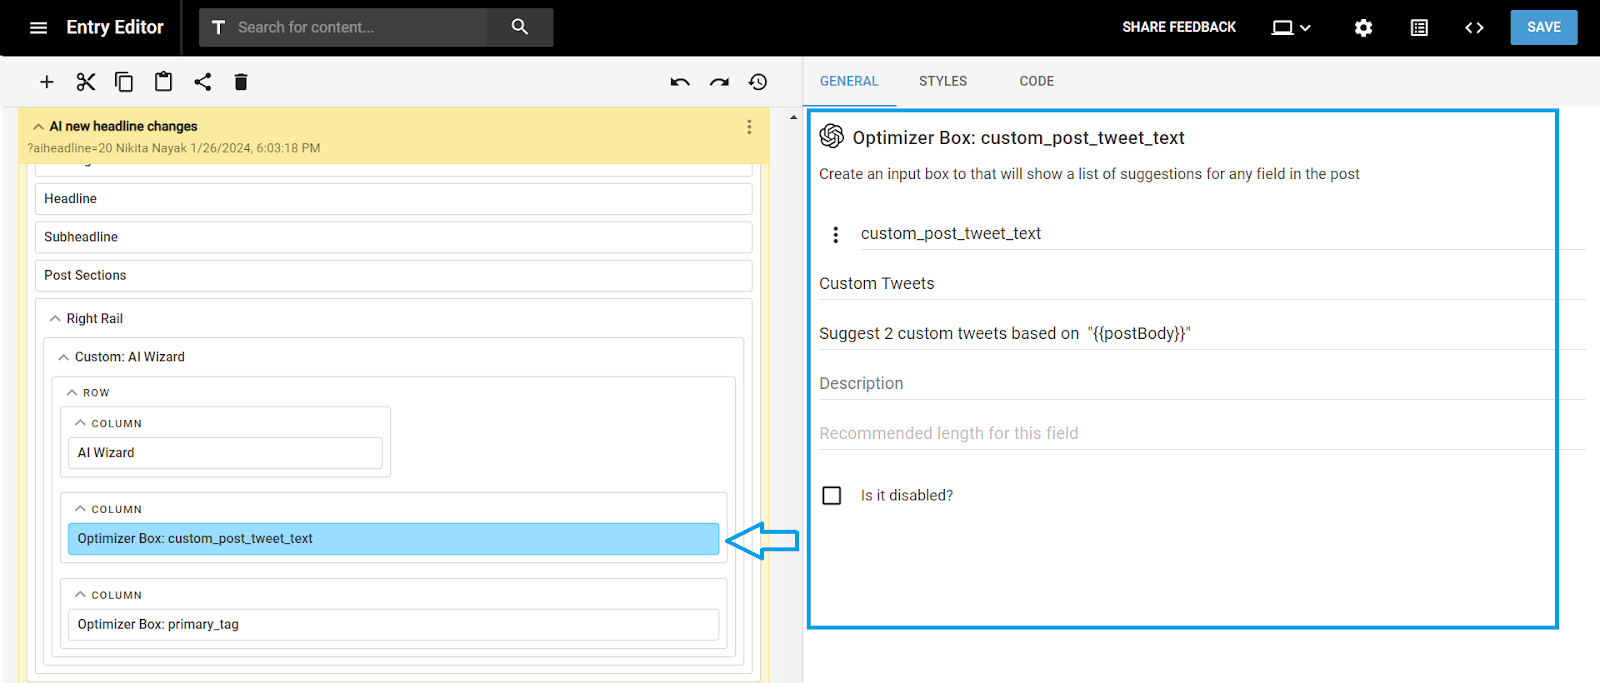
Here, you can add a specific prompt. For example:
“Create a social caption in under 280 characters that engages and interacts with readers. Provide three different variations."
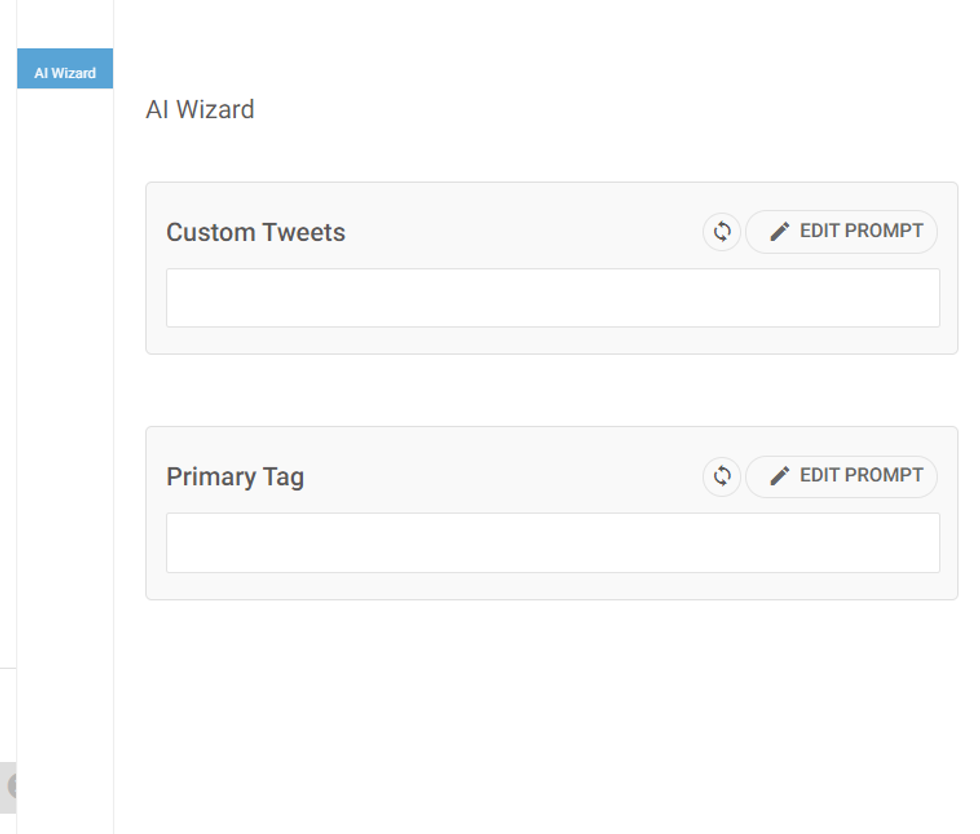
To add more custom fields to your custom AI tab, follow steps 9–13 as needed. You can also watch this quick video tutorial:
14. In Entry Editor, your fields will appear like this under your custom AI tab:
FAQ
Here are some common questions and answers to help you customize your AI prompts in Layout & Design Tool.
1. How do I remove/disable a Headline element?
You can use the optimizer field to disable a Headline element if you want to hide or remove it. This will deactivate Entry Editor's ability to add this field name under the Headlines tab. In the example below, the Teaser Headline element is turned off.

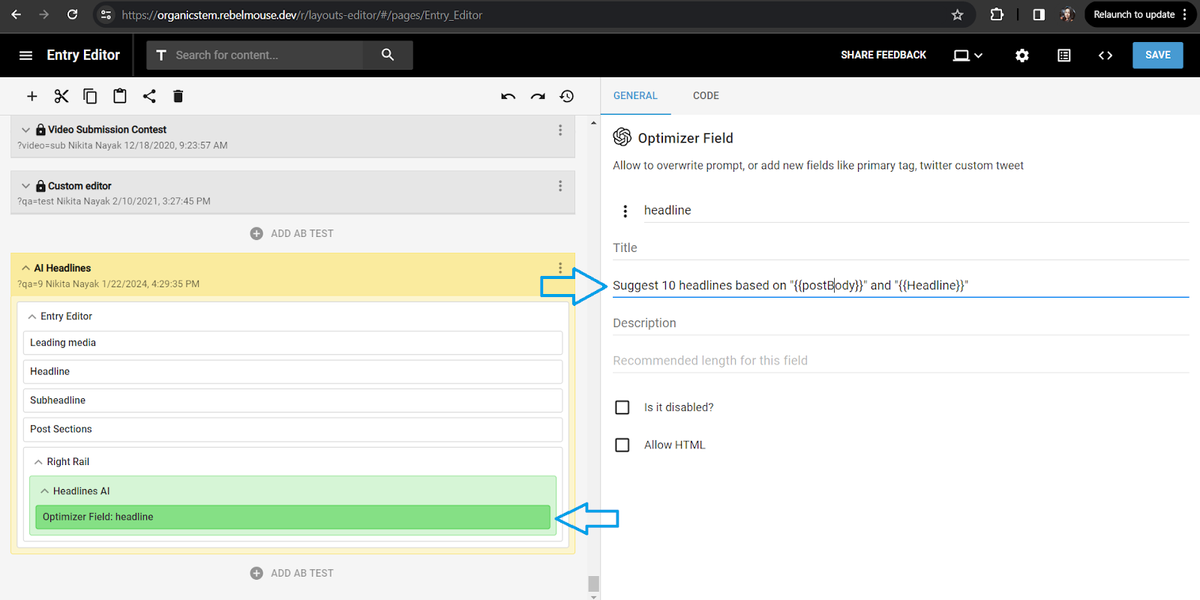
2. How do I update an AI prompt?
Any AI prompt can be updated using the optimizer field. This change can be seen in Entry Editor under the Headlines tab. For example, in the screenshot below, we are changing a prompt that will generate different article titles.
Supercharge Content Creation With RebelMouse’s AI Tools
Use RebelMouse's AI headline generator to enhance your content strategy and online visibility. RebelMouse represents the future of content optimization, offering a streamlined process that increases user satisfaction and engagement.
Leverage tools for a faster and simpler content strategy to stay competitive and communicate effectively with your audience.
If you want to add our AI tools to your account, contact your account manager or send an email to support@rebelmouse.com to learn more.


![Best CMS for News Websites and Large-Scale Publishing [2024]](https://www.rebelmouse.com/media-library/image.png?id=51952819&width=600&height=600&quality=85&coordinates=350%2C0%2C350%2C0)


