
Litmus Builder Essentials: Get to Know Our Email Builder
Getting to know any new software application can be an arduous task. Even the most well-thought out and beautifully designed interface can be overwhelming to beginners, making the process of getting started a bit of a challenge.
Litmus Builder lets you quickly build for and test on the email clients that matter most to your audience, and use reusable HTML and CSS code snippets and pre-tested templates to reduce errors and maintain brand consistency. It’s an ideal solution for individuals and teams alike looking to dramatically increase their productivity throughout the email production process. It’s chock-full of features and tools to improve your workflow, and we want to make sure you’re comfortable with all of them.
With that in mind, we’re kicking off a four-part series on the essentials of using Litmus Builder. In Part I (which you’re reading right now), we’ll discuss creating new documents, setting up preferences, and the Builder interface. Part II and Part III will focus on coding, testing, and improving team workflows using Builder. Part IV is on best practices for creating HTML emails in Builder.
Let’s get started and look at how Litmus Builder can help you in your own email marketing.
Starting a new document
When you first log into Litmus, you’ll see your dashboard, which is where you’ll find all your current emails in Litmus—and have the option to build a new email. The Home Dashboard looks like this:
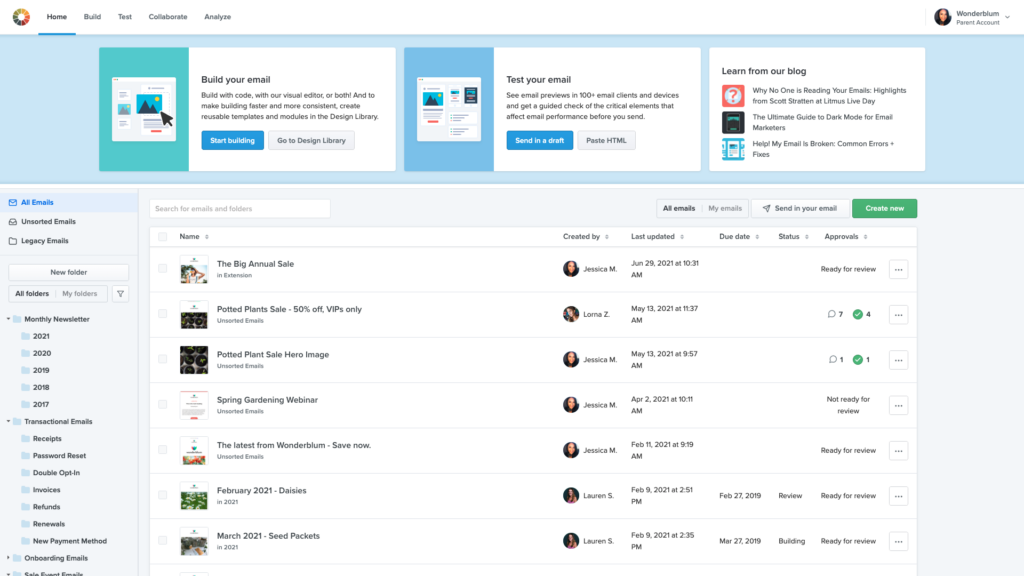
You can find your email using the search bar or the folders on the left-hand side. If you originally created the email, click “My emails” to narrow down your search.
There are a few ways to start a new email in Builder, including importing code or copying and pasting HTML.
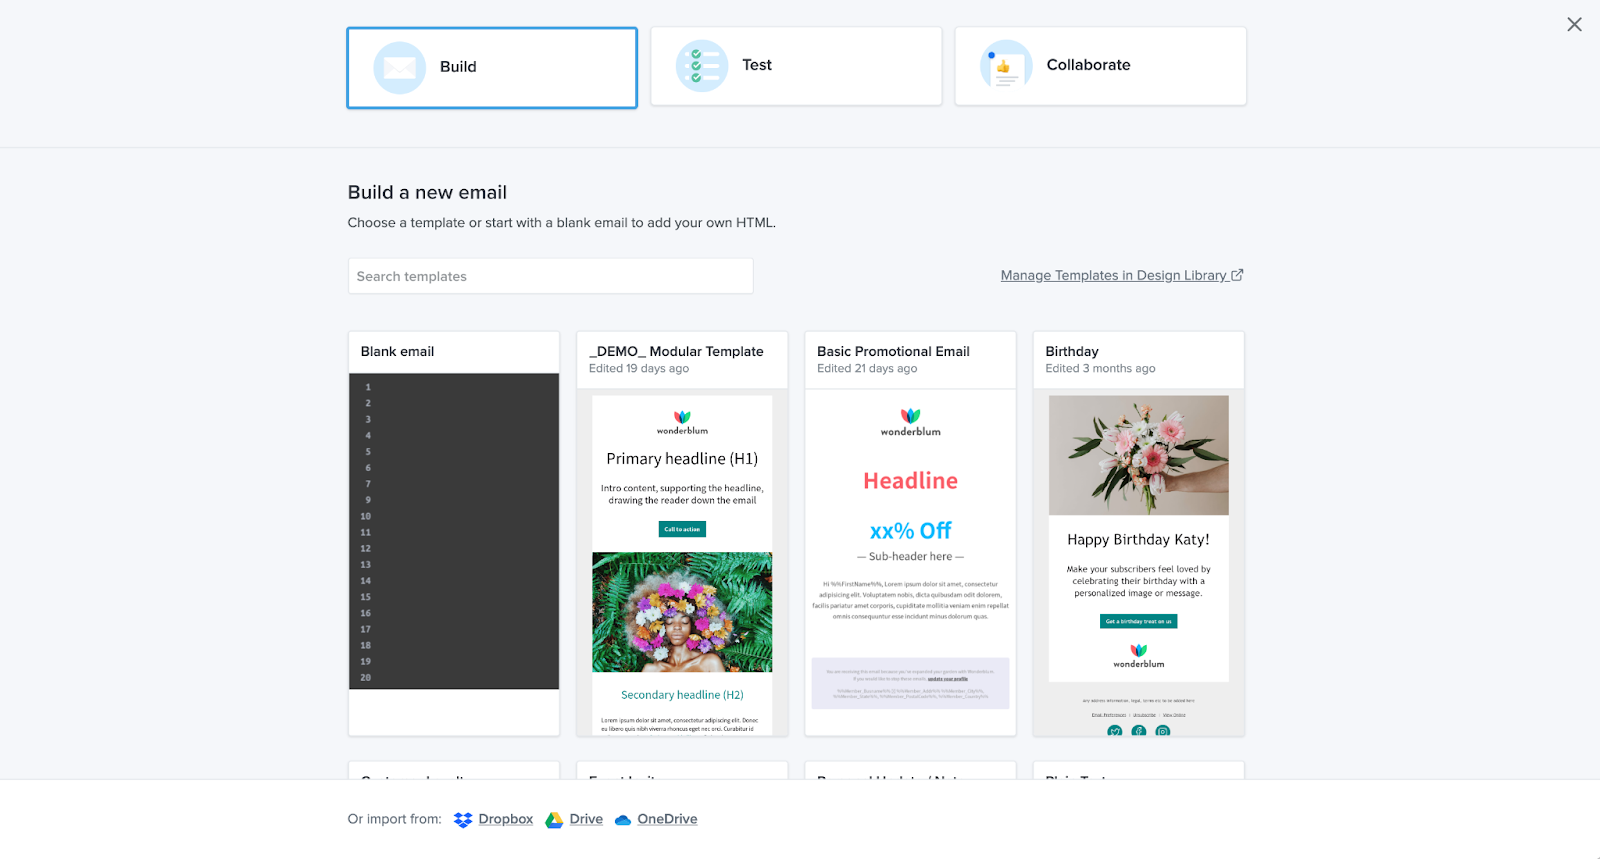
To start, click the green Create new button. Set a project name to easily identify the project, then select Build. From this screen, you can:
- Start with a blank email to add your own HTML.
- Choose a template to edit with your content.
- Import HTML from a cloud sharing solution.
You can also email an existing campaign into Builder.
On the home screen, navigate to the Send in a draft button in the slider menu. On the following screen, you’ll see your Litmus email address. Send your email from your email service provider (ESP) to this test address.
Once received, you’ll find the email on your Litmus home screen. You can save this email address and send to it any time you want to create a new Builder project—without having to manually copy and paste code.
When you see your email, hover over the name of the email and select Builder to open up Builder and get to work!
Navigating Builder
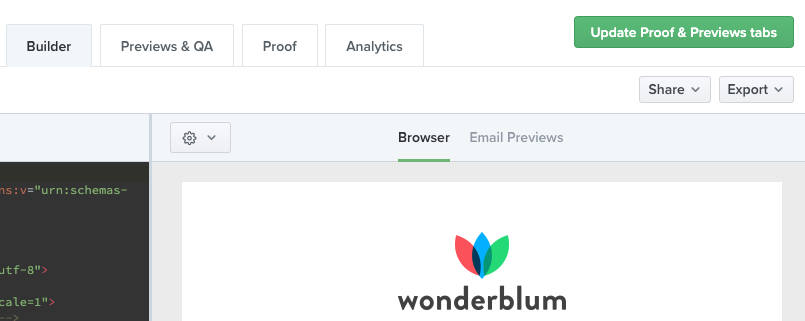
Litmus Builder contains a number of powerful tools for speeding up email development, testing, and sharing. Let’s say you created your project from a template. Here’s what you’ll see:
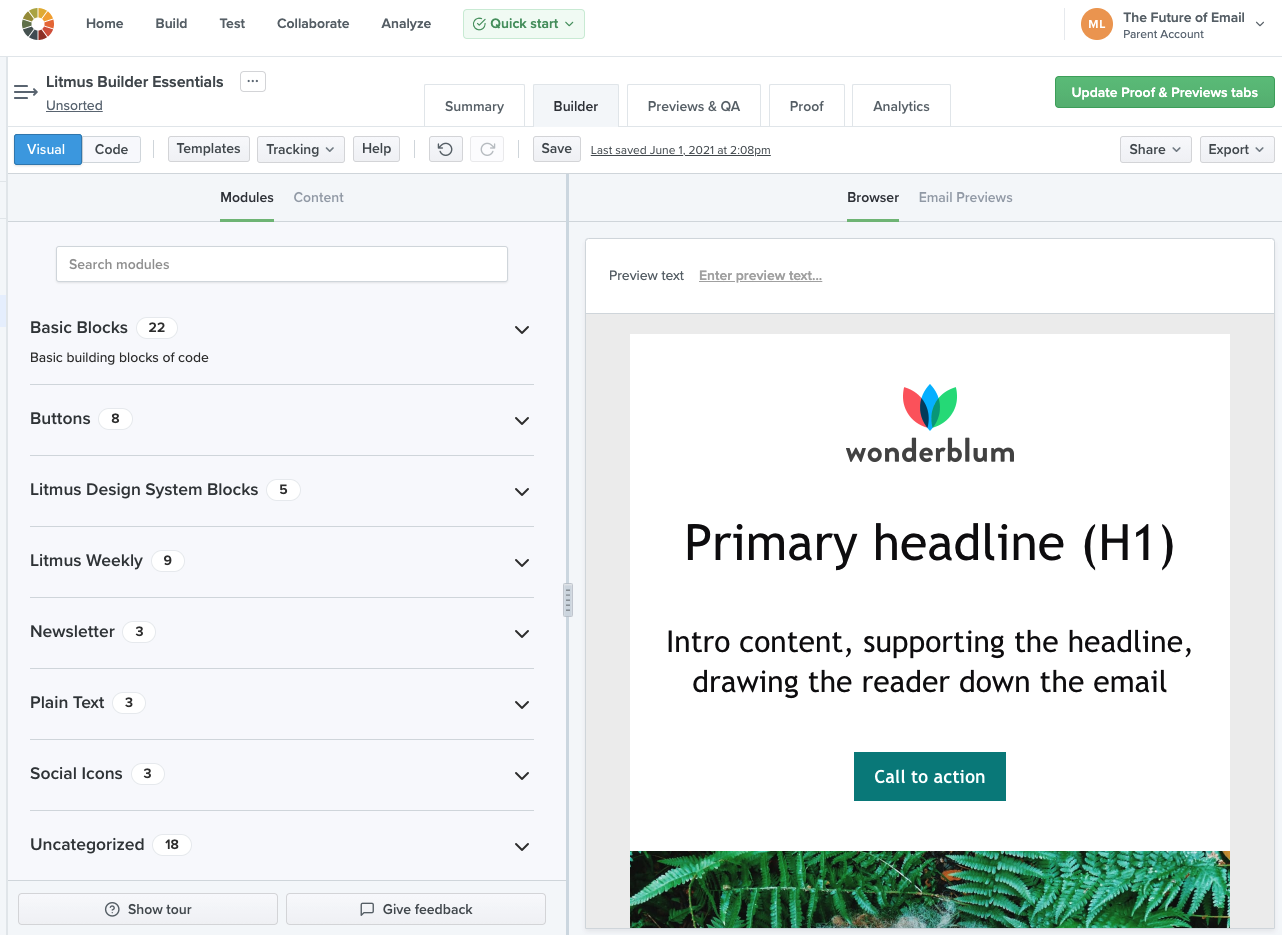
The Visual Editor allows you to leverage templates and code modules to easily build your email. This tool is perfect for team members who might not have strong coding skills.
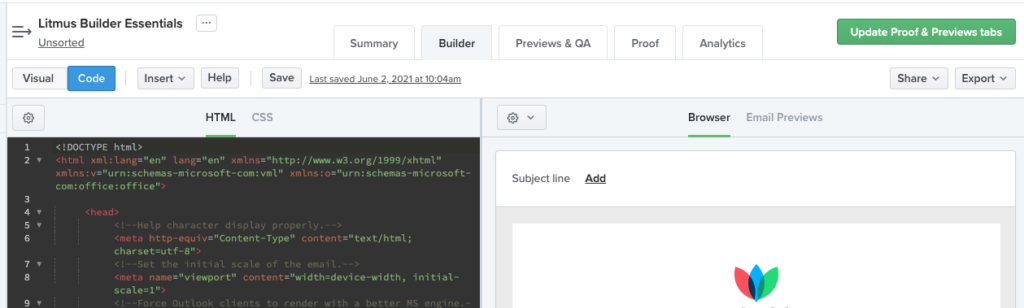
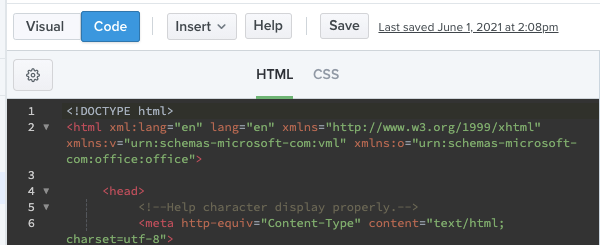
Switch over to the code view, and you’ll see this:
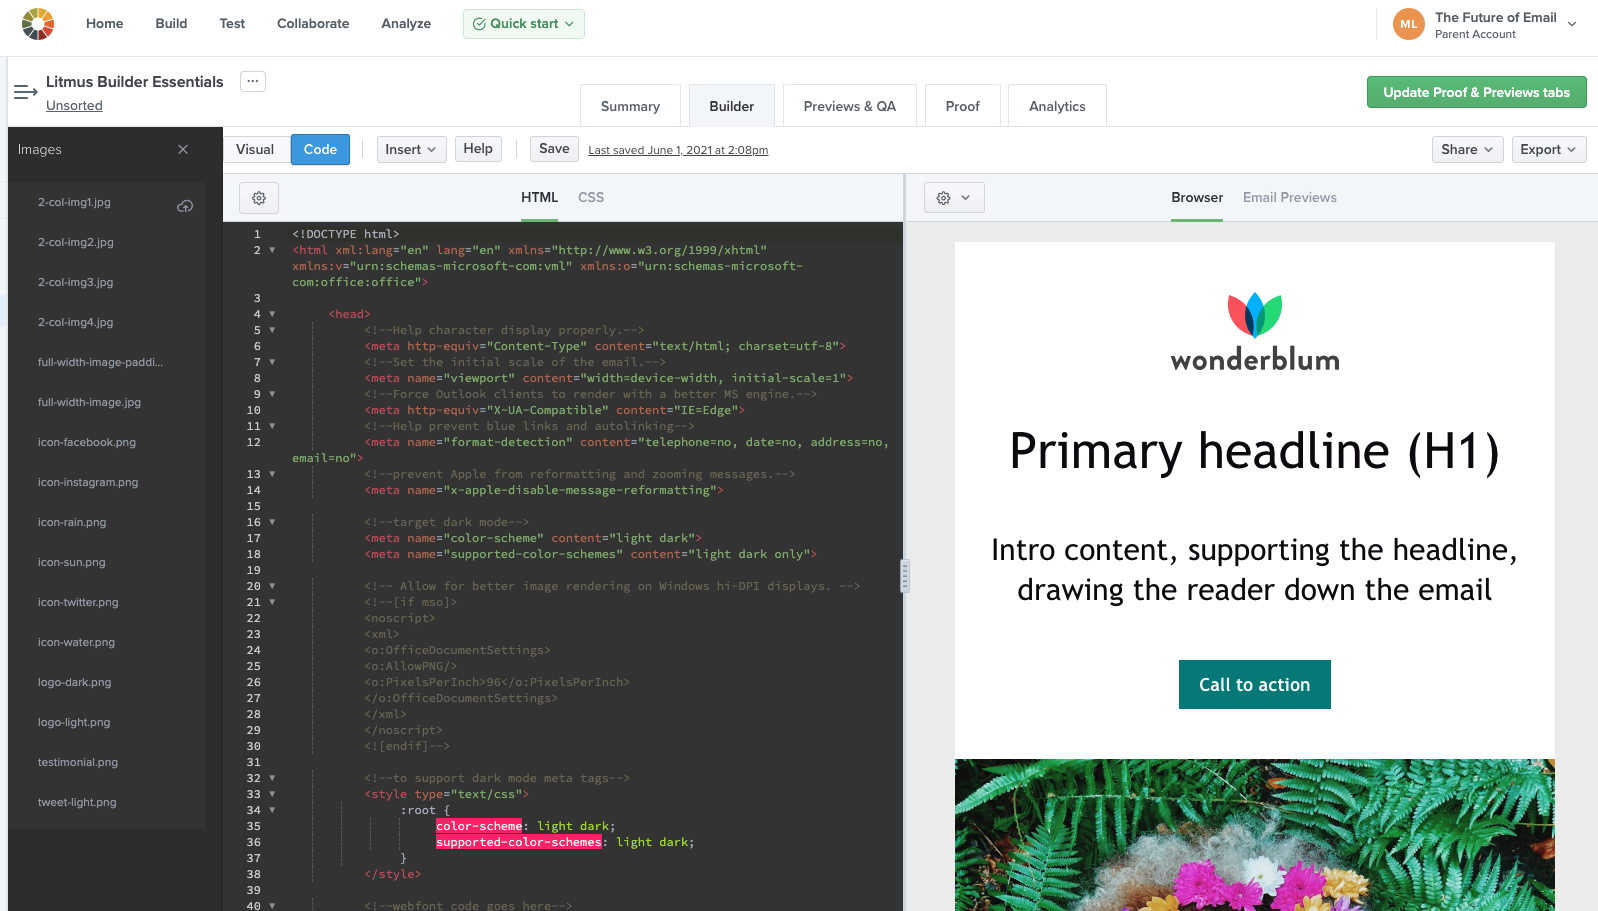
The code editor on the left is where you write HTML and CSS for an email. It has a lot of features built-in to make development as easy as possible. We’ll look at these in-depth in the next post.
The preview pane on the right allows you to see previews of your email in 100+ different email clients, view changes in real time as you code, navigate your code using the Grid View, and toggle images on and off.
You’ll also see a menu bar and toolbars above the editor and preview pane. While we’ll dig into these toolbars more in the next post, let’s get familiar with the different options in the menu bar.
The menu bar
The menu bar is where you can access Builder-specific settings as well as take certain actions on your open email and Builder project. Here’s everything you can do using the menu bar:
Visual and Code allow you to toggle back and forth between the visual and code editor interfaces.
In the Code view, you’ll see Insert, which provides several options:
The Partial option opens the Partials Library, which is where you can create, save, and update code partials which can be pulled into any campaign (available in the code editor only). Partials are dynamic, so if you update a partial, those changes will propagate to any email using that partial. This is perfect for things that don’t change often and are reused across email campaigns, like headers and footers.
The Snippet option opens the Snippets Library, where you can create, save, and update code snippets that can be used in any campaign. Unlike partials, snippets paste code directly into your email, so you can customize them on a per-campaign basis. Snippets are great for things like buttons, content sections, and even CSS styles.
The Image option allows you to upload image content to include in your email.
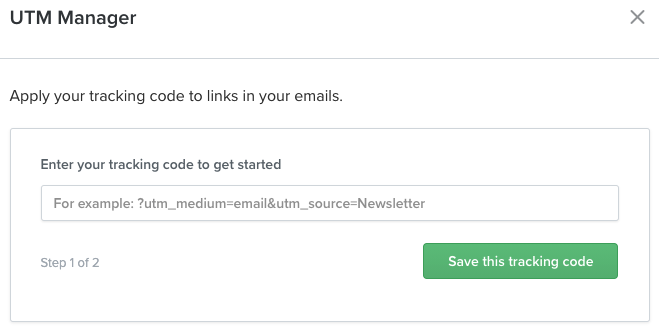
UTM Codes opens a simple screen that allows you to quickly and easily apply a tracking code to the link in your email.
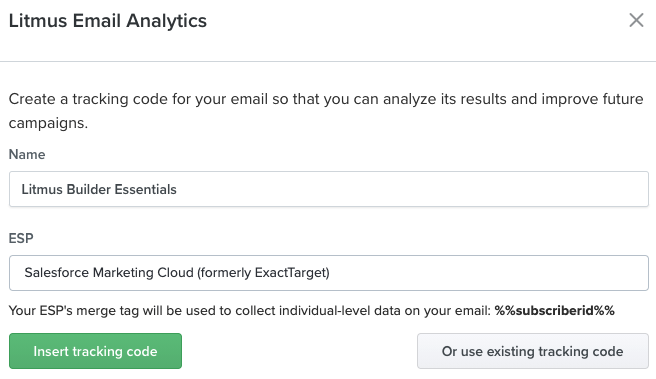
The Litmus Tracking option opens a pop-up that helps you insert your Litmus Email Analytics tracking code—which gives you insights into which email clients and devices your subscribers are using, where in the world your emails are being read, email read time, and other engagement metrics. Email Analytics is only available on Plus and Enterprise plans.
The Replace Template option opens the Template Gallery, which gives you 60+ professionally built email templates to use as a starting point for your campaign.
Moving along our menu:
The Help button opens Builder’s help documentation in a new tab, where you can find frequently asked questions about our powerful email code editor.
The Save button allows you to save your email and progress.
Where you see Last saved with a date and time stamp, clicking on that link will bring you to a history of changes to your email, allowing you to see the evolution of your email campaign at a glance and revert back to a previous version in case something went wrong.
Share lets you create a shareable link and/or send a test email. We cover this in more depth in a later post in our Litmus Builder Essentials series: How Teams Can Use Our Email Builder.
Click Export to easily copy or download your HTML or sync your email to a supported ESP. Once connected, your email will automatically stay up-to-date in your ESP every time you save in Litmus.
In the Visual view, you’ll see things a little differently…
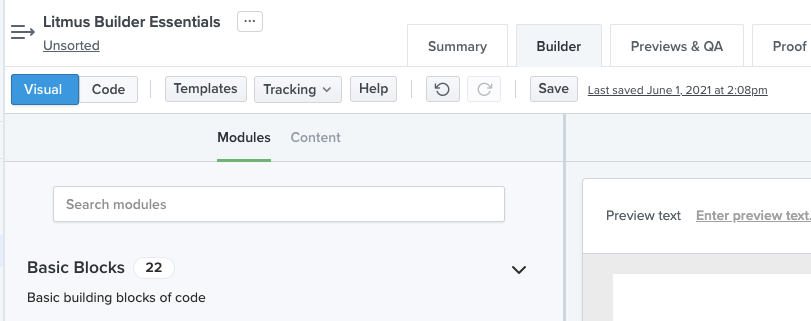
Templates act the same as Replace Template, and you use Tracking to insert your UTM code and Litmus Email Analytics code. To insert snippets and images, you’ll add them from the Modules panel. Partials are unavailable in Visual Editor. You still have the Help, Save, and Last saved functions. However, now you also get a counter clockwise circular arrow to undo your last step as well as a clockwise circular arrow to redo what you just rewound.
Now let’s go over to the right-hand side of your menu, which is the same for both Visual and Code views:
The Share button offers the option to share a public link to your email or send a test email.
Finally, the Export button lets you sync your email from Builder to your ESP, copy the HTML from your email, or download HTML to store for future reference.
Setting Builder preferences
From the code editor view, you’ll see a gear icon above the code editor pane. Selecting the gear icon allows you to access the Settings panel. The Settings panel is where you can customize the Builder code editor to your tastes, as well as take advantage of some of the powerful tools that Builder has to offer.
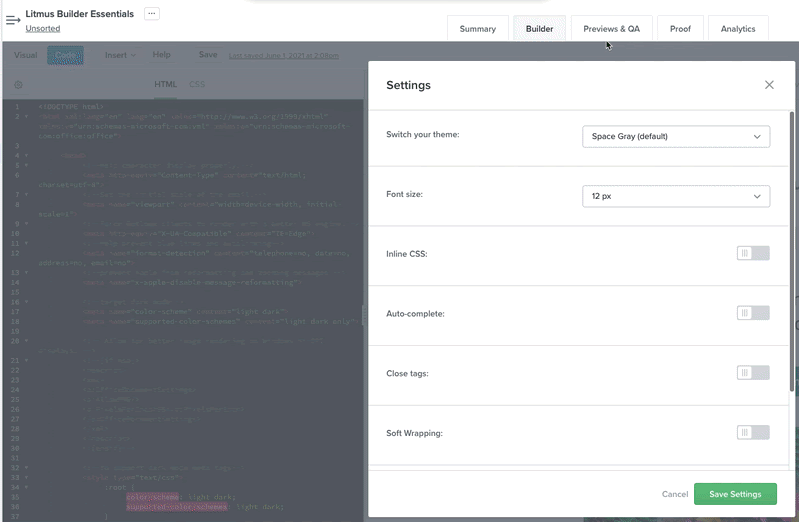
Builder ships with a number of different color schemes which can be applied to the code editor. Using the Switch your theme dropdown, you can choose the color scheme that best suits your preferred coding style. There are a variety of both light and dark themes available, with the classic Space Gray being the default.
The Font size dropdown lets you pick a comfortable font size for the text editor. While the default 12px size works for most people, you can choose a larger (or smaller) font size to make reading text easier when building your email campaigns.
The other six toggles allow you to turn specific Builder features on and off.
Inline CSS allows you to separate your HTML and CSS (which can make development easier) and compile it automatically. We’ll see how this works in the next article in the Litmus Builder Essentials series.
Auto-complete adds the ability to view a list of options for common HTML elements when coding. You can scroll through the list and select an element, which is then added to your code.
The Close tags option enables the automatic closing of any open HTML tags within your document, ensuring that no rogue open tags affect the rendering of your email campaign.
Soft Wrapping helps improve the readability of your code, while the Indentation and Tab Width options let you customize the editor to pick a side in the ages-old tabs versus spaces debate.
Builder settings are account-specific, which is perfect for teams. Different team members can save their own personal preferences, without the fear of overriding those set by others.
Sharing emails in Builder
Litmus Builder offers a number of ways to share your email campaigns, whether it’s to a colleague for review, your own email account for testing, or your ESP for a final send. All of the options for sharing your email can be found in the top-right corner of Builder.
When you click on the Share button, you have two options to select: Get shareable link or Send a test email.
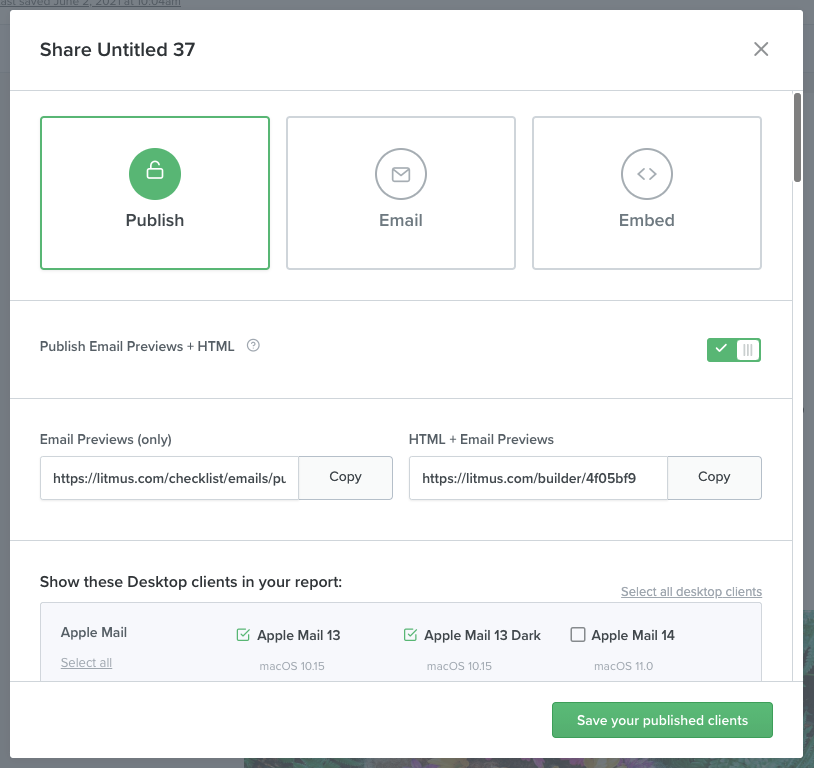
The Get shareable link option opens a dialog for you to share your email in three ways:
- Publish, which generates URLs you can use to share Email Previews—either with or without the HTML of your campaign. You can even select which email clients to show on the published page.
- Email, which lets you email a copy of the campaign, giving you quick access to previews in your own inbox. You can select which Litmus users receive it.
- Embed, which gives you code to embed the Builder doc right on a web page.
The Send a test email option simply gives you quick access to the Email dialog mentioned above.
There’s also an Export button with three options: Sync to ESP, Copy HTML, or Download HTML.
With the Sync to ESP option, quickly sync your email with any connected ESP (or add a new one to connect if you haven’t already). We currently offer a number of popular ESPs with which to sync, including Salesforce Marketing Cloud, Mailchimp, Campaign Monitor, Acoustic Campaign, Marketo, HubSpot, Pardot, and Eloqua.
ESP Sync will push your HTML and images to your ESP, properly writing image paths in the process, giving you the quickest possible route from Builder to final send.
From the Export button, you can also Copy HTML which will bring up a pop-up with your compiled HTML that you can click on once to instantly copy to your clipboard. There’s a button to download the compiled HTML into a zip file, which is the same as clicking Download HTML from the Export menu.
Get started with Litmus Builder today
Now that you’re comfortable with Litmus Builder’s interface, why not take it for a spin? It’s built specifically for email marketing and empowers anyone—regardless of coding skills—to create on-brand, error-free emails fast.
Already a Litmus customer? Jump right in. Otherwise, try Litmus for free and see for yourself how Builder can make your email life easier.
Litmus Builder is more than just building emails Quickly build and QA test on the email clients that matter most to your audience, and take advantage of reusable email modules and templates to reduce errors and maintain brand consistency. |
Learn more in our Litmus Builder Essentials series
- You are here: Litmus Builder Essentials, Part I: Get to Know Our Email Builder
- Litmus Builder Essentials, Part II: Create in Our Email Builder
- Litmus Builder Essentials, Part III: How Teams Can Use Litmus Builder
- Litmus Builder Essentials, Part IV: Best Practices for Creating HTML Email Templates in Builder
Shannon Howard
Shannon Howard was a Customer Marketing Manager at Litmus