
Accessibility in Email Marketing: 7 Simple Tricks to Make Your Code More Accessible
Accessibility is quickly becoming as much a pillar of email marketing as it is in user experience and design. More and more brands are making sure that their email campaigns can be enjoyed by every subscriber, whether they have physical, visual, or cognitive disabilities—or even if they simply cannot view images in their emails due to a corporate setting.
As email marketers, we all strive to deliver great emails to our subscribers’ inboxes. We run spam tests and email testing to ensure our design renders perfectly on all devices and email clients. But sometimes, we forget to set ALT tags for our images, use a color combination that’s difficult to read, or fail to optimize our emails for screen readers—and that alienates some of our subscribers.
If you’re just getting started with making your email code more accessible, things can be overwhelming. But there are a few simple tricks that you can implement easily—and have a big impact on email accessibility.
Here’s how to check your email for its accessibility to all of your subscribers, section by section.
Is your email accessible?Accessibility checks in Litmus Checklist make it easy to test your email against key accessibility best practices, identify areas for improvement, and make your emails more accessible to all your subscribers. |
Your Accessibility Checklist
1. Add a language code to your <HTML>
Not all of your subscribers will read your email on their laptops or phones—some will use screen readers to access your email. Since your email content will be read out loud, it should be in the right language so the pronunciations will be correct—you wouldn’t want your email written in French to be pronounced in American English, would you?
To prevent that from happening, you’ll have to let screen readers know what language your email is written in. If there’s no language code specified in your emails, screen readers can’t pronounce the copy correctly—and your eloquent email may come out sounding completely wrong.
That’s why it is key to check your <HTML> for a language code—that’s a simple snippet of code that specifies your email’s language. If it isn’t already in your code, add lang=“xx”—replace xx with the appropriate language code for your email. A list of all possible language codes and localities—which allows you to account for different accents, like a differentiation between British and American English—can be found here.
There are a few special cases to consider:
- If you’re using any XML in your <HTML> tag, you’ll also need to add xml:lang=“xx”.
- If you’re including the Outlook 120dpi fix in your email code, you’ll need this solution to specify a language. Here’s how our code looks with this fix:
<html
xmlns_v="urn:schemas-microsoft-com:vml"
xmlns_o="urn:schemas-microsoft-com:office:office"
lang="en" xml_lang="en">
Pro tip: it’s possible to populate the language code dynamically if you have localization set up within your ESP.
2. Always include ALT tags for your images
It’s important to keep in mind that the images in your emails might not always be visible for your subscribers. Maybe they have their images off, or they have a bad connection, or they’re using a screen reader—and if you’re including a lot of important information in your images, that messaging will be lost. That’s where ALT text comes in. You can set text that’s visible to your subscribers (or read out by their screen reader) so they still get the same messaging as people that can see your images.
Wherever you have an <IMG> tag in your email code, be sure to set the ALT tag. If you have populated ALT tags already, double check to make sure that text matches the text on the image. If you have empty ALT tags, make sure that there isn’t any text on the image that needs to be populated for a screen reader to see. If there’s no ALT tags on your images and no text in the image itself—or no text necessary for the meaning of the email—be sure to add an empty ALT tag: alt=“”. If you don’t include this, screen readers will read out the URL of the image—and no one wants a long URL read out to them!
Once you’ve set all of your ALT tags—empty or not—for the images in your email, add font styling into the <IMG> tag for styled ALT text. This styling lets you get fancy with your ALT text and lets you alter the appearance of the font, color, size, style, and weight.
3. Include role=”presentation” attribute on all <TABLE> elements
Most email marketers rely on tables to structure their email layout, but those can cause serious issues for screen readers. If a screen reader identifies a table in your email’s code, it will read out loud as one. It might literally tell you how many rows and columns there are, telling you each column’s position and content, making it impossible to understand your message.
That’s why it’s key to tell the screen reader that you’re using the table for layout purposes only. You can do that by adding role=“presentation” to every table in your email. This role tells the screen readers to remove any semantic meaning from the tables—so instead of reading out row and column numbers, it focuses on the content instead.
Let’s look at this really simple email header from one of our own emails:

Before we optimized for accessibility, our code looked like this:
<table width="100%" cellpadding="0" cellspacing="0"
border="0"><tr>
<td align="center" bgcolor="#2f343c" valign="top"
style="padding: 0px 15px;">
<table class="w100p" width="600" cellpadding="0"
cellspacing="0" border="0"><tr>
<td class="w100p" width="600" align="center">
<table cellpadding="0" cellspacing="0" border="0">
<tr><td style="font-size: 1px; line-height: 30px;">
</td></tr></table>
<a rel="noopener" target="_blank" href="https://litmus.com?utm_campaign=soeanalytics2019rt&utm_source=email&utm_medium=marketing&utm_content=%%dynamic_content_1456%%">
<img src="https://pages.litmus.com/l/31032/2016-08-16/954sb7/31032/95886/litmus_logo_white.png"
width="134" height="50" style="color: #ffffff;
font-family:'proxima_nova', Helvetica, Arial, sans-serif;
text-align:center; font-weight:bold; font-size:36px;
line-height:40px; margin: 0 auto; padding: 0;" />
</a>
<table cellpadding="0" cellspacing="0" border="0">
<tr><td style="font-size: 1px; line-height: 30px;">
</td></tr></table>
</td></tr></table>
</td></tr></table>
Did you notice that it’s missing ALT attributes and the tables aren’t set to role=”presentation”?
Those small oversights have a big impact on accessibility. Here’s how a screen reader interprets the code above:
Screen reader: Non-accessible email header
And here is that same code that’s been refactored by adding the ALT=”” attribute and role=”presentation” to <TABLE> tags to be screen reader-friendly:
<table role="presentation" width="100%" cellpadding="0"
cellspacing="0" border="0"><tr>
<td align="center" bgcolor="#2f343c" valign="top"
style="padding: 0px 15px;">
<table role="presentation" class="w100p" width="600"
cellpadding="0" cellspacing="0" border="0"><tr>
<td class="w100p" width="600" align="center">
<table role="presentation" cellpadding="0" cellspacing="0"
border="0">
<tr><td style="font-size: 1px; line-height: 30px;">
</td></tr></table>
<a rel="noopener" target="_blank" href="https://litmus.com?utm_campaign=soeanalytics2019rt&utm_source=email&utm_medium=marketing&utm_content=%%dynamic_content_1456%%">
<img src="https://pages.litmus.com/l/31032/2016-08-16/954sb7/31032/95886/litmus_logo_white.png"
width="134" height="50" alt="Litmus" style="color: #ffffff;
font-family:'proxima_nova', Helvetica, Arial, sans-serif;
text-align:center; font-weight:bold; font-size:36px;
line-height:40px; margin: 0 auto; padding: 0;" />
</a>
<table role="presentation" cellpadding="0" cellspacing="0"
border="0">
<tr><td style="font-size: 1px; line-height: 30px;">
</td></tr></table>
</td></tr></table>
</td></tr></table>
Screen reader: Accessible email header
As you can hear, there’s quite a difference!
4. Use semantic elements to structure your content
Semantic elements make it easy to highlight content hierarchy, showing subscribers (and screen readers) what’s a headline and what’s paragraph copy. Including semantic elements gives your subscribers who use screen readers the option to “scan” through an email more easily.
When double checking your copy, make sure any headline-worthy copy is enclosed within an <H> tag: <H1>, <H2>, <H3>, and so on. Similarly, make sure any body copy is housed within a <P> tag. When going through your email, screen readers put emphasis on specific headers, and setting up these <H> and <P> tags will make your email easier to navigate.
5. Left-align your copy, if possible
When it comes to your body text, it may be tempting to center align. However, when it comes to accessibility, this is a big don’t!
When you center your text, the starting edge changes for every line, which forces your subscribers to work harder to find the beginning of each line—and that’s a challenge for people with dyslexia and other reading impairments. If you have any copy that’s longer than two lines, left-align that copy. This is especially important for mobile, since the narrow width often produces more lines of text than you may realize. You may need to left-align your text responsively on mobile.
6. Check the contrast of your copy
Check the contrast ratio of your text colors against the background colors of your email. You may have subscribers that have color deficits, and if your colors do not provide enough contrast for them, they may not be able to read your email. There are two ways you can check your contrast ratio:
- If you need to manually input your color codes, check out https://contrast-ratio.com/
7. Add hover effects for CTAs, links, and images
At Litmus, we use hover effects on our CTAs, links, and images to indicate clickability. Hover effects are a simple interactive element that can make your emails more engaging and improve your subscribers’ experience. Though hover effects are only supported in AOL, Apple Mail, Gmail, and Yahoo! Mail, they’re a popular effect and worth implementing in your email code. You can fade an image, change the color of your CTA button, add a pop-up tab, and more.
See the full email in Litmus Builder →
Want more email tips?
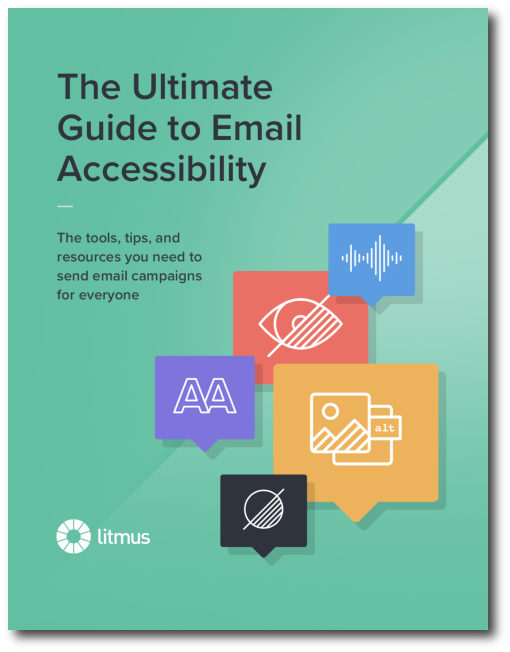 | Ultimate Guide to Email AccessibilityThis guide has the insights and step-by-step advice you need to write, design, and code emails that can be enjoyed by anyone—regardless of their ability. |
Get the best email marketing and design tips, stats, and resources straight to your inbox and stay at the forefront of email innovation when you sign up for Litmus News.
Alice Li
Alice Li was a Principal Email Engineer at Litmus