Zoho CRM is one of the more popular CRMs across the world—especially in India, where the company’s headquarters and the majority of its 250,000+ customers reside.
With so many users entrusting Zoho CRM to house their leads, we wanted to make sure it was easy for NetLine Portal users to pass their lead data automatically.
Connecting the NetLine Portal to Zoho via Zapier
Linking the NetLine Portal over to Zoho CRM is simple and straightforward.
For our purposes, we’re going to start at step nine (Fulfillment) of the Campaign Setup as you’ve likely already completed steps one through eight.
(If you’d rather watch the video to learn how to connect the portal to Zoho, you can do so below.)
1. Connect Your NetLine Account to the Zoho CRM
Currently, there’s no direct API that directly connects NetLine to Zoho CRM. This could certainly change in the future, but in the meantime, this is why the internet invented Zapier! (If you don’t already have a Zapier account, you can create one for free.)
Starting at the Fulfillment step within the NetLine Portal, scroll down to the Connector Fulfillment section and select ‘Other’ from the Connector Type dropdown menu.
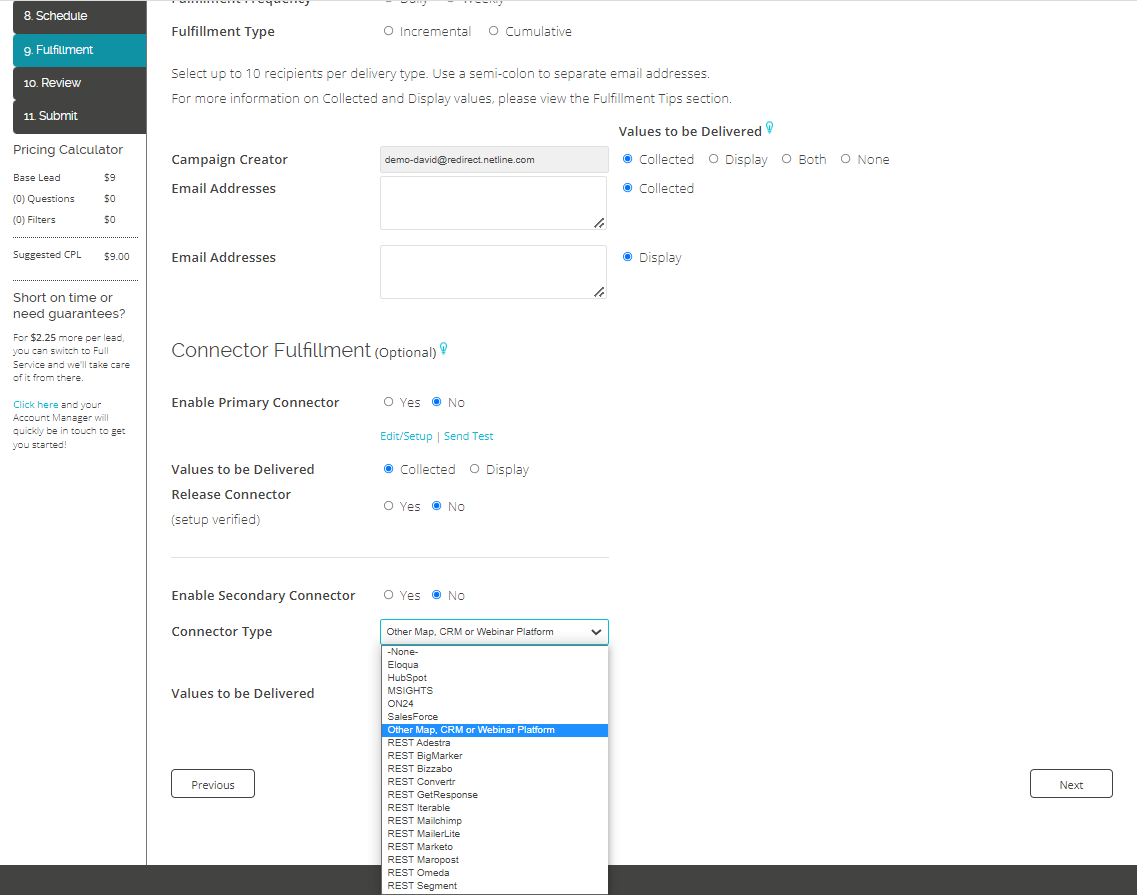
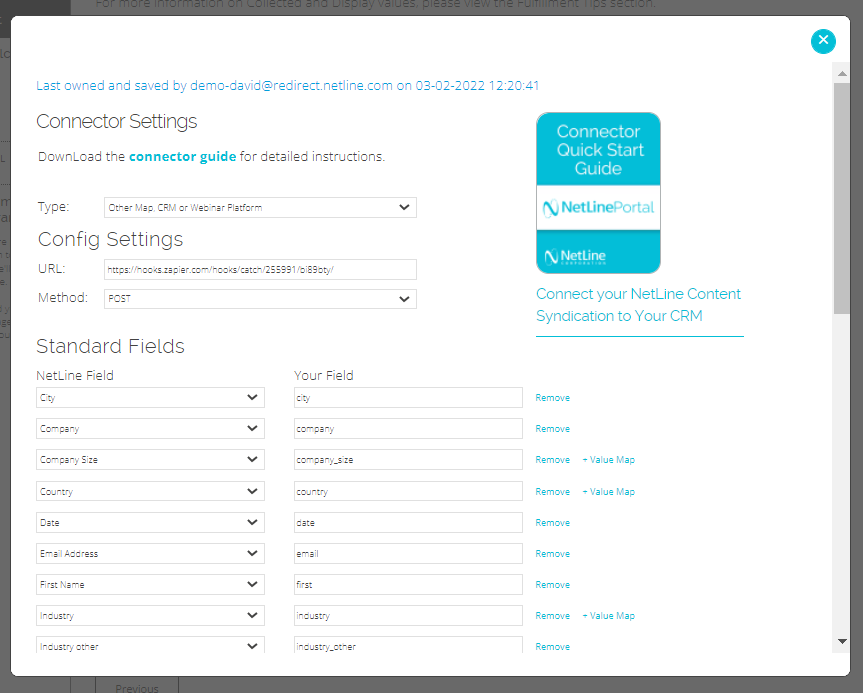
Next, we’ll hit, Edit/Setup. You’ll see here is a quick API key, which will allow NetLine to speak to Zoho CRM.
From here, we’ll need to figure out a few things:
- Where are we sending the data?
- Which fields are important to us?
- Are there any constant fields?
Of course, these fields will be determined by the needs and goals of our lead gen program.
2. Establish Your Zapier to Zoho CRM Webhook
In order to catch data being sent to Zapier, we’ll use a webhook; specifically a Webhook by Zapier, which we’ll want to connect to Zoho CRM.
Next, we’ll want to Catch Hook (which means we’re catching the data from NetLine) and instruct Zapier to Find or Create a New Lead. There are few different options available to you here, but based on the use case, our educated guess is that we’ll to want to find or create a lead.
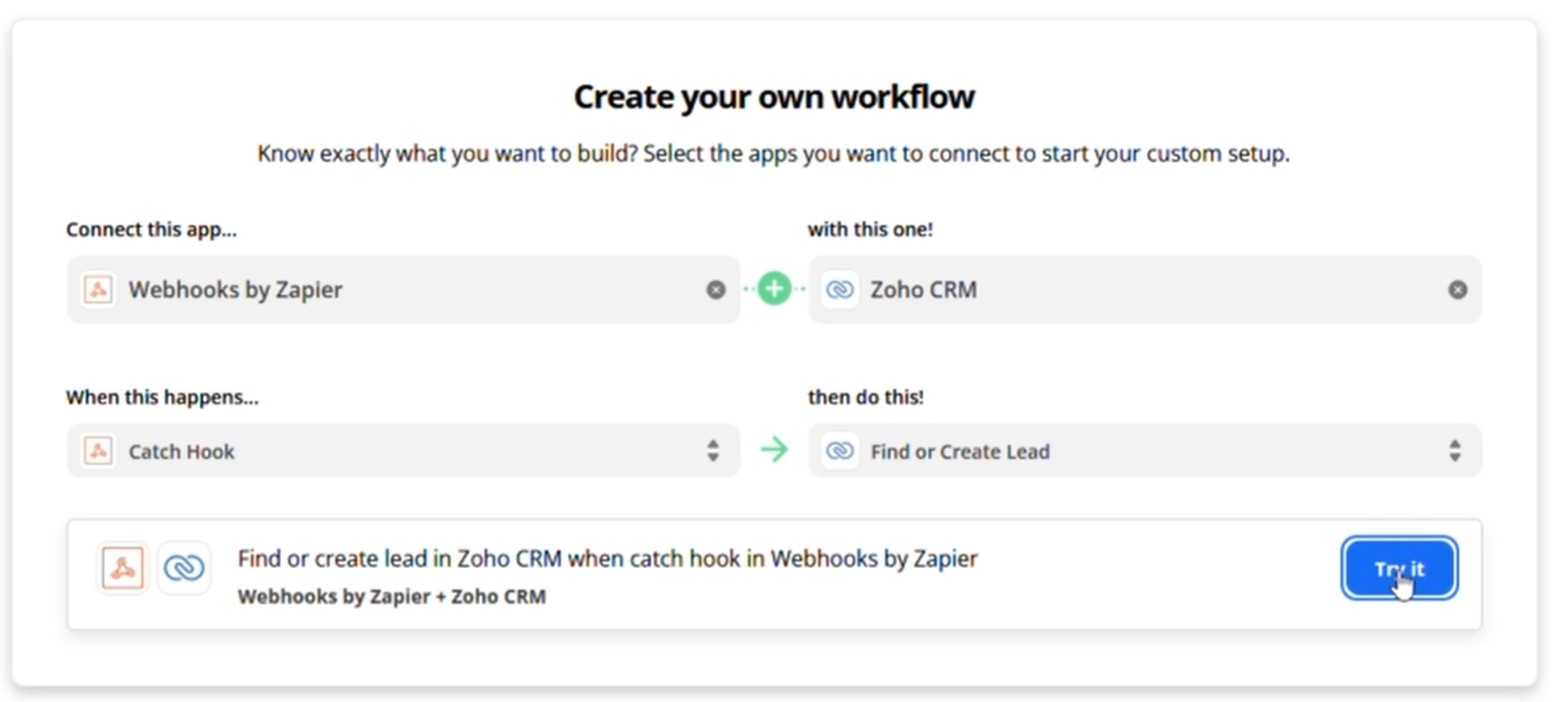
Once all of these fields are complete, hit Try it.
3. Test Your Trigger
In Zapier, you’ll be greeted by a multi-step page. The first thing you should see under Choose app & event is Set up trigger. Copy this URL. With this URL copied, we’ll jump back to the Portal.
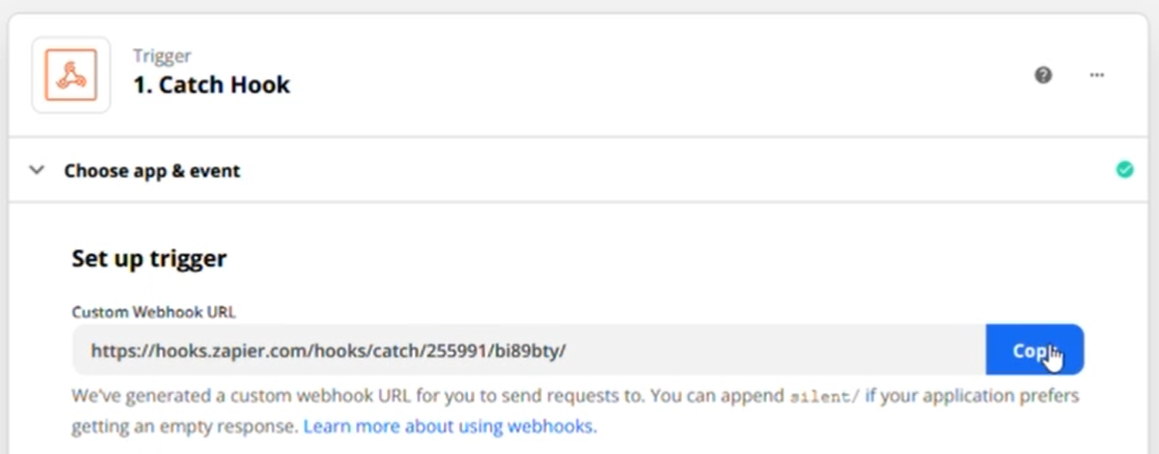
Under Config Settings, paste the URL into the empty URL field. Hit Submit. We’ll come back to this page in a moment.
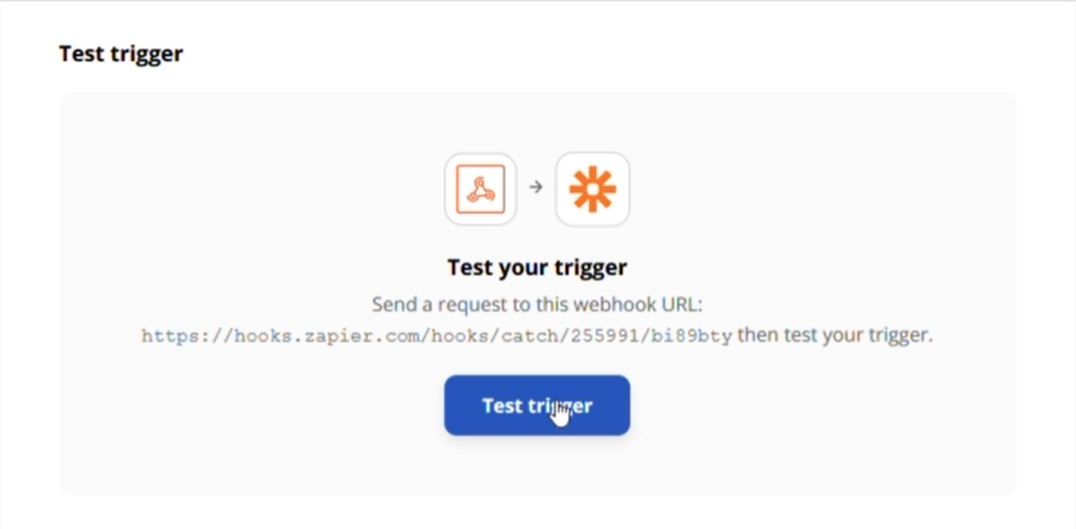
Now, we’ll return to Zapier and hit continue. When presented with the option to Test Trigger, click the blue button. You will get a message saying Zapier didn’t find anything. We’ll need to send a test via the NetLine Portal.
Returning to the Portal, you should see a new option under Connector Fulfillment and directly next to Connector Type to select Send Test. Click this link.
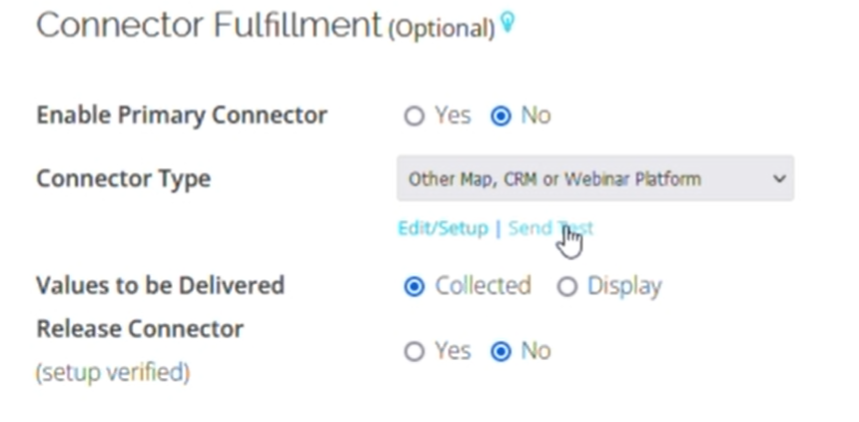
Clicking Send Test will pull up a number of test records which will be sent over directly to Zapier through the connector. After hitting Submit in the pop-up window, the system will take a second and confirm that those test records have been sent.
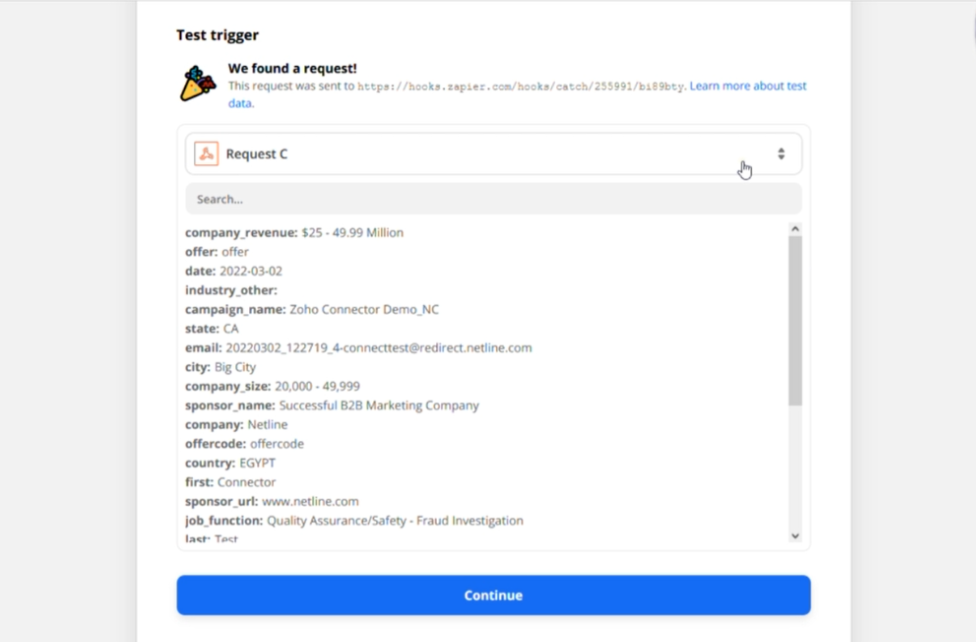
Next, we’ll tab back over into Zapier and once again hit Test trigger. Now the data should be found within Zapier.
If you see this screen above, hooray! It worked! Hit Continue.
4. Connecting Zapier’s Webhook to Zoho CRM
At this point, technically, we’ve already confirmed that NetLine has sent data in real-time to Zapier. Now what you need to do is connect Zapier to Zoho. To complete this step, you will need to be a Zoho CRM paying customer.
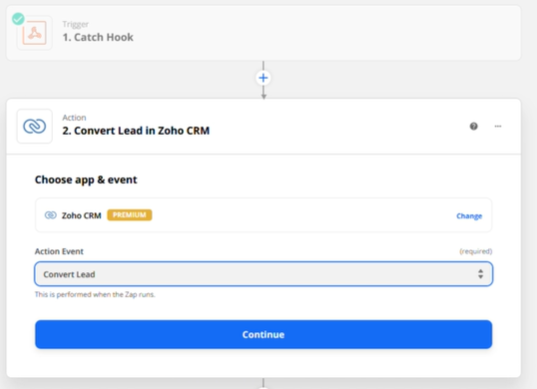
Within the Action step in Zapier (Find or Create Lead in Zoho CRM), you’ll choose “Converted Lead” from the Action Event dropdown menu. Hit continue.
5. Sign in to Zoho CRM
Under Choose Account, you’ll hit, “Sign Into Zoho CRM,” where you’ll be met with a pop-up OAuth to login. Effectively, this connects Zoho to Zapier, and Zapier is then connected to NetLine from there.
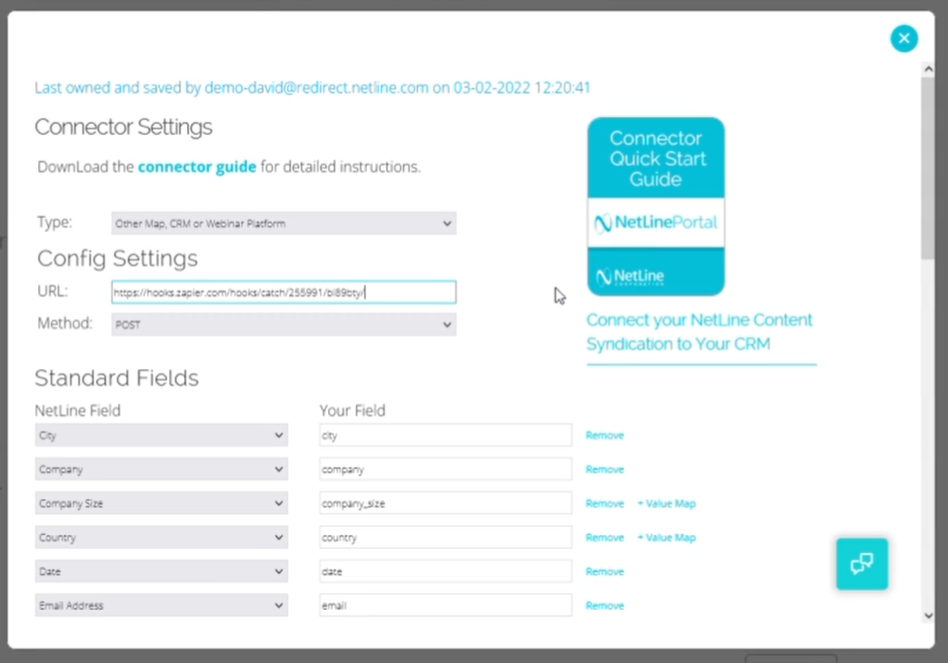
The only other things that you’ll need to consider is going back into this and looking at the fields that we’re delivering and first figuring out are these fields and the naming conventions that Zoho is receiving them as meaning that like is city or, or lowercase.
You may be required to add some constant fields like an API key, but this will all be addressed in Zapier’s setup flow. You can pass in campaign names and tracking codes and even UTM parameters, if you so choose. If there are fields that you don’t even want to receive, you can simply remove those, which means we won’t be sending that data to Zapier, which means that most certainly won’t go into Zoho.
Successfully Connecting NetLine to Zoho CRM in a Matter of Minutes
That’s it!
Zapier does continue forward with that progression a bit more, as there are little tools and tips to help connect the dots for you.
We hope this was helpful and kind of getting you on your way to passing along your leads! If you need any further assistance or want to walk us through some additional screenshots of the Zoho side, feel free to reach out to our Portal Support is always eager to help and provide solutions and guidance.