
If you want to improve your conversion rates, one important thing to know is how to qualify leads.
When your leads are qualified for marketing and sales, you’ll be more likely to convert them into paying customers. This can save you precious time, money, and resources.
In this article, we’ll go over the basics of lead qualification and show you 5 easy ways to qualify leads with OptinMonster.
- What Does It Mean To Qualify Leads?
- Why It’s Important to Qualify Leads
- Common Lead Qualification Frameworks
- How to Qualify Leads With OptinMonster Field Mapping (A Step-by-Step Guide)
- Other Ways to Qualify Leads With OptinMonster
- Next Steps: What to Do With Qualified Leads
Ready to go? Let’s get started!
What Does It Mean To Qualify Leads?
Qualifying leads means making sure that your sales leads are a good fit for your product or service. The lead qualification process can happen during a sales call, in the lead generation form, on the sales page, or even in your presale marketing materials.
You want to make sure that your leads have the budget, authority, and willingness to complete the purchase. You also want to know that your potential customers need and want what you’re selling.
Why It’s Important to Qualify Leads
Lead qualification can significantly improve your conversion rate. Without qualifying leads, your sales reps can waste a lot of time and energy on follow-ups with leads who will never buy from you. If you have an automated sales funnel, filling that funnel with unqualified leads will only be a waste of resources.
Lead qualification also lets you focus on a smaller group of customers who fit your ideal customer profile. You can personalize the selling experience more, which typically leads to higher sales.
By focusing only on the leads most worth pursuing, you can standardize your sales pipeline more effectively. If you were chasing every lead that came your way, you’d have to reinvent or adjust the sales process every time. This would make your sales team significantly less efficient.
For more information, read What Is Lead Quality? And How to Measure It (+8 Bonus Tips!).
Common Lead Qualification Frameworks
Before you dive into the technical details of qualifying leads, you need a plan for lead qualification. Here are 3 common lead qualification frameworks you might use:
BANT
BANT can be used for practically every business model. The letters stand for:
- Budget: Does the prospect have enough money for the purchase?
- Authority: Is the contact the decision-maker for this purchase?
- Need: Does the prospect have a pain point that your product or service can solve?
- Timeline: When is the prospect planning to buy?
Let’s use an example from eCommerce. Imagine that you sell a digital product about meal planning. A qualified lead should:
- Have enough budget for meal preparation
- Be the authority on food-related decisions in their household
- Need an easy way to plan meals for the week
- Want a solution in a short timeframe so that an instant digital download is more appealing
CHAMP
Another version of BANT is CHAMP:
- CHallenges: What is the pain point felt by the customer?
- Authority: Can the prospect make this decision?
- Money: Do they have a budget for this product?
- Priority: How important is solving this problem?
As you can see, the only major difference between BANT vs. CHAMP is the order of importance. CHAMP’s first disqualifying question is about the need, while BANT’s first priority is budget.
MEDDIC
MEDDIC is a common sales process framework for B2B Sales. Because B2B purchasing decisions are more complex, you can see that there are more elements involved:
- Metrics: What are the measurable ways your solution will impact the customer?
- Economic Buyer: Who are the decision-makers at the company? How easy are they to reach?
- Decision Criteria: What does the customer value most in a solution?
- Decision Process: How will they evaluate a new service or product?
- Identify Pain: What’s causing friction in their current process? How will your solution relieve that pain? What negative consequences will happen if they don’t address the issue?
- Champion: Who will benefit most from your solution?
We can look at one of the buyer profiles for OptinMonster as an example.
- Metrics: Wants to get at least 25% more leads from their website
- Economic Buyer: Owns the business and can make decisions about marketing expenses
- Decision Criteria: Wants something that just works without a lot of fuss, offers support when needed
- Decision-Making Process: Read some more articles about OptinMonster, check out the documentation, look at some campaign examples, talk to someone on live chat to get questions answered, try out the product
- Identify Pain: Tired of wasting time and money on marketing campaigns that don’t work, might shut down their blog if they can’t get results soon
- Champion: The blogger themselves
One way to use these frameworks is to create a lead scoring system. This means that you assign points to different parts of the framework. The higher the score, the more qualified the lead is.
Now that you understand some common frameworks for qualifying leads, let’s learn how to qualify leads using OptinMonster.
How to Qualify Leads With OptinMonster Field Mapping (A Step-by-Step Guide)
The most direct way to qualify leads with OptinMonster is to use field mapping. Field mapping allows you to capture details about your leads beyond name contact information so that you can make sure your leads are qualified.
You can add radio buttons, phone number fields, text areas, number fields, dropdowns, and more to your popup lead generation forms, all with zero coding necessary.
We’ll show you how!
1. Figure Out Your Qualifying Questions
Before you start building your lead generation form in OptinMonster, you need to decide what a qualified prospect actually looks like for your business.
Perhaps they’re part of a certain demographic group or living in a specific geographic area. Or they’re interested in a topic related to your business.
Asking the right questions at the very beginning can help you avoid red flags like prospects who don’t have the budget or aren’t prioritizing a solution for their problem.
In this tutorial, we’re going to make a lead generation form for an event photographer. Here’s what this photographer wants to know about every sales prospect:
- Date of the event
- Company size for corporate events or guest list for private events
- Location
- Name and email address of a contact person
Now let’s build the form!
2. Create Your Lead Generation Form
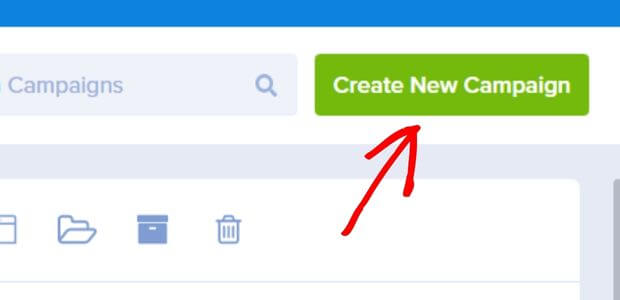
First, make sure you sign up for an account with OptinMonster. Then, log into your OptinMonster account and click Create New Campaign.
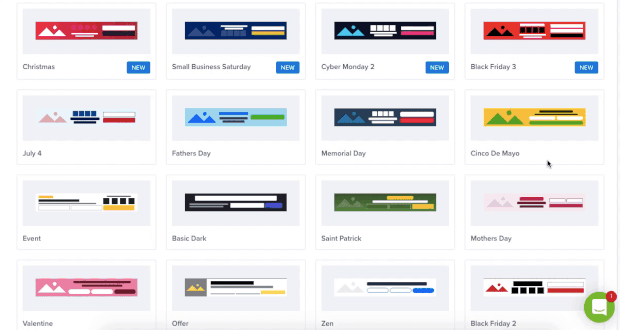
For this tutorial, we’ll use a template and customize the lead generation form. Look through the template library for something that you like. Keep in mind that you can completely customize any template you want to match your branding. For this tutorial, we’ll use the Unlock template.
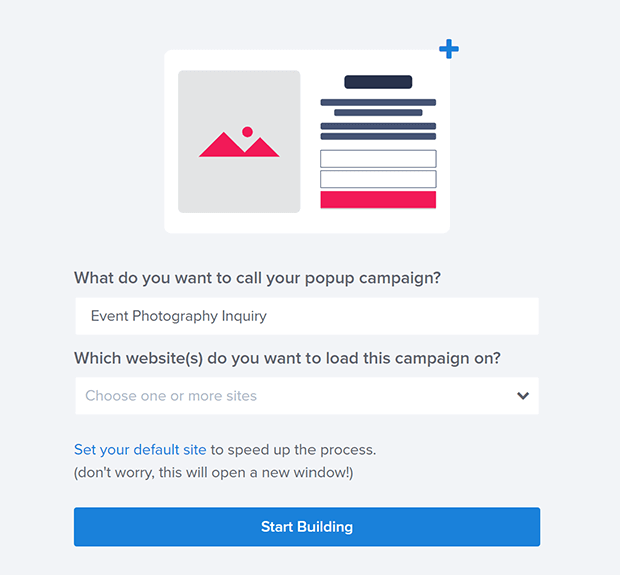
Give your campaign a name and click Start Building. We will add a website at the end.
The Unlock template has a Yes/No view that is proven to boost conversions. A high-quality lead who takes the time to click through to the lead generation form is more likely to finish the process of filling out the form.
You can customize every element by clicking on it in the builder. You’ll see options for customizing images, text, and other options in the left sidebar.
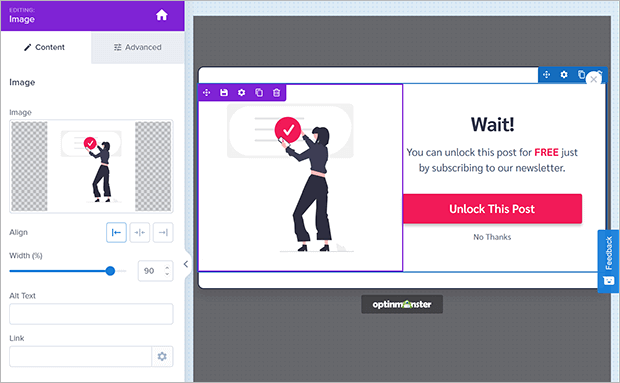
You can deactivate the Yes/No view by clicking on the toggle in the footer.
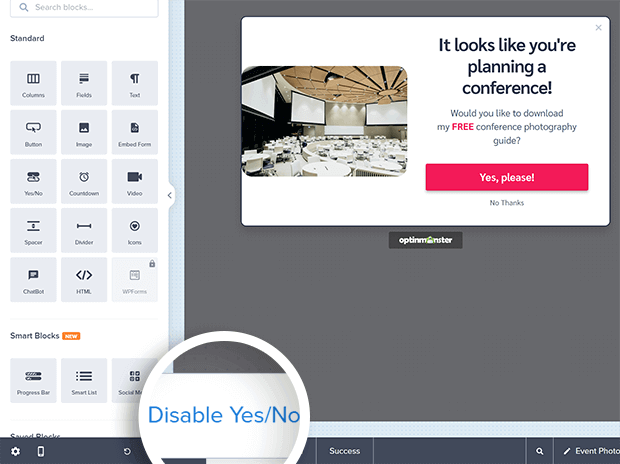
Once you have your Yes/No view the way you want it, let’s customize the optin view. Click on the Optin view in the footer.
You can customize the look and feel of the optin view the same way you did for the Yes/No view. Let’s focus on the Fields block. Click on the name or email fields to open the Fields block.
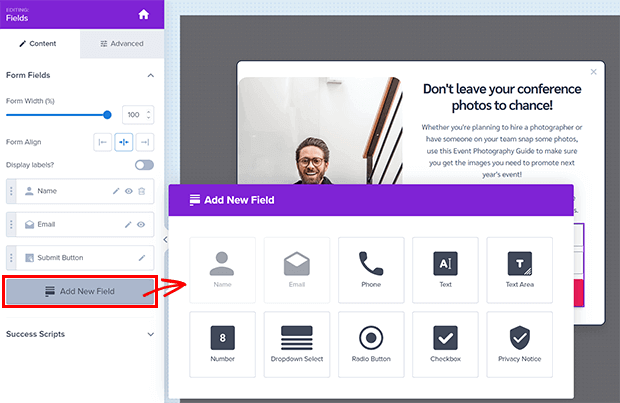
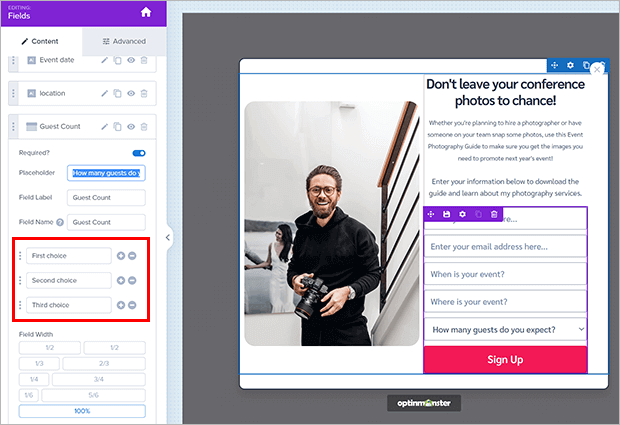
The name and email address fields are already part of this template, so we don’t have to do anything there. We need to add a field for the event date, company size, and event location.
Start by clicking Add New Field. For the event date, let’s choose a text field.
Customize your text field with placeholder text, which disappears when your lead starts typing in the field, a field label, and a field name. You can also toggle whether this field is required.
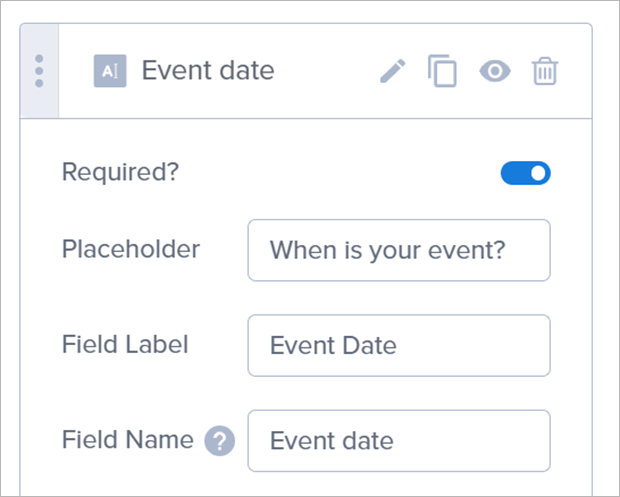
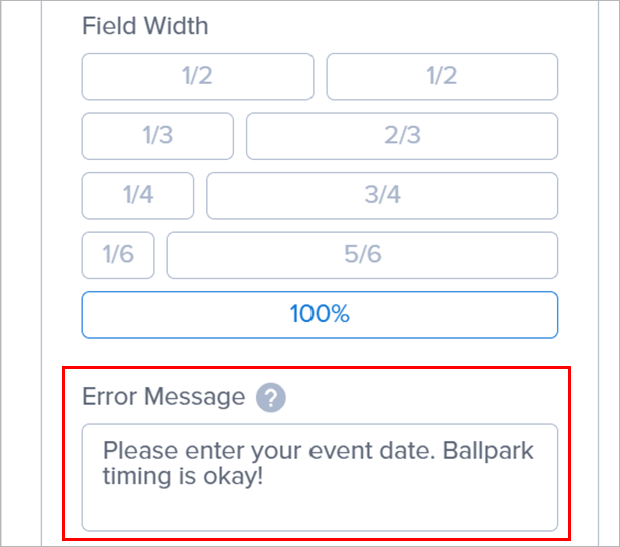
You may also want to adjust the field width and the error message that is displayed if someone tries to submit a form without a required field.
You can repeat the same process for adding another text field for the event location.
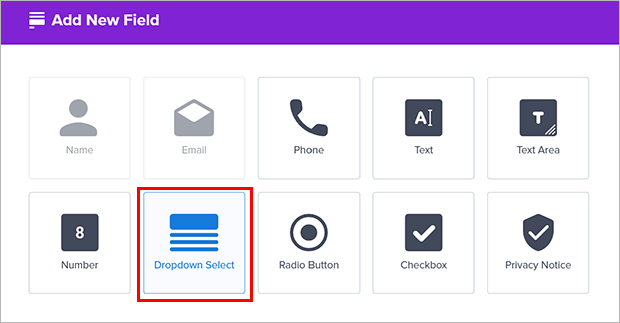
For the number of event guests, we’ll show you how to use a dropdown menu. This can reduce friction for the lead as they just have to select something instead of typing the number themselves.
Click Add New Field and then choose Dropdown Select.
You’ll see that customizing this field looks a bit different from the text field. As before, customize the placeholder text, field label, and field name.
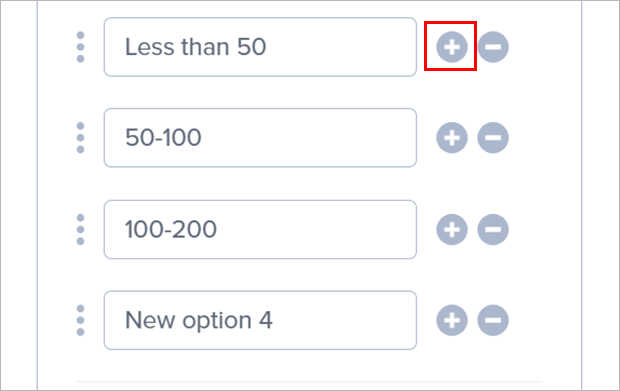
Now, you can add your dropdown options. You might choose options that correspond with different packages that you offer, or whatever information is most helpful in qualifying your leads. To add another option, click the + button. To delete an option you don’t need, click the – button.
Customize the field width and error message like you did before.
If you need to reorder your fields, simply drag and drop them into the right order.
Once you finish the optin view, you can customize the Success view. This is an important way to make a good impression by paying attention to detail. Click on the Succes view in the footer.
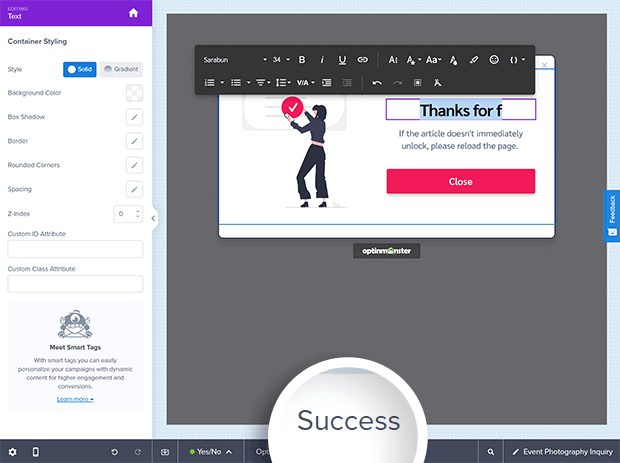
Use the Success view to thank your lead for contacting you and reminding them what the next steps will be.
Once your lead generation form looks right, make sure to click the Save button in the upper right corner.
3. Target Your Form
Now we’re going to set the display rules for your lead generation campaign. This is where we make sure the form gets seen by your target audience.
Click the Display Rules tab in the header.
There are a wide variety of display rules to choose from. You can target visitors based on their engagement metrics, such as:
- pages visited
- time on page
- returning visitor
- interaction with other campaigns
You can also target visitors based on geography, referral source, social media cookies, and much more.
In this example, we’ll target engaged visitors to blog posts and pages about event planning. The display rules we’ll use are:
- Page targeting
- Time on page
Here’s what it looks like:
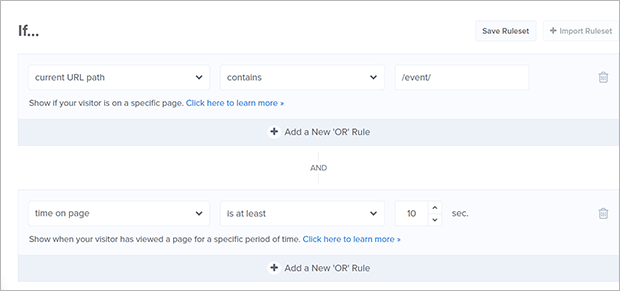
You can combine any number of display rules for super-precise targeting and personalization.
Now let’s take all those lead qualification fields and map them to your email marketing platform.
4. Connect Your Lead List
OptinMonster integrates with just about every major email marketing and CRM software you can think of. Click on the Integrations tab in the header and search for your marketing tool. You’ll also need to log into your marketing software account to create or get names from your form fields.
Don’t have an email list yet? You can collect leads for free using our Monster Leads feature.
For our example tutorial, we’ll use ConvertKit.
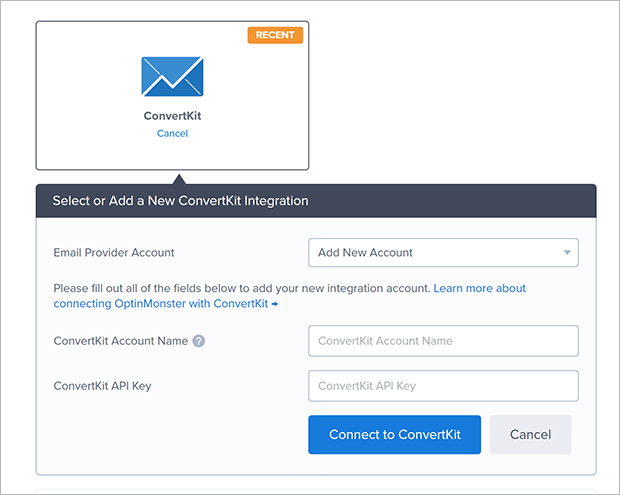
Each marketing tool is a little different, so just follow the instructions given to connect your account.
Once your account is connected, you may see a list of your email forms, subscriber lists, or customer groups. Again, this will vary depending on what tool you’re using. For ConvertKit, let’s choose a form from the dropdown list.
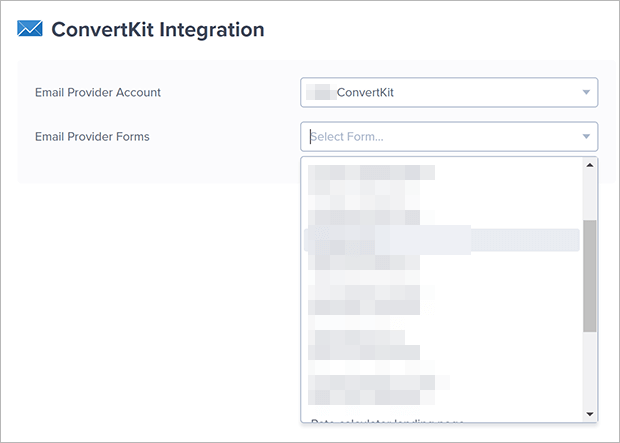
You may get other options, such as adding the lead to an email sequence or adding a tag. Choose what you need accordingly.
Next, scroll down to Field Mapping. You’ll see that the name and email fields are already mapped to the default fields in ConvertKit.
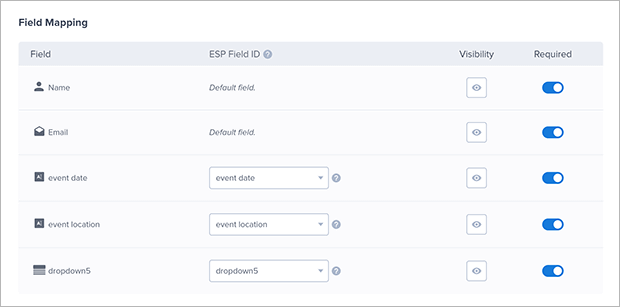
Now we need to map the remaining fields. By default, the field ID will be whatever you entered in the builder during the previous step. You must have a matching subscriber field in ConvertKit or whatever marketing tool you’re using.
At this point, you can have two options. First, you can create matching subscriber fields in your marketing tool if you don’t have them already. Check the documentation for your email service provider (ESP) or customer relationship management (CRM) software for how to do this.
Alternatively, you can map the OptinMonster fields onto existing fields in your marketing tool. Log into your marketing tool to get the exact subscriber field names and match them to the OptinMonster fields.
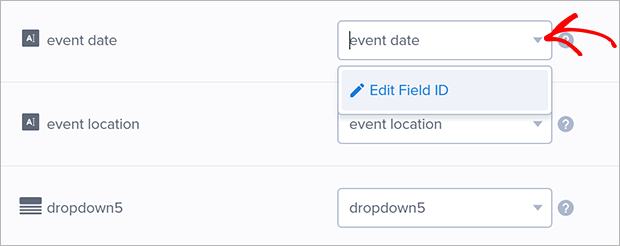
To edit a field ID, click the dropdown button, then click Edit Field ID.
Make sure all your fields are mapped appropriately so your ESP or CRM can pull the right information about each new lead.
Now, let’s move onto the last step of publishing your lead qualification form!
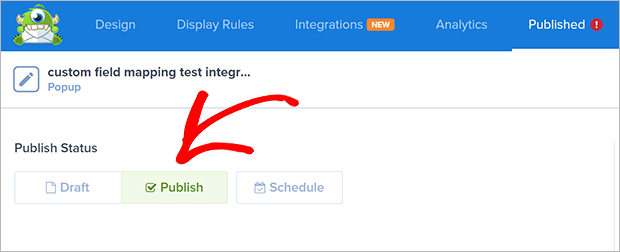
5. Publish Your Lead Generation Form
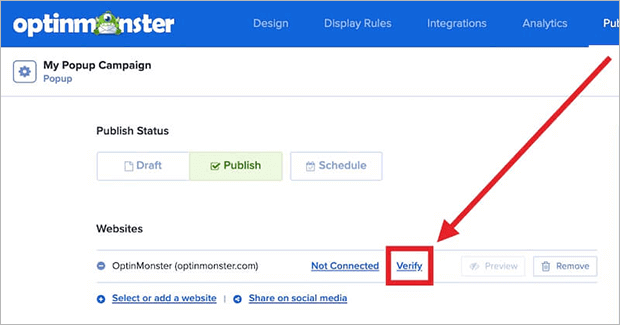
Click the Publish tab in the header. First, change the Publish Status to Publish.
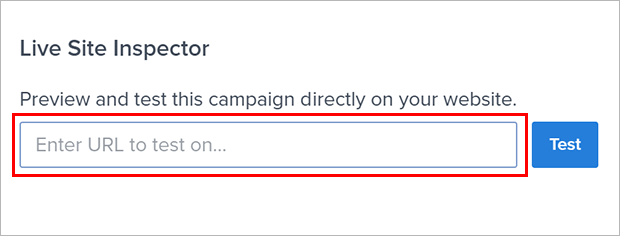
You can enter a URL into the live site inspector to preview the campaign on your website.
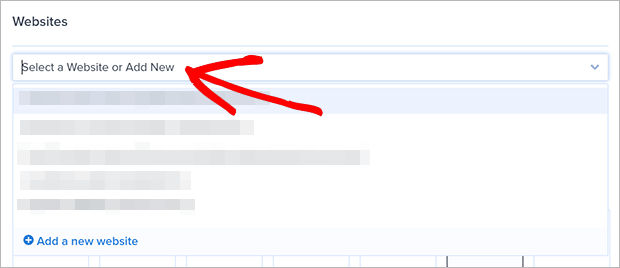
Under Websites, click the dropdown menu and select Add New Website. If you’ve added your website previously, select it from the dropdown.
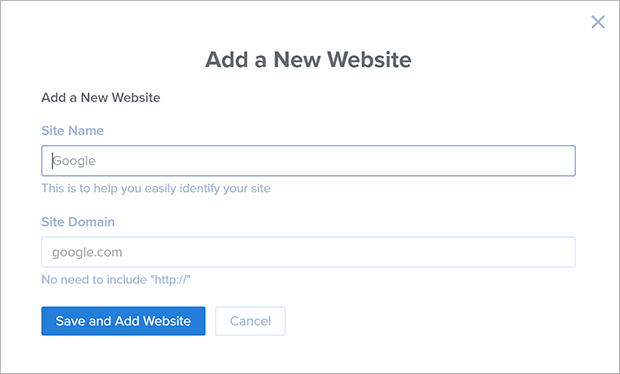
Add your site name and domain in the popup window.
Next, you need to place the OptinMonster embed code on your site. The directions for this depend on what platform you’re using, but we have guides for every major website builder and eCommerce platform. Once you add the code, go back to the OptinMonster Publish screen and click Verify for that site.
That’s it! Your lead qualification form is done and your website is connected. Now you can start bringing in highly qualified potential buyers.
Other Ways to Qualify Leads With OptinMonster
Would you believe that there are other ways to qualify your leads using OptinMonster? That’s right! We really believe that lead qualification is important for a successful sales strategy, so we’ve built in several other automated lead qualification functions.
TruLead™ Lead Verification
OptinMonster can filter out bad leads from spam bots, temporary email addresses, and other red flags.
Verifying your leads saves you money, protects your email sender reputation, and drives more revenue from your email marketing. That’s because warm leads are more likely to convert and tend to spend more overall.
With lead verification, you can filter out:
- Domains
- IP addresses
- Specific strings and characters
- Temporary, free, or role-based emails
- Test or throwaway emails like “[email protected]”
and much more.
Lead verification is a paid add-on for OptinMonster. Pricing depends on the number of email addresses your campaigns capture every month.
Geotargeting
OptinMonster includes geolocation functionality so you can segment your leads by location. For example, you can create campaigns in different languages based on region. You can then send these subscribers relevant offers or even connect them with a salesperson who speaks the same language.
Referrer Detection
Referral leads are often much more likely to convert than cold traffic. Use that to your advantage by using OptinMonster’s referrer detection to show customized campaigns for referral visitors. For example, you can mention a podcast host or blogger that you collaborated with when they send you traffic from their site.
OnSite Retargeting and OnSite Follow Up Campaigns
Most people need to see an ad several times before they’re ready to act on it. OptinMonster can help you follow up with visitors who are spending a lot of time on your site and interacting with other campaigns.
OnSite Follow Up Campaigns® let you present leads with another offer after they close or accept the first one. OnSite Retargeting(R) gives new promotions and offers to repeat visitors.
This type of targeted marketing can really boost your conversions when used properly.
Next Steps: What to Do With Qualified Leads
We hope this tutorial helps you qualify your leads more easily! Once you have qualified leads, make sure to nurture those leads and avoid these lead-nurturing mistakes.
Ready to start qualifying your leads automatically? Try OptinMonster risk-free today!

Disclosure: Our content is reader-supported. This means if you click on some of our links, then we may earn a commission. We only recommend products that we believe will add value to our readers.