Do you want to create an EmailOctopus popup that automatically adds new subscribers to your email list?
EmailOctopus is one of the most affordable email newsletter services on the market. With a popup, you can grab your visitor’s attention on your site and convert more of them into leads and customers.
In this tutorial, we’ll create an EmailOctopus popup that helps you grow your email list exponentially.
What is an EmailOctopus Popup
An EmailOctopus popup is an email optin form that appears over your site’s content to grab your visitors’ attention. It’s a super-effective way to increase your subscribers with little effort from your side.
Here’s how it works.
You display your popup on your site.
To attract your visitor’s attention, you’ll include an offer, like:
- Lead magnet: an incentive marketers offer to people in exchange for their email addresses. It’s usually a piece of downloadable content like a PDF checklist or report
- Coupon promotion: if you’re an ecommerce site, you could offer an exclusive coupon to increase signups and sales
When you’re using EmailOctopus, your popup is connected to your EmailOctopus account. So, all the email addresses you collect are stored in your EmailOctopus database.
From there, you can run email marketing campaigns.
Email marketing service providers like EmailOctopus are popular because they make it easy to send targeted bulk emails.
EmailOctopus lets you:
- Create beautiful emails easily with templates that work across all devices
- Run automated campaigns for time-based emails and drip sequences
By default, EmailOctopus doesn’t let you create a popup for your email campaigns. That means you’ll miss out on one of the best opportunities to skyrocket your list.
But no worries. You can connect your EmailOctopus account to OptinMonster, the best lead generation tool in existence.
Here’s why OptinMonster works so well:
- Create a stunning popup form with 50+ beautiful templates without writing a line of code.
- Target site visitors with behavior automation (Exit Intent, Scroll Trigger and so on), so you can only show popups when visitors are likely to be converted into leads
Customers get results as soon as they start using OptinMonster.
Fastrack sees an increase in conversion rate of 10 – 30 percent when they launched a new OptinMonster campaign. In one case, they were able to recover 53% of abandoning visitors!
And the good news is it’s not hard to put all of this together.
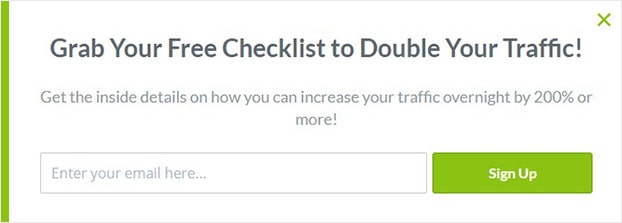
It took us less than 15 minutes to create this EmailOctopus popup today:
Ready? Let’s jump in.
How to Create an EmailOctopus Popup
You’ll need an OptinMonster account to get started.
Step 1: Create an OptinMonster Campaign
First, we’ll need to create a campaign.
Head over to your OptinMonster dashboard, and click Create New Campaign.
Now, you’ll need to choose a campaign type.
You can pick from different campaign types:
- Popup
- Floating Bar
- Fullscreen
- Inline
- Slide-in
- Gamified
What’s the best campaign type for you?
That depends on your goals.
A fullscreen campaign will cover the visitor’s screen, hiding the content behind it. It brings the reader’s attention to a single goal. You could use a floating bar to add a countdown timer during a limited sale.
Today, though, we’ll go with Popup.
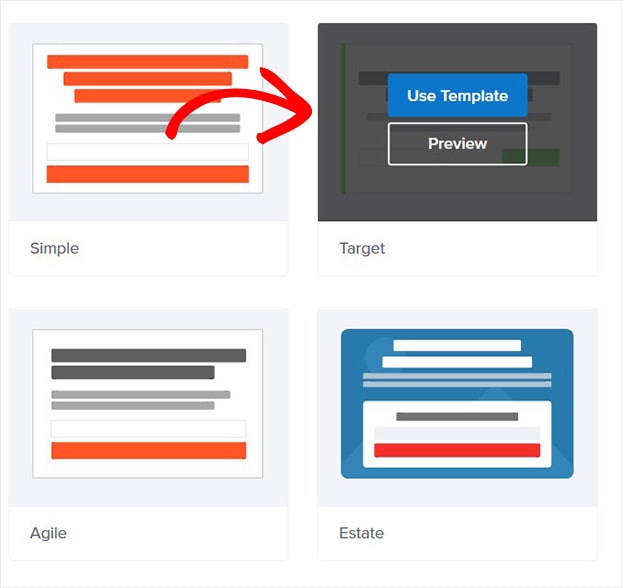
Next, pick your template.
You can choose from 50+ templates for any type of campaign. And if you like, you can build a custom popup from scratch with the Canvas template.
For this tutorial, we’ll go with Target.
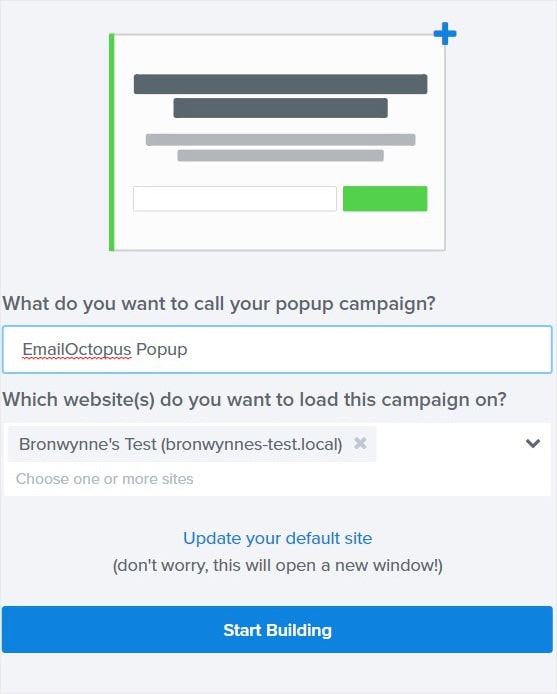
Now, it’s time to name your campaign and click Start Building.
You’re ready to design your popup.
Step 2: Design Your EmailOctopus Popup
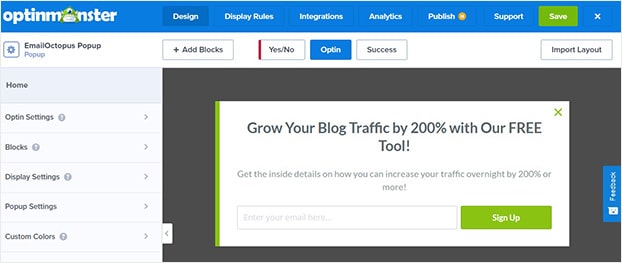
The next screen is the OptinMonster editor.
Customizing your popup here is simple.
There are two main ways to change anything about your popup:
- Drag and drop a block onto your optin form
- Click on an element you want to change to pull up the editing tools on the left
That’s all there is to it.
So, let’s see how this works.
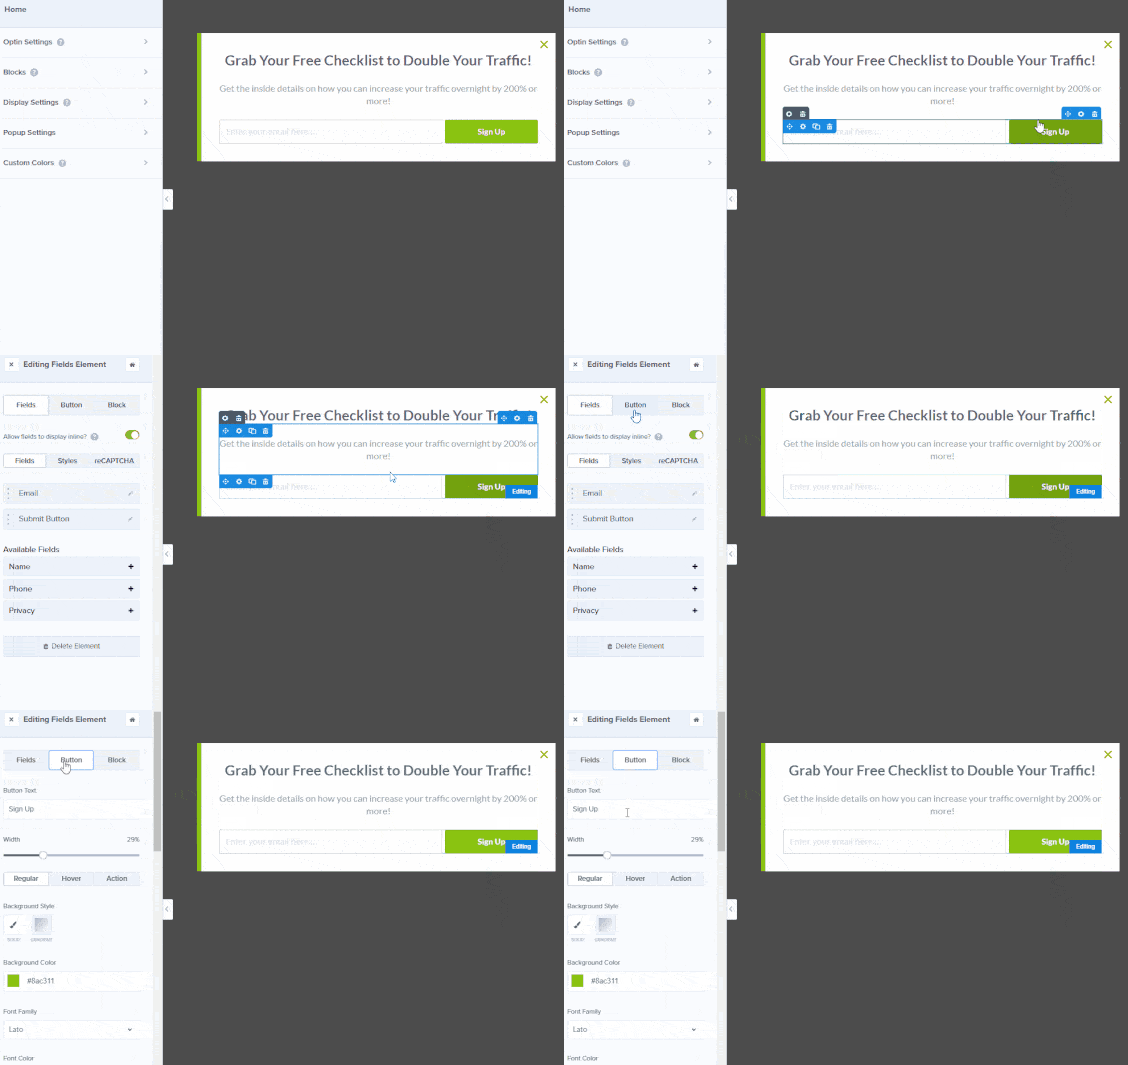
Click on the text and start editing your content right away.
You might want to change the color and text of the submit button.
Go ahead and click on the optin form’s Sign Up button.
Now, you’ll be able to change the button’s text and color.
And that’s not all.
You can convert your popup into a two-step optin.
All you need to do is a create Yes/No campaign.
Why would you want to make your sign up process longer?
Two-step optins increase conversions because when the person starts the action, they’ve already committed to your offer.
And OptinMonster customers who use Yes/No campaigns see up to 18% more conversions. Cole’s Classroom gained over $55,000 in sales using two-step optins.
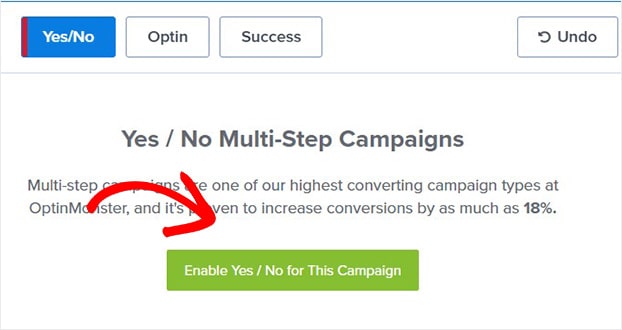
At the top of your editor, you’ll see the Yes/No button.
On the next screen, you can enable a Yes/No campaign.
We can’t get into all the different ways you can customize your popup here simply because there’s just too much to cover. But know that you’ll have the freedom to design a popup that reflects your brand.
Looking for ideas? Check out this article for popup design inspiration.
Step 3: Display Your EmailOctopus Popup
In this section of the tutorial, we will decide when and where to display our popup.
One advantage of OptinMonster is its precise targeting. That means no annoying, distracting popups.
Instead, you have the power to show the right offers to the right people at just the right time.
OptinMonster’s targeting and campaign triggers let you display popups to people based on:
- Their physical location
- The blog post they’re reading
- Whether they’re new or returning visitors
And more.
Today, we’ll choose OptinMonster’s Time Delay Rule.
The Time Delay Rule lets you display your campaign based on how long the visitor has been on your site. Longer sessions mean your site visitor is already more engaged with your content. And more engaged visitors are more likely to complete your optins.
Head over to Display Rules. Find and select Time on Site.
Now, you can control exactly when the popup should be displayed.
Next, we’ll connect OptinMonster with your EmailOctopus account.
Step 4: Integrate With EmailOctopus
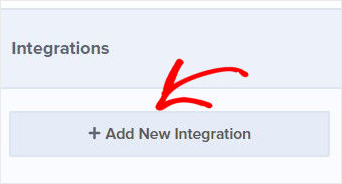
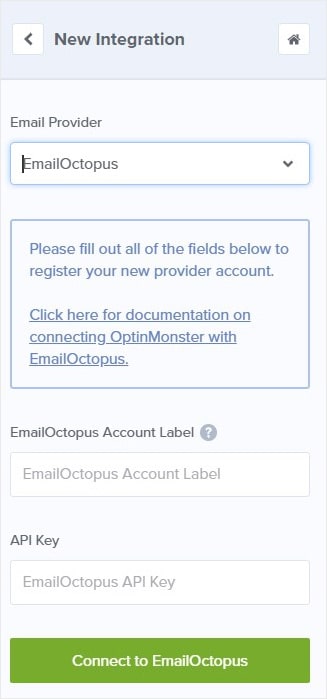
Head over to Integrations.
Click Add New Integration.
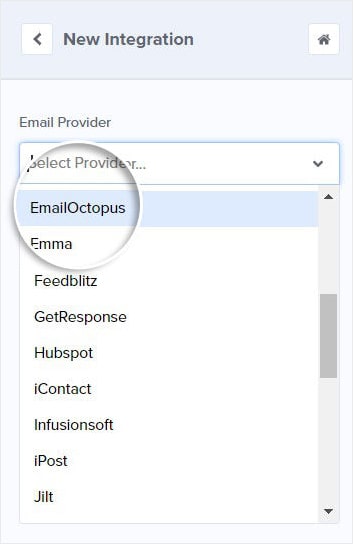
Now, select EmailOctopus from the dropdown.
Next, you’ll need to add your integration details:
- Account label
- API Key
For the account label, choose anything that helps you organize your integrations.
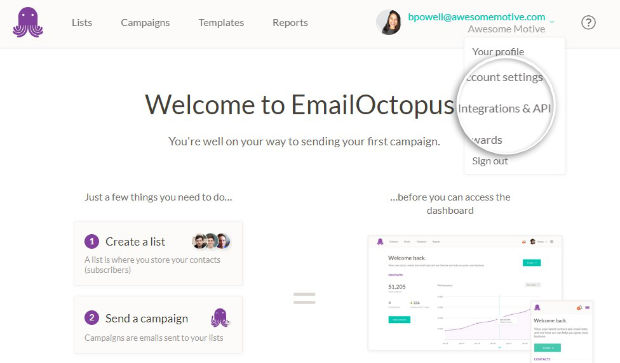
And, we will need to get the API key in EmailOctopus. So, head over to your EmailOctopus account.
At the top right, click on your name and Integrations & API.
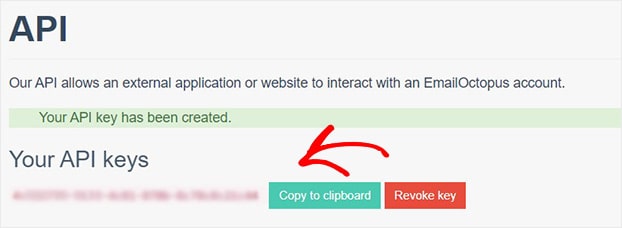
Next, click developer API.
Click Create a key.
Copy the key.
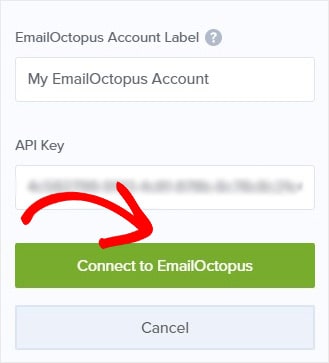
Head back to OptinMonster.
Paste the API key. Go ahead and click Connect to EmailOctopus.
Now, you’ll need to publish your campaign.
That’s it! You’ve successfully created an EmailOctopus popup to grow your email list.
We hoped you enjoyed this article.
Once you start collecting emails, the next step for you is to make sure you’re sending the right kind of emails that help you turn your leads into loyal subscribers and customers.
Here are resources that can help:
- 50 Email Segmentation Tips You Need to Use Now
- 184 Best Email Subject Lines to Boost Your Email Open Rates (2020)
- Email Marketing Made Simple: A Step by Step Guide [+ Examples]
Want to get started? Get OptinMonster today.
Disclosure: Our content is reader-supported. This means if you click on some of our links, then we may earn a commission. We only recommend products that we believe will add value to our readers.









Thanks for reading this article – I hope you found it helpful.
I wanted to let you know about our powerful Exit Intent® technology that converts abandoning website visitors into email subscribers and customers. Typically 70% of the people who visit your website will leave and never return, meaning all those marketing efforts to reach them have gone to waste.
OptinMonster’s Exit Intent® technology detects user behavior and prompts them with a targeted campaign at the precise moment they are about to leave.
You can unlock this powerful technology 100% free when you purchase our OptinMonster Pro plan.
Get started with OptinMonster today and see why 1,000,000+ choose OptinMonster to get more subscribers and customers.
Thomas Griffin
President of OptinMonster
All your blogs was amazing and nice work