
April 5, 2019
Is your team getting ready to create a bunch of pages from one template that have similar content and dreading the time-consuming process of setting up each page one by one?
Now might be a good time to think about setting up all that content using HubDB to create dynamic website pages.
What are dynamic website pages?
Dynamic website pages are like typical site pages, except the content on the page comes from a HubDB table instead of being added to the page from the page editor. Instead of going through the steps of creating a typical site page, a dynamic page is created automatically for every row in your table. And the best part about dynamic pages, besides being able to update all of the content in one place? Each page has its own unique URL, which is great for SEO—and you can even check out the analytics for each individual page.
You may be thinking, “Sounds cool, but what can we really use this for?” Don’t worry. I’ve put together a list of some of the ways you can leverage dynamic pages:
- Team pages Want to see an example? Check out our employees on SmartBug’s™ About page.
- Partner directories
- Job postings
- Office or store locations
- Product listings
- Event listings
- Course listings
Step 1: Set Up Your HubDB Table
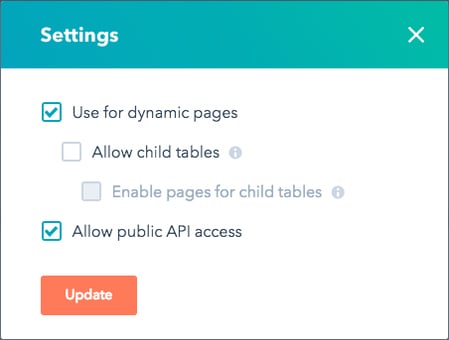
Head over to HubDB in your HubSpot portal and click on the “Create table” button in the upper right corner. Name your new table, then click on the “Settings” button. In the settings window, check the “Use for dynamic pages” option, then click on the “Update” button (ignore the other two options for now).
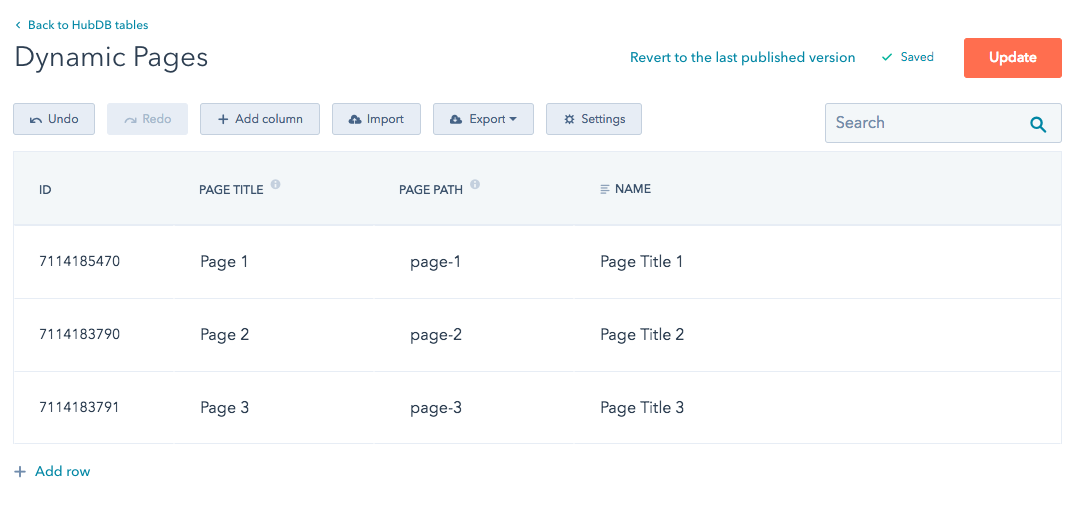
This will add two new columns to your table: “Page Title” and “Page Path.” Page Title is exactly what it sounds like—it’s the HTML title of the page. Page Path is the unique part of the URL for the page; it’s the section at the end of the URL path.
Finally, you’ll want to create the rest of the columns needed for the content you’ll be adding to the pages and include all the data as individual rows in the table. Don’t forget to publish the table!

Step 2: Set Up the Custom Module
The next step is to set up a custom module. We do this because it lets us include custom fields if needed and it gives us the ability to use custom HTML and HubL within the module, which can then be placed on any template. Once the custom module is ready to go, just add it to the template you’d like to use for the pages.
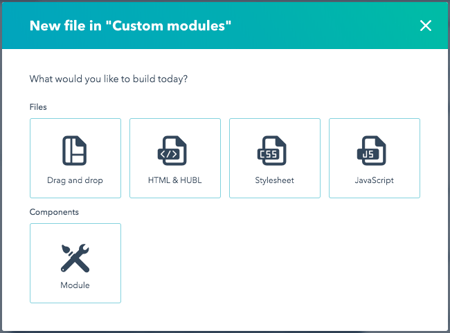
From the Design Manager, in the left side panel, click on the “File” dropdown and select the “New file” option. Make sure you’re in the appropriate folder if you’d like to keep everything organized. From the “New file” window, choose the “Module” option.
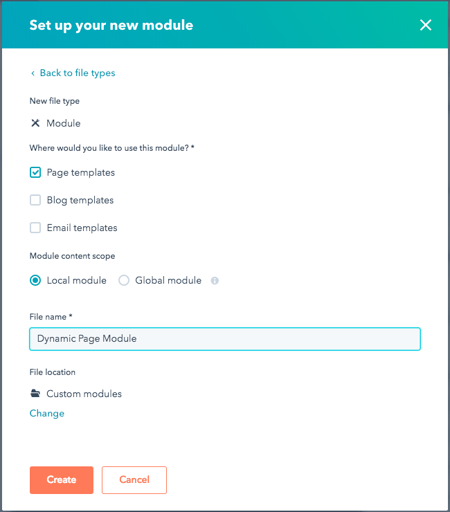
In the next window, choose where the module will be used, in this case “Page templates,” and whether it’s going to be a local or a global module. You also have the option of changing the file location here if you need to. Finally, name it and click on the “Create” button.
Next, we’ll add in the code that will display the listing and individual pages. For this example, I’ll keep it pretty simple.
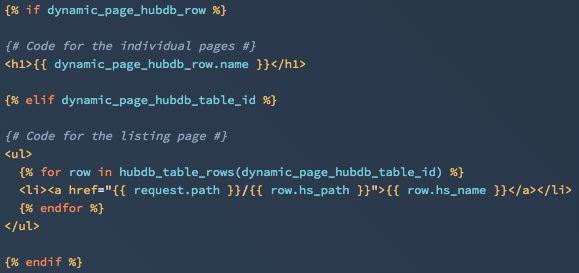
In the first part of this code snippet, "if dynamic_page_hubdb_row," you’ll want to include the markup for how the individual page will look. In this example, the only thing that will appear on the page is the content in the “Name” column of the table.
In the second half, "elif dynamic_page_hubdb_table_id," is the markup for how the parent or main page will look. This is the page that won’t have the “Page Path” segment in the URL. The for loop goes through the HubDB table and creates an unordered list for each row. Each list item shows the “Page Title” and links to the unique “Page Path.” Once you have your custom module all set up, publish it and add it to the template you’ll be using for your pages.
If you try to check out the preview for this, you’ll notice that you’re only getting a blank page. This is because it doesn’t know where to pull all this content from yet. This will be selected in the next step.
Step 3: Create Your Dynamic Pages
Go through the normal steps for setting up a page: Create a website page, name it, and choose the template. Next, you’ll want to click over to the “Settings” tab and fill in the page title, URL, and meta description. Keep in mind that the URL you set for this page will be the base for the dynamic pages.
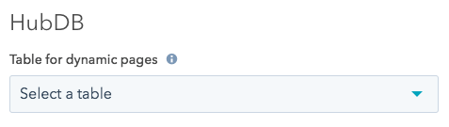
Once that’s set, expand the “Advanced Options” section and scroll down to the “HubDB” option. This is where you’ll choose your table for the dynamic pages. Select the table that you created earlier from the dropdown.
When you’re ready, click the “Publish” button. Your new page and the dynamic pages are now live!
Remember how I said you could check out the analytics for the individual dynamic pages? Once the analytics process is finished, you’ll be able to see the URLs for each page under the “Analyze” tab of your Website Pages. By clicking on one of the dynamic website pages, you can check out the page’s analytics just like any other site page.
There’s plenty more to discover about HubDB and dynamic website pages. If you want to take a deeper dive into this topic, check out HubSpot’s documentation. You’ll even find tutorials on how to add video to your dynamic pages and how to create dynamic pages with up to five child pages.

Plan, design, build, and launch your website successfully with:
Mastering The Art of Website Redesigns


Other insights you might like