Are you looking for an easy way to set up SMTP in WordPress?
Simple Mail Transfer Protocol (SMTP) ensures the emails you sent from your WordPress website is not seen as spoof emails. That way you can improve the email deliverability rate and rest assured that it never hits the spam folder.
The good news is there’s a simple way to set up SMTP in WordPress with only a few clicks. No code needed.
In this tutorial, we’ll explain how to set up SMTP in WordPress the easy way.
Using SMTP to Send WordPress Emails
Before we jump in, it’s worth taking a moment to look at why your WordPress site needs SMTP.
There are a few reasons you’d want to send emails from your WordPress site, such as:
- Contact form entry notification
- New account registrations
- Lost password
- Comment notifications
And more.
By default, WordPress uses PHP mail() function to send emails. Here’s where the trouble comes in. Some WordPress hosting companies don’t support that function, so it’s highly likely that your emails won’t be delivered at all.
On top of that, most web hosting doesn’t even support masked email addresses. In such cases, you’ll find a warning message that says “Misconfiguration leads to mail delivery failure or other troubles”.
In a nutshell, without proper authentication, your messages either end up in the spam folder or don’t get delivered at all.
SMTP fixes this problem. SMTP stands for Simple Mail Transfer Protocol, and it’s an industry standard for sending emails.
For this tutorial, we’ll use an SMTP plugin, and that’s because it’s the easiest way to set up SMTP in WordPress.
Let’s get started.
How to Set Up SMTP in WordPress
Today, we will be using WP Mail SMTP to set up SMTP in WordPress.
WP Mail SMTP is the best SMTP plugin for WordPress websites. It lets you send emails from your WordPress site using the SMTP email service provider of your choice.
Getting started with WP Mail SMTP is incredibly easy. Setup takes just a few minutes.
But, if you want, you can get WP Mail SMTP’s experts to install and configure the plugin for you.
Once you’ve installed and activated the service, you can send test emails right from your WordPress dashboard. You can even check your email log for a history of all your WordPress emails.
Here are some of the WP Mail SMTP mailers you can use:
- SMTP.com: SMTP.com is recommended because it is the industry leader in SMTP. This SMTP provider also offers super easy setup.
- Mailgun: Mailgun is a popular and reliable SMTP tool, and it offers competitive pricing. Plus, it comes with a limited free trial, so you can test the service.
- GMail /G Suite: You can connect WP Mail SMTP and Gmail. Keep in mind there are limits to the number of emails you can send using Gmail. Once you reach those limits, your emails won’t be sent. This is a free option, but it’s best suited to smaller websites. In fact, Google discourages people from using its services to send transactional emails.
Find WP Mail SMTP’s complete list of mailers here.
Finally, you can also use your hosting provider.
Now, that you have an overview of your mailer options, let’s jump right into the tutorial.
Step 1: Download and Activate WP Mail SMTP
The first step is to install and activate the WP Mail SMTP plugin. For help, here’s a step by step guide for installing a WordPress plugin.
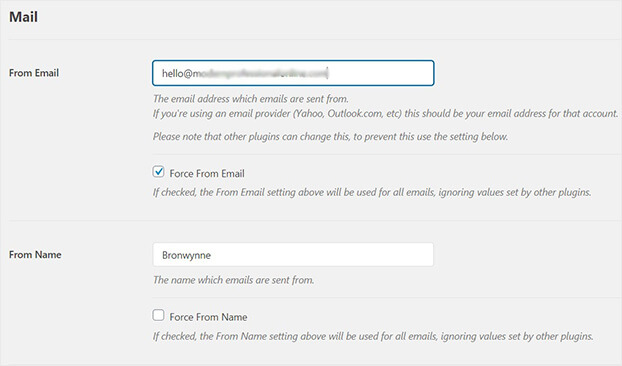
Once you have activated the plugin, visit Settings » General to start configuring the plugin.
You will need to add:
- From Email: the address your emails should be sent from
- From Name: the name emails will be sent from
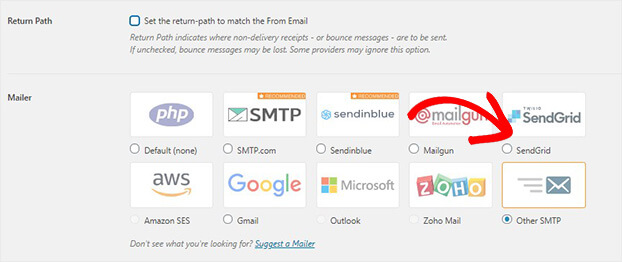
Then, you’ll also need to choose your mailer. For this tutorial, we will choose Other SMTP since we’ll be using our hosting company.
Next, we’ll create our email account in our hosting account.
Step 2: Set Up Your Email to Send WordPress Emails
In this step, we’ll be setting up our email account to send WordPress emails.
The exact steps you’ll need to follow will depend on your hosting provider or mailer, but the process is pretty similar across companies.
Check out this resource for instructions for specific hosts: How to Set up WP Mail SMTP with Any Host (Ultimate Guide)
So, the first thing you need to do is log into your cPanel.
In this example, we’re using HostGator.
So, we’ll head over to our cPanel.
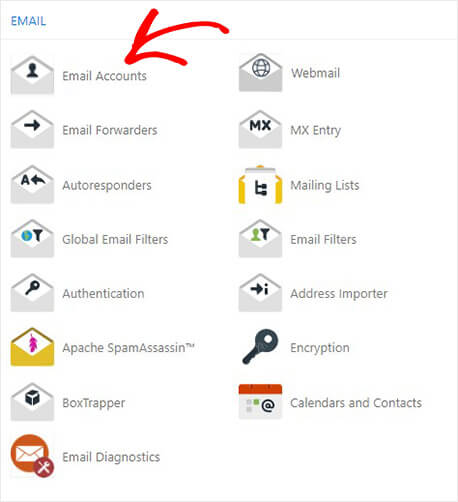
Click Email Accounts under Email.
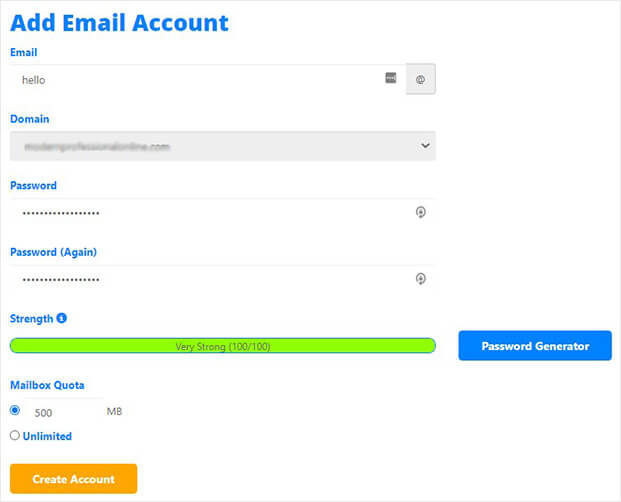
Then, fill in the information you need to create an email account.
For the email, choose any email that makes sense for your domain. For example, you might want to use [email protected] or [email protected]
Then, make sure your domain is added.
Finally, create and confirm your password.
Once you’re done, click Create Account.
Scroll down, and you’ll see your account has been created. Now, we’ll need to gather the details we need to set up SMTP.
Click on Set Up Mail Client.
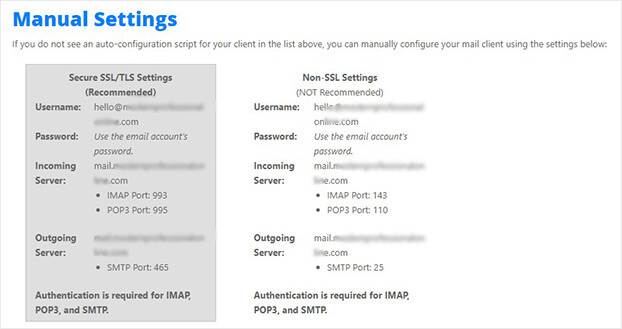
From here, have a look at your SMTP settings.
The way this information is displayed might differ from host to host.
Here’s the information you need to set up SMTP:
- Incoming server or SMTP host
- SMTP Port
- Username
- Password
Keep this window open because we’ll need to add these settings to the WP Mail SMTP plugin in WordPress.
Step 3: Authorize WP Mail SMTP
Head back to WordPress to configure WP Mail SMTP settings.
You’ll need to add all the details you got from your host over here.
- From Email: the email you created in your hosting account
- From Name: the name you want to use to send your emails
You also want to make sure you’ve checked Return Path. The return path will match the sender email, which means bounced emails will return to your inbox.
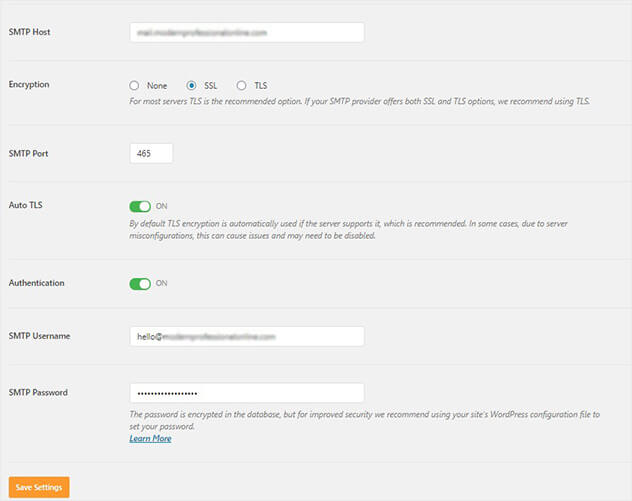
Now, copy all the SMTP account information from your hosting account.
Here is what you need to add:
- SMTP Host
- SMTP Port
- Encryption
- SMTP Username
- SMTP Password
Once you have completed the fields, click Save Settings.
You want to make sure everything is working correctly.
Step 4: Test Your SMTP WordPress Settings
In this step, you can test your email.
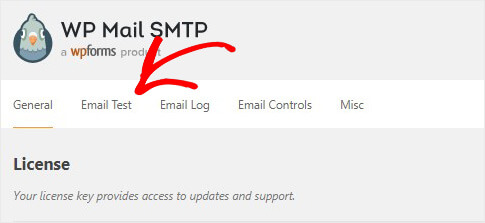
Click Email Test.
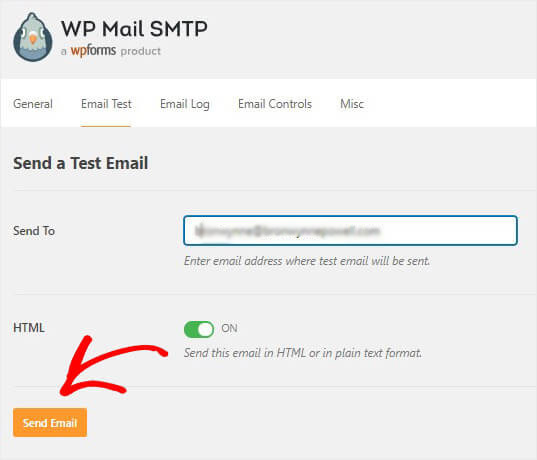
In the Send to field, add any email you have access to.
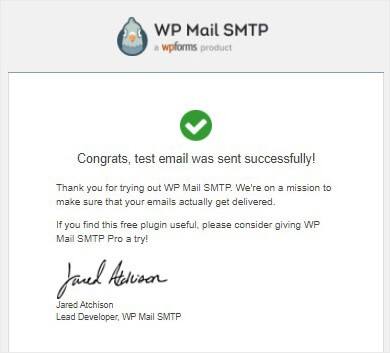
Go ahead and check your inbox to confirm your test email was sent.
There you go. Now you know the easiest way to set up SMTP in WordPress.
We hope you enjoyed this article.
If you’re already sending emails from your WordPress site, here are a few resources that you’ll find interesting:
- Best SMTP Services to Improve Your Deliverability
- 12 Reasons Why Your Emails Go in the Spam Box
- What Is a Transactional Email? (With 10 Stunning Examples)
Set up SMTP on your site and you’ll be on your way to reliably sending emails from your WordPress site.
Disclosure: Our content is reader-supported. This means if you click on some of our links, then we may earn a commission. We only recommend products that we believe will add value to our readers.


