Do you want to track your popup campaigns to see how well they’re performing?
You may have set up awesome marketing popups on your site, but without reliable data, you won’t know what’s working and what’s not.
Plus, you could also be missing out on valuable leads and sales.
In this post, we’ll show you how to set up Google Analytics popup tracking to analyze performance and conversions. You’ll get actionable insights into your campaigns so you can focus your time and energy on what’s working best.
Before we dive into the tutorial, let’s look at why you should track your custom popup events in the first place.
Why It’s Important to Track Custom Popup Events
Data and analytics help you understand your audience so you can cater to them better.
Google Analytics gives you insights into your website and audience, but it can be really hard to understand what the data means.
Plus, it’s not easy to track custom events like popups. You need to add custom code which can be difficult for beginners and people who don’t consider themselves “tech-savvy.”
Today, we’re going to show you the easiest way to set up custom popup events in Google Analytics without any coding at all. You’ll be able to see impressions and conversions for every popup on your site.
Added to that, you’ll also get metrics like transactions, revenue, and eCommerce conversion rate to know how much money your popups are bringing in.
So you’ll get relevant data and actionable insights into your popups with minimal effort. With this data, you’ll know:
- Whether your popup is actually driving growth
- Where to focus your time and energy on campaigns that work
- How many leads, sales, and revenue are generated
- Whether your premium popup tool is worth the investment
These insights give you direction so you can grow sales and scale your business.
Tracking Popup Events in Google Analytics
In this tutorial, we’ll guide you through setting up Google Analytics, creating popups for your site, and tracking their performance.
Let’s begin.
Step 1: Create Popups That Are Easy to Track
Not every popup tool makes it easy to track custom popup events in Google Analytics.
Some need custom code added to your website, which can lead to problems if you don’t know what you’re doing.
At OptinMonster, we’ve made sure that it’s easy for you to create popups and track their performance with just a few clicks – no coding required:
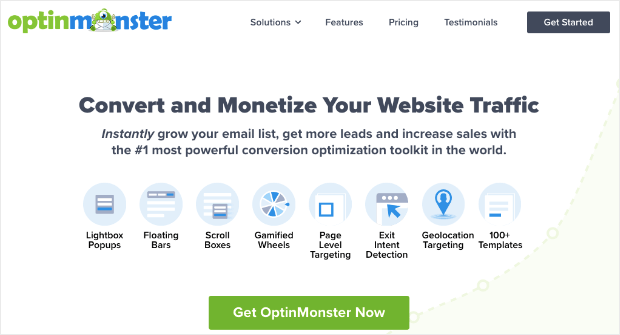
OptinMonster is the #1 popup tool on the market to capture leads and get higher conversions. It works with any website platform, including WordPress, Shopify, and BigCommerce.
OptinMonster has built-in analytics for every popup campaign. It shows you how your popups are performing and how your audience reacts to them.
You can see your conversions and conversion rate as well. If you own an eCommerce store, then you may also want to track sales, transactions, and revenue metrics.
For this, OptinMonster lets you seamlessly integrate your campaigns with Google Analytics. In fact, it takes just a few clicks to make the connection.
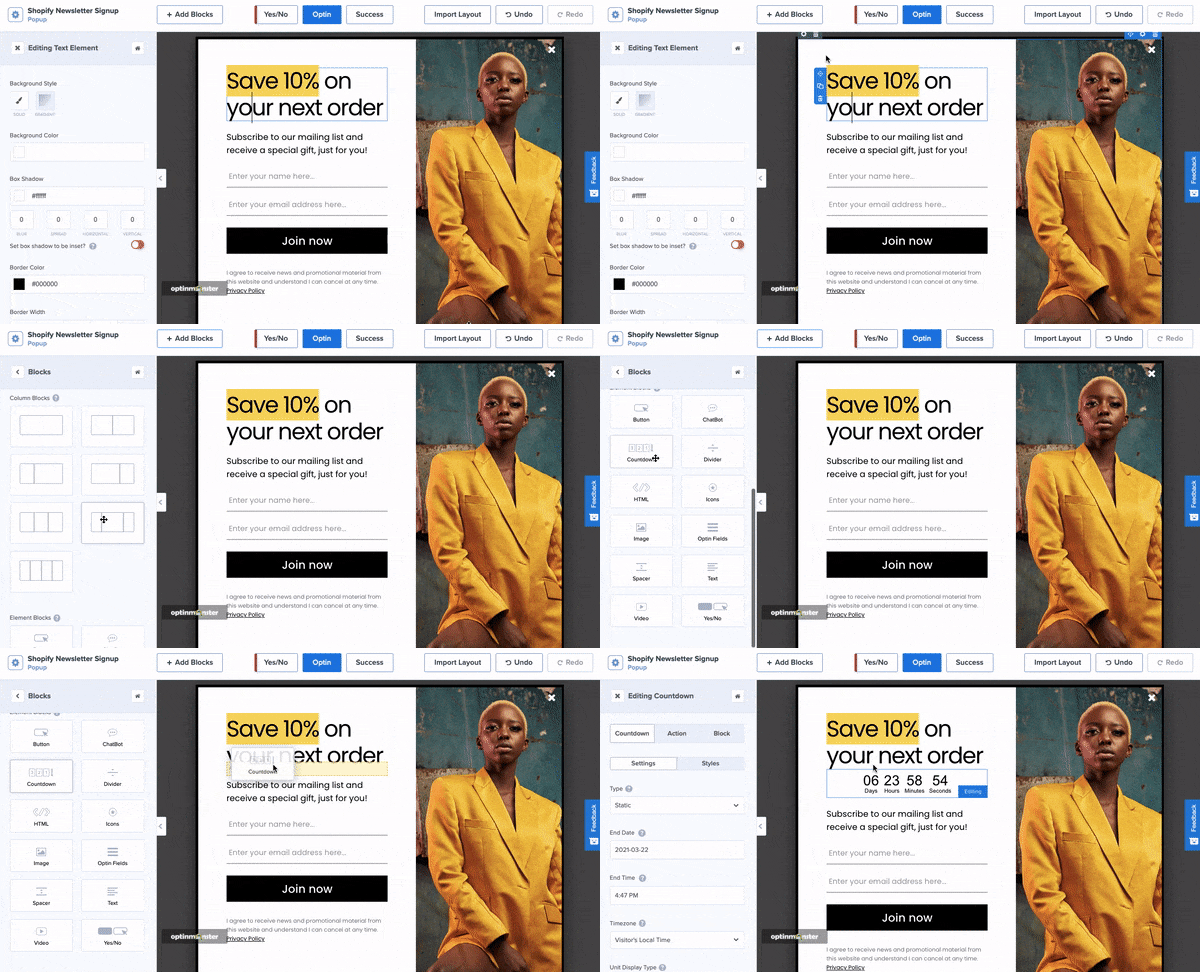
There are 50+ stunning templates and the drag and drop builder to create high-converting popups in minutes.
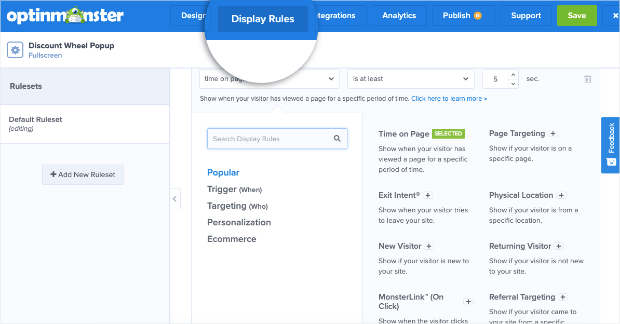
Plus, you can use our powerful targeting features to display popups to the right people at just the right time in their customer journey.
You can trigger popups on a button click, as users exit your site, or based on how people engage with preview optin campaigns they’ve seen.
Added to that, there are eCommerce specific campaign triggers for online stores.
With OptinMonster, you can:
- Increase conversions and sales with stunning popup designs
- Recover abandoning visitors with powerful Exit-Intent® triggers
- Create OnSite Follow Up® and OnSite Retargeting® campaigns
- Integrate with email marketing campaigns
- A/B test campaigns to optimize results
- Track popup performance with built-in analytics
- Connect campaigns to Google Analytics with a few clicks
Not sure if this tool will work for you? Just check out how Kampanjjakt increased conversions by 800% with lightbox popups from OptinMonster.
To create your own popups, follow our guide: How to Create a Lightbox Popup Campaign.
Ready to create awesome popups for your site that can easily be tracked?
Step 2: View Built-in Popup Campaign Analytics
The best part about OptinMonster is that it tracks every campaign automatically. You don’t even have to turn on any settings.
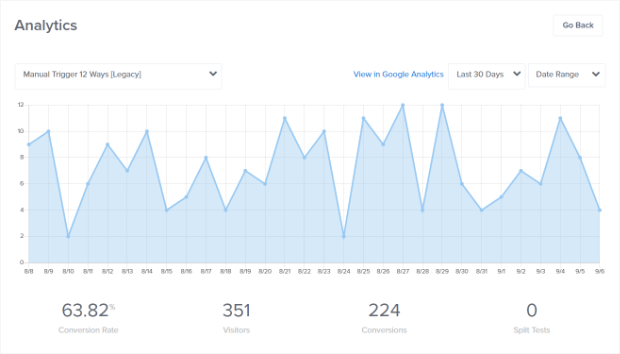
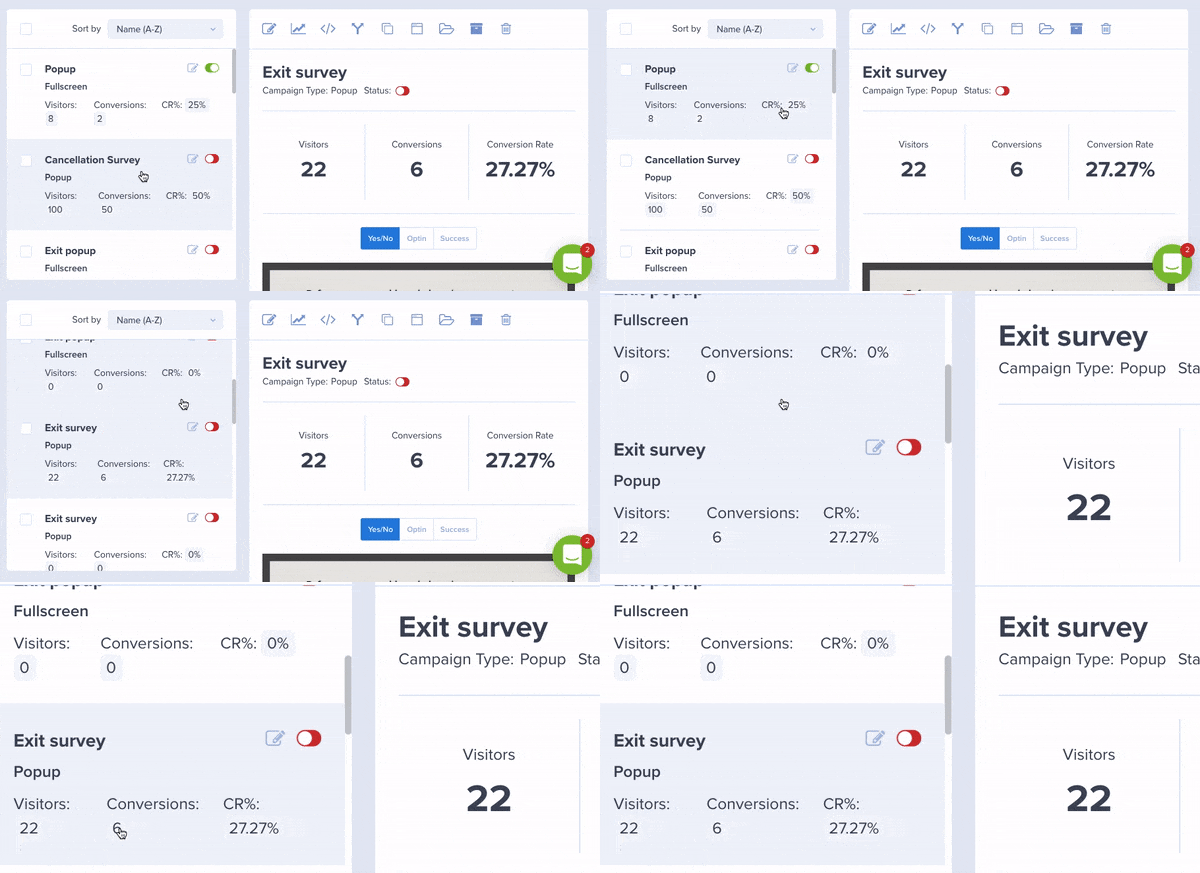
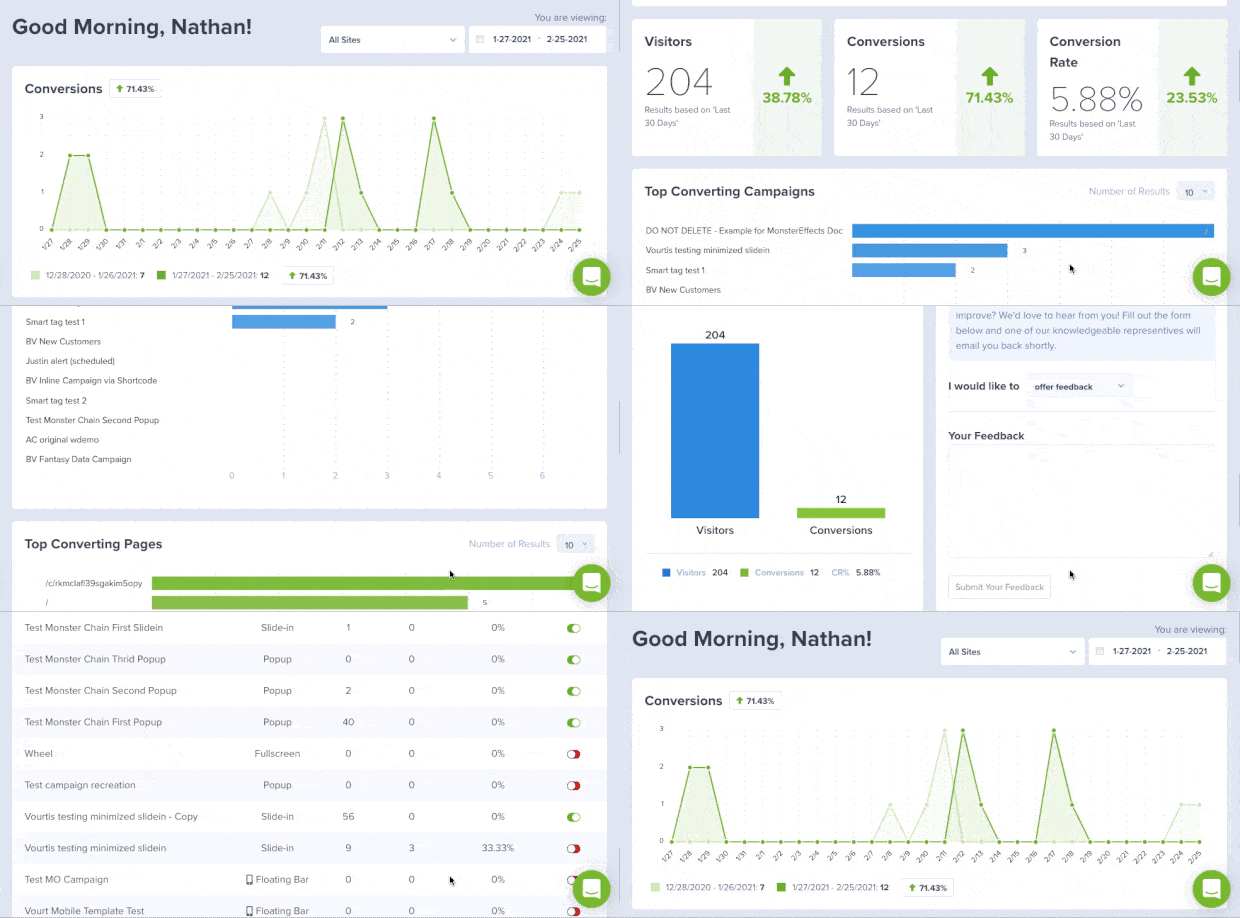
You can access your campaign data inside the OptinMonster dashboard. Under your campaign name, you’ll see the number of visitors, conversions, and conversion rate.
You can view this data for all campaigns in the list so you can see right away which campaigns are performing better than others.
To view more detailed data, click on the Analytics icon in a campaign.
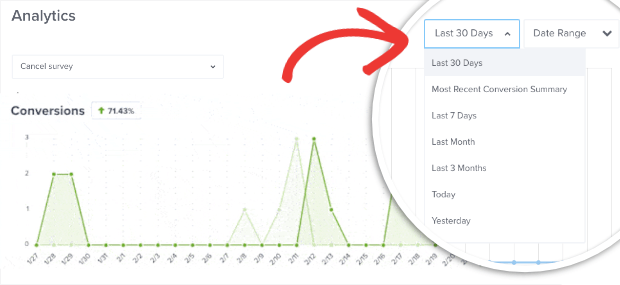
You’ll see a graph of conversions by date so you can see on what days your visitors converted the most. You can find out whether certain campaigns perform well on weekends or particular days of the week or perhaps on holidays.
You can filter the data by date range or choose to see data for today, yesterday, last week, or last month.
When you scroll down the page, you can see how many visitors viewed your campaigns and how many converted.
Added to that, you’ll also get data on:
- top converting campaigns
- top converting pages
- visitor vs. conversion bar graph
- latest campaigns
This data is more than enough in most cases and lets you quickly find out what’s working and where you need to improve.
Now if you own an online store, you may also want to see if your popups are driving sales revenue, transaction numbers, and average order value.
To access this data, you’ll want to connect your popups to Google Analytics so you can view your eCommerce tracking data.
Up next, we’ll show you how to connect OptinMonster to Google Analytics in just a few clicks.
Step 3: Set Up Google Analytics on Your Website
To track your popups in Google Analytics, you’ll first need to sign up for a Google Analytics account. If you already have one, skip to the next step.
You can follow the guided instructions to connect your website to it. For more detailed steps on setting up Google Analytics, follow this guide: Google Analytics 101: How to Track Your Conversions (Step-by-Step).
WordPress users can simplify the entire process using MonsterInsights:
MonsterInsights is the best Google Analytics plugin for WordPress. It gives you all the power of Google Analytics directly from your WordPress dashboard.
That means you’ll have quick access to key performance indicators (KPIs) such as:
- Sessions
- Bounce rates
- Time on page
- Conversion goals
- User device
- User country
- And so much more…
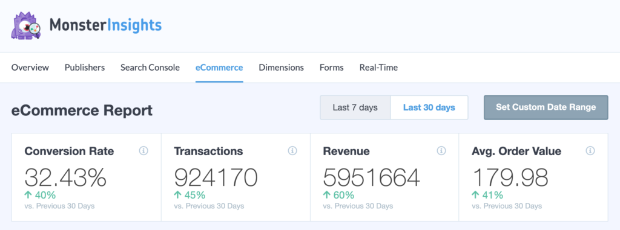
It even comes with eCommerce reports so you can track what channels are driving the most revenue:
But the best part is that MonsterInsights lets you connect your website to Google Analytics in just a few clicks.
Want to see it in action for yourself? Sign up for your risk-free MonsterInsights account today!
Now you’re ready to connect OptinMonster campaigns to Google Analytics to get deeper insights into your popups.
Step 4: Connect Your Popups to Google Analytics
You can connect every OptinMonster popup to Google Analytics. This means you can track individual campaigns.
Or you can make a sitewide connection for a specific domain. This way, every campaign you create for your domain will automatically be tracked in Google Analytics.
We’ll show you how to set up both options.
1. Connect OptinMonster Popup Campaigns to Google Analytics
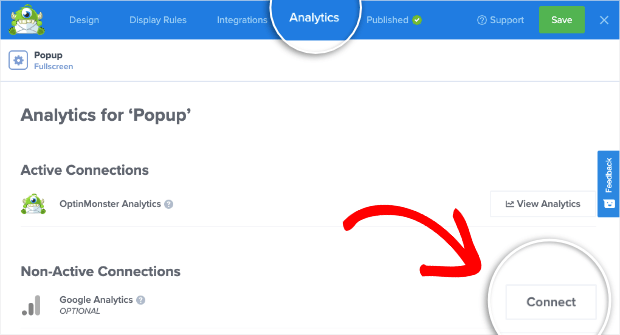
In the OptinMonster campaign builder, you’ll see an option in the top menu bar called ‘Analytics.’ Open this page to get an option to connect your account.
Click Connect:
Using the drop-down menu available, add a new connection.
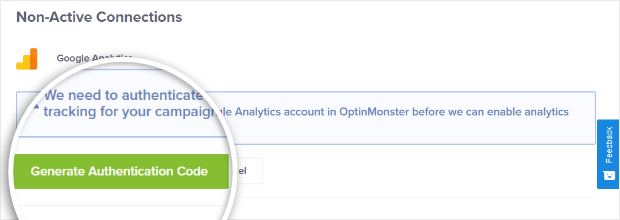
Then hit the green Generate Authentication Code button.
This will prompt you to select the Google account associated with your website’s Analytics account.
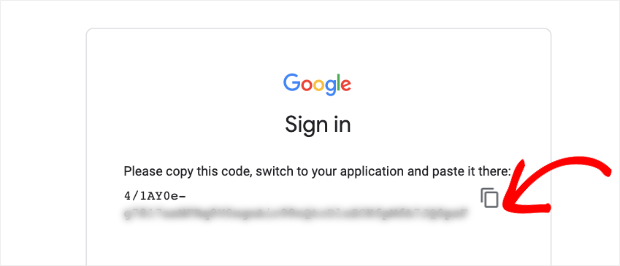
When you choose your Google account, an authentication code will appear.
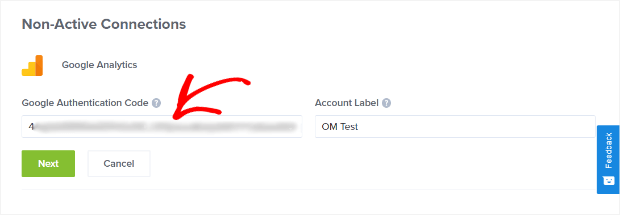
Simply copy this and head back to your OptinMonster tab. Then paste it under Google Authentification Code:
Next, you can add a unique label name so you can identify this Google Analytics integration later.
Complete the integration by clicking on the green ‘Next’ button.
Now you’ll need to select the Google Analytics profile you want from the Website Profile drop-down field. We recommend using the All Web Site Data profile in most instances:
And that’s it! Your popup is connected to Google Analytics. Be sure the domain here matches the domain your OptinMonster campaigns are set to appear on.
2. Link Domain in OptinMonster to Google Analytics
OptinMonster lets you set up a permanent Google Analytics connection for a domain.
This means any campaign you create for that domain will automatically be linked to your Google Analytics account. That way, you won’t have to integrate your campaigns with Google every single time.
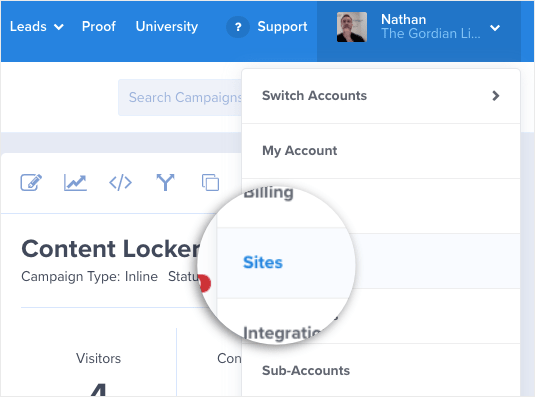
To set this up, on your OptinMonster dashboard, select your profile at the top right corner.
From the drop-down menu, click on Sites. Then click the ‘Edit’ button next to the domain you want to connect to Google Analytics.
Scroll down this page to find the Google Analytics row. You’ll see two drop-down menus to select your Google Analytics account and your website profile.
If you’ve already made a connection before, you can select the account here.
If you haven’t connected to Google Analytics yet, you can create a new connection here.
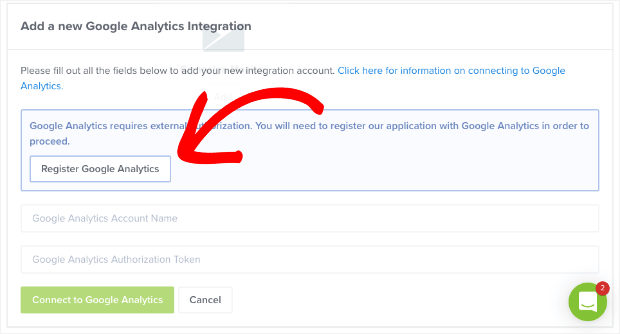
This will open the Integrations tab, where you’ll see a Register Google Analytics button:
You’ll need to select your Google account associated with Analytics. Then a code will be generated, which is your Google Analytics authorization token:
Copy this and switch to the OptinMonster tab to paste it here:
Next, add a name for this integration and click on the ‘Connect to Google Analytics’ button to store it.
After this is done, head back to the ‘Sites’ tab and edit your site.
Then, in the Google Analytics row, select the account you just added.
For a website profile, we recommend using All Website Data in most cases.
Finally, hit the ‘Save Changes’ button to store the sitewide connection.
Step 5: View Custom Popup Events in Google Analytics
To view eCommerce data for your popup campaigns, you’ll want to access your Google Analytics account. Make sure you log into the account you connected to earlier.
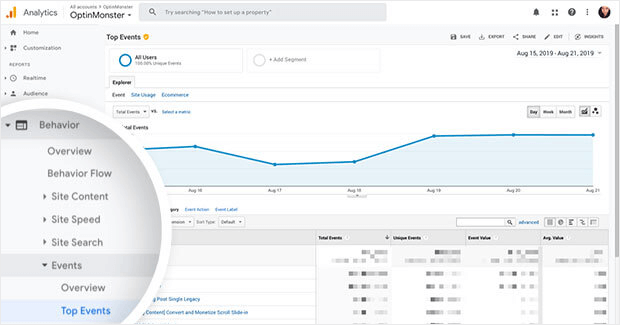
From the left taskbar, go to the Behavior » Events » Top Events tab.
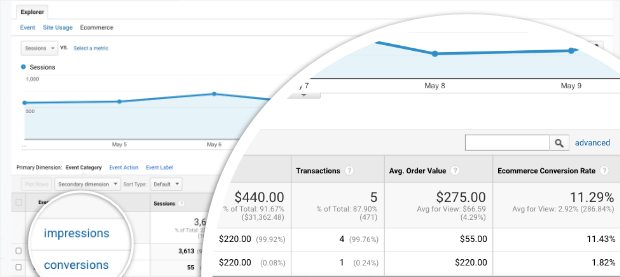
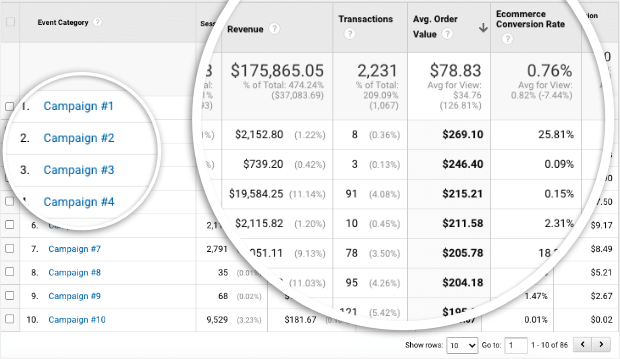
You’ll see a list of your site events including OptinMonster popups displayed by their name. The metrics here will show you total events, unique events, event value, and average value.
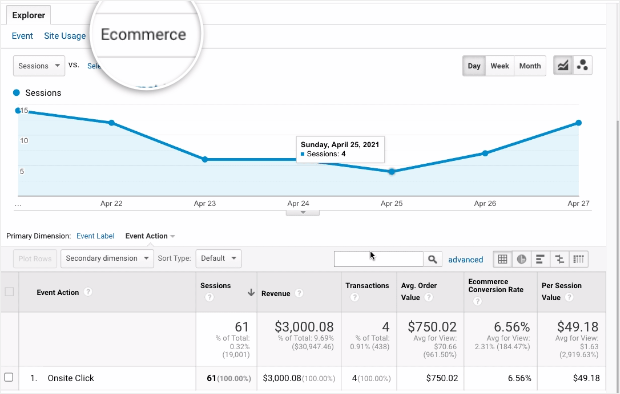
If you have eCommerce tracking enabled in Google Analytics, you can switch to the ECommerce tab.
This will give you more valuable eCommerce stats for your campaigns including:
- sessions
- revenue
- transactions
- average order value
- eCommerce conversion rate
- per session value
In case you don’t have eCommerce tracking set up, follow this guide to do it now: How to Enable Enhanced eCommerce Tracking in WooCommerce.
To help you understand this data, we’ll break down this report and explain it in simple terms so you can see exactly how your popups are helping your business.
1. View How Many People Saw Your Campaign
OptinMonster tracks how many people saw your popup campaign so you can see how popular it was and how well it performed.
From the list of campaigns you see in the Top Events page, select the popup campaign you wish to track.
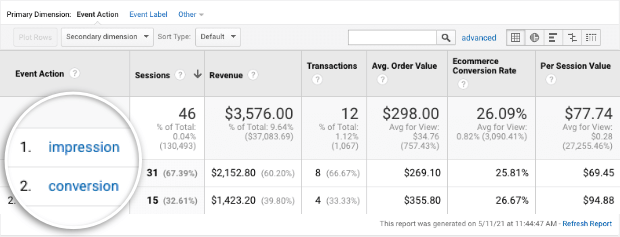
When you select the campaign name, OptinMonster shows you 2 metrics:
- Impression
- Conversion
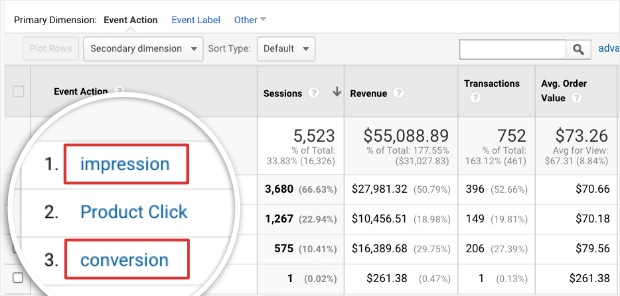
Impression shows you how many people saw your campaign. You can click on ‘Impression’ to see all the impression data for every Optinmonster campaign.
You can see how many times the Optinmonster popups were viewed. If there is revenue and transaction data here, it means the viewer closed the popup but still converted into a paying customer.
2. View How Many People Converted Through the Popup
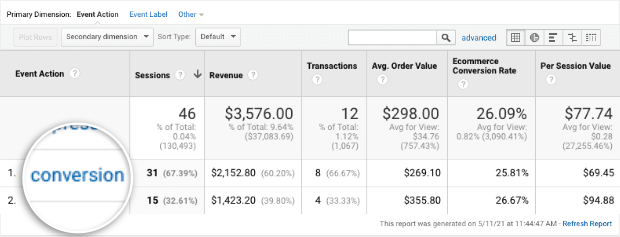
To view how many people engaged with the OptinMonster campaign and converted into paying customers, you can use the Conversion option.
In the report above, you can see that 4 people took action and converted through the popup. The popup generated a total revenue of $1423.20 which brought the eCommerce conversion rate to 26.67%.
So you can see that your popup is making money and the OptinMonster tool is worth the investment.
Next, just like Impressions, when you click on ‘Conversion’, you’ll see the conversion data for all OptinMonster campaigns in one place.
3. View Which Pages and Sources are Converting the Most
Now we’re going to show how to filter your data to see more helpful analytics.
For instance, you can see which page a visitor viewed first before they engaged with your popup and converted into customers. This data is super helpful in finding pages to focus on and add more marketing campaigns to and which pages to improve.
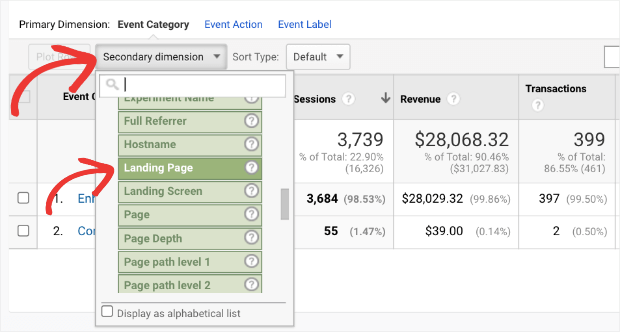
From the Secondary Dimension menu, select Behavior » Landing Page.
This will add an extra column to your report to show you which pages a customer landed on when they first came to your site.
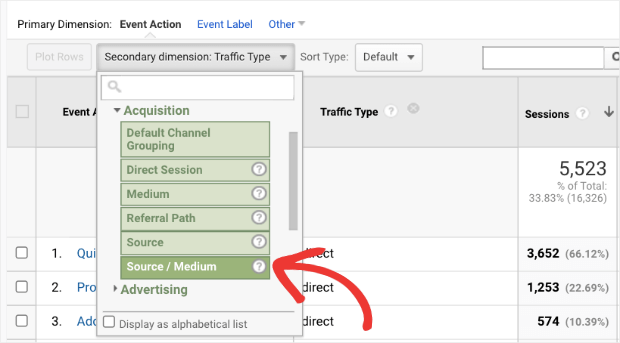
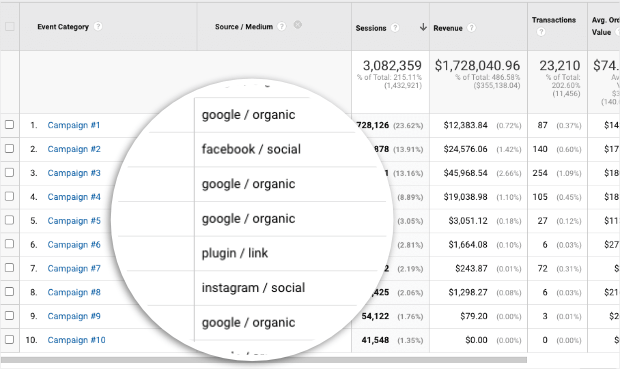
Next, to see where your customers are coming from, use the Secondary Dimension menu to select Acquisition » Source/Medium.
This will show you which channel brought in traffic and conversions.
So you can see if your organic search or paid ads are driving more conversions through your popup campaigns.
4. View All OptinMonster Campaigns in One Place
We’ve already shown you how to view all OptinMonster campaigns by clicking on the Impression and Conversion link inside a campaign. But there’s an easier way and it will save you a lot of time when you want to view your popup data.
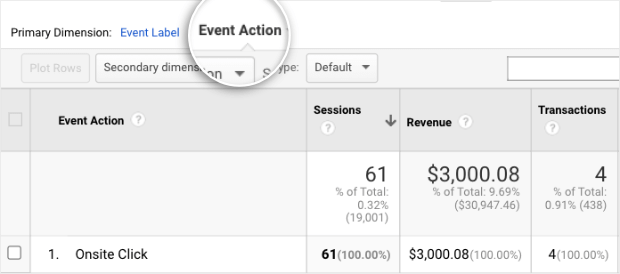
To filter out all other site events and view only OptinMonster campaigns, from the Primary Dimension menu, select the ‘Event Action’ tab.
In case you don’t see this option, you can use the drop-down menu available to select it.
Now we know OptinMonster has 2 metrics which are Impression and Conversion.
So you can click on either one, and you’ll see a list of the OptinMonster campaigns only.
This will give you an overview, and you can make comparisons to see which campaigns are performing better. You can save that report for your future use.
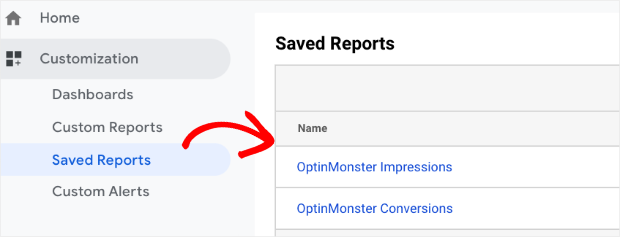
We suggest creating 2 reports, one for OptinMonster campaign impressions and one for conversions.
You can access the report under Customization » Saved Reports tab.
It will take you straight to the list of all OptinMonster campaigns where you can view the Impression or Conversion report without having to make a lot of clicks.
With that, you’ve learned how to track custom popup events in Google Analytics. You can easily track your popups’ views, conversions, and even see how much money the popups are actually making for you!
If you haven’t yet started creating awesome popups with OptinMonster, what are you waiting for?
We hope you liked this post. If you found it helpful, you may also want to check out:
- How to Get Actionable Insights with a Custom Google Analytics Dashboard
- Email Marketing Analytics: How Data Can Increase Your ROI
- Top 8 Best Google Analytics Plugins for WordPress (Expert Pick)
These posts will help you use analytics to get actionable insights to boost your revenue and growth.
Disclosure: Our content is reader-supported. This means if you click on some of our links, then we may earn a commission. We only recommend products that we believe will add value to our readers.
