
Do you want to learn how to create a landing page? What if you can do that under 10 minutes?
In the digital marketing world, landing pages are the unsung heroes, often determining the success of marketing strategies. They’re the first impression, the pitch, and the conversion point all rolled into one.
Did you know that a well-crafted landing page can increase your conversion rates by over 50%?
In this guide, I’ll walk you through the process of creating an effective landing page that captures attention and drives conversions.
Let’s dive in and learn how to create a landing page.
- What Is a Landing Page?
- Why Are Landing Pages Important?
- Landing Page Best Practices
- How To Create a Landing Page
- Landing Page Essentials: OptinMonster
What Is a Landing Page?
A landing page is a standalone web page created for an advertising or marketing campaign. It’s where a visitor “lands” after they click on a link in an email or ads from Google, Bing, YouTube, Facebook, Instagram, Twitter, or similar places on the web.
Unlike regular web pages, which typically have many goals and encourage exploration, such as the homepage, landing pages are designed with a single focus or purpose, known as a call to action (or CTA, for short).
Recommended Reading: What Are the Best Call to Action Button Colors? 3 Proven Ways to Increase Click-Through Rate
Let’s have a look at this landing page example. Mirasee’s landing page includes a call to action to register for a webinar:

When you click it, you get this registration form:

Successful landing pages increase your potential to make sales, by growing your subscriber numbers and helping to convert visitors into leads.
Why Are Landing Pages Important?
Landing pages can help in the following ways:
- Lead Generation: Landing pages are commonly used to generate leads by offering value, such as a free ebook, whitepaper, email newsletter or webinar, in exchange for the visitor’s contact information.
- Product Sales: Landing pages play a crucial role in product launches or sales promotions by providing a focused platform for showcasing the product’s features and benefits and prompting visitors to purchase.
- Event Registration: When promoting events like webinars, conferences, or workshops, landing pages can streamline the registration process and encourage sign-ups.
- A/B Testing: Marketers often use landing pages to conduct A/B testing, experimenting with different elements to optimize performance and increase conversion rates.
- Advertising Campaigns: Landing pages are frequently linked to online advertising campaigns, ensuring visitors who click on an ad are directed to a page tailored to the ad’s messaging, increasing the likelihood of conversion.
Considering the benefits of having landing pages above, it’s clear how important it is to have one and, more importantly, know how to create a landing page that converts.
Landing Page Best Practices
Here are some best practices to consider when creating a landing page:
- Clear and Concise Headline: Your headline should immediately grab the visitor’s attention and clearly explain the product or service. It’s often the first thing visitors see, so make it count.
- Compelling Subheadings: Use subheadings to break up text and provide additional details. They should support the main headline and guide visitors through the page.
- Strong Call-to-Action (CTA): Your CTA should be clear, compelling, and eye-catching. Use action-oriented language and make it stand out with contrasting colors or design elements. Ensure that it aligns with what you’re offering.
- Focused Content: Keep your landing page content focused on the page’s primary goal. Remove any unnecessary information or links that could distract the visitor from the CTA.
- Engaging Visuals: Use high-quality images or videos relevant to your product or service. Visuals can demonstrate the value of what you’re offering and keep visitors engaged.
- Social Proof: Include testimonials, reviews, or case studies to build trust and credibility. Seeing that others have had a positive experience can be a powerful motivator for visitors to take action.
- Simplicity in Design: A clean, uncluttered landing page design helps visitors focus on the content and CTA. Use whitespace effectively and keep the layout intuitive.
- Mobile Optimization: Ensure your landing page looks good and functions well on mobile devices. Most web traffic comes from mobile, crucial for reaching a wider audience.
- Fast Loading Time: Page load speed is critical. Slow loading times can lead to high bounce rates and poor user experience. Optimize images and scripts to ensure your page loads quickly.
- A/B Testing: Regularly test different elements of your landing page (like headlines, CTAs, images, and layout) to see what works best with your target audience. Use data and analytics to guide your decisions.
- Clear Value Proposition: Clearly articulate the benefits of your product or service. Explain how it solves a problem or improves the visitor’s situation.
- SEO Elements: Incorporate SEO best practices to improve the visibility of your landing page in search engines. Use relevant keywords, meta descriptions, and an SEO-friendly URL structure.
- Easy Navigation: Ensure that navigation is intuitive if your landing page is part of a larger website. However, for standalone landing pages, minimal navigation can help keep visitors focused on the CTA.
- Trust Signals: Display relevant certifications, awards, or security badges to reassure visitors that your site is trustworthy and your business is credible.
- Follow-Up Strategy: Plan what happens after a potential customer completes the CTA. Whether it’s a thank you page, email follow-up, or a download, ensure the process is smooth and continues the user’s journey.
Remember, the key to a good landing page is to keep testing and optimizing based on visitor feedback and performance metrics. What works for one audience or product might not work for another, so continuous improvement is essential.
Next, I’ll show you how to create high-converting landing pages.
How To Create a Landing Page in 6 Steps
To follow along in this tutorial, you’ll need a SeedProd account, the best way to create a landing page.
SeedProd is the best landing page builder for WordPress. It allows you to create beautiful landing pages easily using a drag-and-drop builder.
Plus, it has 200+ stunning landing page templates. As a result, you can create landing pages that convert without writing any code.
It’s quick and easy to create an account. You can get started on the SeedProd website and follow the prompts to download the plugin. The pricing starts at $39.50/year.
Here’s a quick guide for installing and activating a plugin.
The following step by step tutorial will teach you how to create a landing page in 10 minutes:
- Step 1: Choose Your Landing Page Type
- Step 2: Choose a Landing Page Template
- Step 3: Customize Your Landing Page
- Step 4: Connect Your Email Service Provider
- Step 5: Configure Your Landing Page Settings
- Step 6: Preview and Publish Your Landing Page
Step 1: Choose Your Landing Page Type
When you open the SeedProd dashboard, you’ll see options to create different types of landing pages for your site:
- Coming Soon Mode
- Maintenance Mode
- Login Mode
- 404 Page

Under this, there’s an Add New Landing Page option.
You simply need to click this button to start building your landing page.
Step 2: Choose a Landing Page Template
SeedProd comes with several stunning pre-built landing page templates. This means you don’t need to spend hours designing a landing page from scratch.

The landing page templates are divided into different categories:
- Coming Soon
- Maintenance Mode
- 404 Page
- Sales
- Webinar
- Lead Squeeze
- Thank You
- Login
For this step-by-step tutorial, we’ll go with the Ebook Squeeze Page template.
Hover over the template until a red tick appears. Then click on it to select the template.

Next, give your landing page a name.
Now, click Save and Start Editing the Page to enter the drag and drop builder.

Step 3: Customize Your Landing Page
In this step, you’ll design your landing page in SeedProd’s visual drag and drop page builder.

It’s quick and easy to customize your landing page in SeedProd.
Everything you see on the page, like the text and images, is divided into elements called Blocks and Sections.
To change anything on your page, simply click on the block.
Let’s try that with the text.
So, we’ll simply click on the text block. Then, we can make our changes directly on the landing page.

For more editing options, select the Advanced tab. It allows you to change the color and spacing.

You can also easily add any block to your landing page, like:
- Headlines
- Text
- List
- Button
- Image
- Video
Just click on the block and drag it onto your landing page. Like this, you can add CTA buttons, lists, images, and more.

In addition to these blocks, you can also use Advanced blocks. You’ll see options to add optin and contact forms, countdown timers, and icons.
These elements are specifically designed to increase lead generation. Again, just drag and drop the block you want to add to your landing page.

You can even add social media profiles and testimonials to serve as social proof.

SeedProd even comes with eCommerce blocks like product grids, and ‘add to cart’ and ‘checkout’ buttons.
Then, you can also choose from prebuilt layouts under the Sections tab.

From here, you can add:
- Headers
- FAQ
- Call to Action
And more.
To add a section to your landing page, hover over it and click the plus icon.

Then, the section will be added to your landing page.

SeedProd also lets you keep your landing page similar to the rest of your website.
Click on Global Settings. Then, you can see the color, font, and background image.

From here, you can customize the colors, fonts, and background to match your website.
Save your design as you work by clicking the Save icon at the top of the builder.
Step 4: Connect Your Email Service Provider
Growing your email list is simple with your SeedProd landing page. You can connect with your email service provider takes just a few minutes.
This lets you tap into marketing automation to trigger automatic emails to those that sign up.
Head over the top of the editor and click Connect.

Find your email service provider and click Connect. Then, follow the prompts.

Now, email addresses will be automatically added to your email service provider.
OptinMonster also lets you integrate with Google Analytics, Zapier, and Recaptcha to add more functionality to your page and track its performance.
Step 5: Configure Your Landing Page Settings
The next step is to configure your page settings.
Here you can edit SEO settings for search engines and customize your header.

Step 6: Preview and Publish Your Landing Page
Once you are ready, you can preview and publish your landing page.
At the top-right corner of the SeedProd builder, you’ll see options to preview your page or save it. There’s also a Mobile Preview option at the bottom of the taskbar on the left. This lets you see how it would look on mobile devices.
If you click on the arrow next to the ‘Save’ button, you’ll get a dropdown menu with the ‘Publish’ option.

You’ll get a notification when your landing page is published.

That’s it. You’ve successfully learned how to create a landing page in 10 minutes.
SeedProd is a great landing page builder for any business!
Its built-in marketing tools make it easy for marketers, small business owners, and eCommerce sites to get the most out of their landing pages.
Landing Page Essentials: OptinMonster
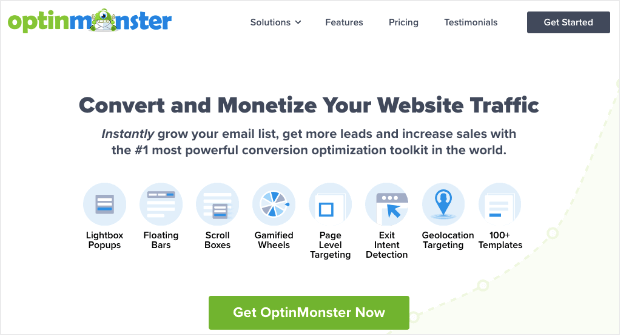
OptinMonster is the best lead generation tool. It lets you turn any web page into a lead generation machine.
It lets you easily design stunning pop-up campaigns in a drag and drop builder. So instead of creating separate landing pages, you can add this optin form to existing web pages where you would like it to appear.
OptinMonster is beginner-friendly and also has features like custom CSS for advanced users.
With OptinMonster, you’ll get access to:
- 100+ campaign templates that you can easily customize.
- Responsive designs so they look good on any device.
- Powerful targeting features to segment audiences and personalize campaigns based on the user’s activity, behavior, and interest on your site.
- Campaign triggers like on click, time spent on page, scroll depth, and more.
- Email integration with popular email marketing services and CRM like Constant Contact and Mailchimp.
- A/B testing and actionable insights
Check out How The Advisor Coach Increased Conversions 3X using inline forms among other campaign types from OptinMonster.
If you haven’t signed up for OptinMonster yet, you can get started right away with a 100% risk-free account:
I hope you found this article helpful in learning how to create a landing page. If you did, you might want to check out these resources on landing pages:
- 10 Expert Tips for Writing Landing Page Copy that Converts
- 34 Best Landing Page Creation Tools to Win You the Most Conversions
- Landing Page Optimization: 7 Best Practices and 5 Case Studies
- 10 Best Website Builders for Small Business
- Anatomy of the Perfect Optin Landing Page (Tips & Best Practices)
- Landing Page Ideas That Are Strikingly Simple (and Actually Work)
- 20 Easy Landing Page Design Tips to Boost Conversions
- How to Create & Optimize a Landing Page for AdWords
- How to Make & Optimize a Lead Generation Landing Page (WordPress)
Disclosure: Our content is reader-supported. This means if you click on some of our links, then we may earn a commission. We only recommend products that we believe will add value to our readers.
Thanks for reading this article – I hope you found it helpful.
I wanted to let you know about our powerful Exit Intent® technology that converts abandoning website visitors into email subscribers and customers. Typically 70% of the people who visit your website will leave and never return, meaning all those marketing efforts to reach them have gone to waste.
OptinMonster’s Exit Intent® technology detects user behavior and prompts them with a targeted campaign at the precise moment they are about to leave.
You can unlock this powerful technology 100% free when you purchase our OptinMonster Pro plan.
Get started with OptinMonster today and see why 1,000,000+ choose OptinMonster to get more subscribers and customers.
Thomas Griffin
President of OptinMonster
Thank you for the detailed article!