
To build a powerful content engine, you need to use content hubs as the backbone of your system. They help you sort and organize each piece of owned or third-party content and find it exactly when you need it, both for your internal and external audiences.
We’ve covered exactly how you can do this in part 1. If you’re wondering how to find the best content for these content hubs—your Scoop.it topics—that’s what we’re focusing on in this guide.
You’ll learn how to keep your content hubs consistently updated, organized, and packed with relevant content.
Before you dive in, define your content hierarchy
Before you start building out your content hubs, take some time to first define how you want to organize your content on paper. Without that, you may end up going in several different directions and have overlapping, unclear structures.
Without structure, you’ll spend more time cleaning up your content hubs instead of saving time.
There’s no one-size-fits-all when it comes to content hub structures, but here’s a sample framework to get you started:
- Broad categories as high-level overview. In Scoop.it, these would be topic groups, or larger categories that group together similar topics.
- Core topics. These are the center of your content curation strategy. In Scoop.it, they’re simply called topics, and each topic page represents one content hub.
- Detailed segmentation. This is your way to refine and label each piece of content, such as by format or subtopics. In Scoop.it, this is best done with tags.
Let’s take the example of a marketing software company. For them, broad categories might be content marketing, social media, project management, and email marketing. Then, the content marketing category can be divided into content writing, content editing, creativity, and content strategy hubs or topics.
Take some time to establish your content hierarchy. When you’re done, jump into the next sections.
The powerful content editor
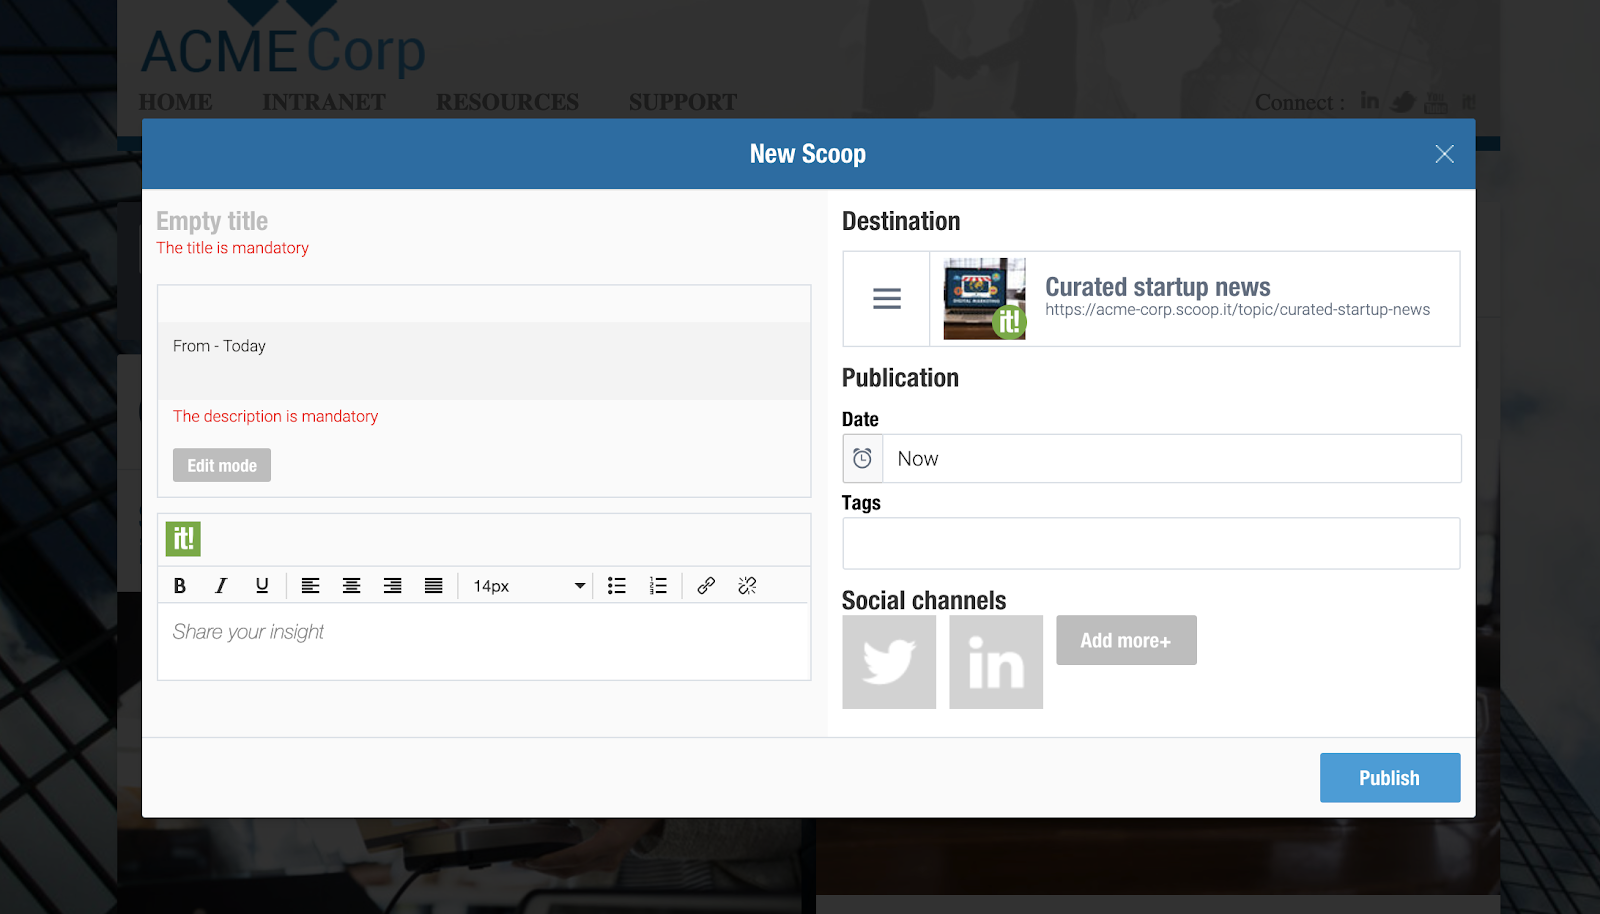
Every piece of content you add to your Scoop.it topics will populate this modal:
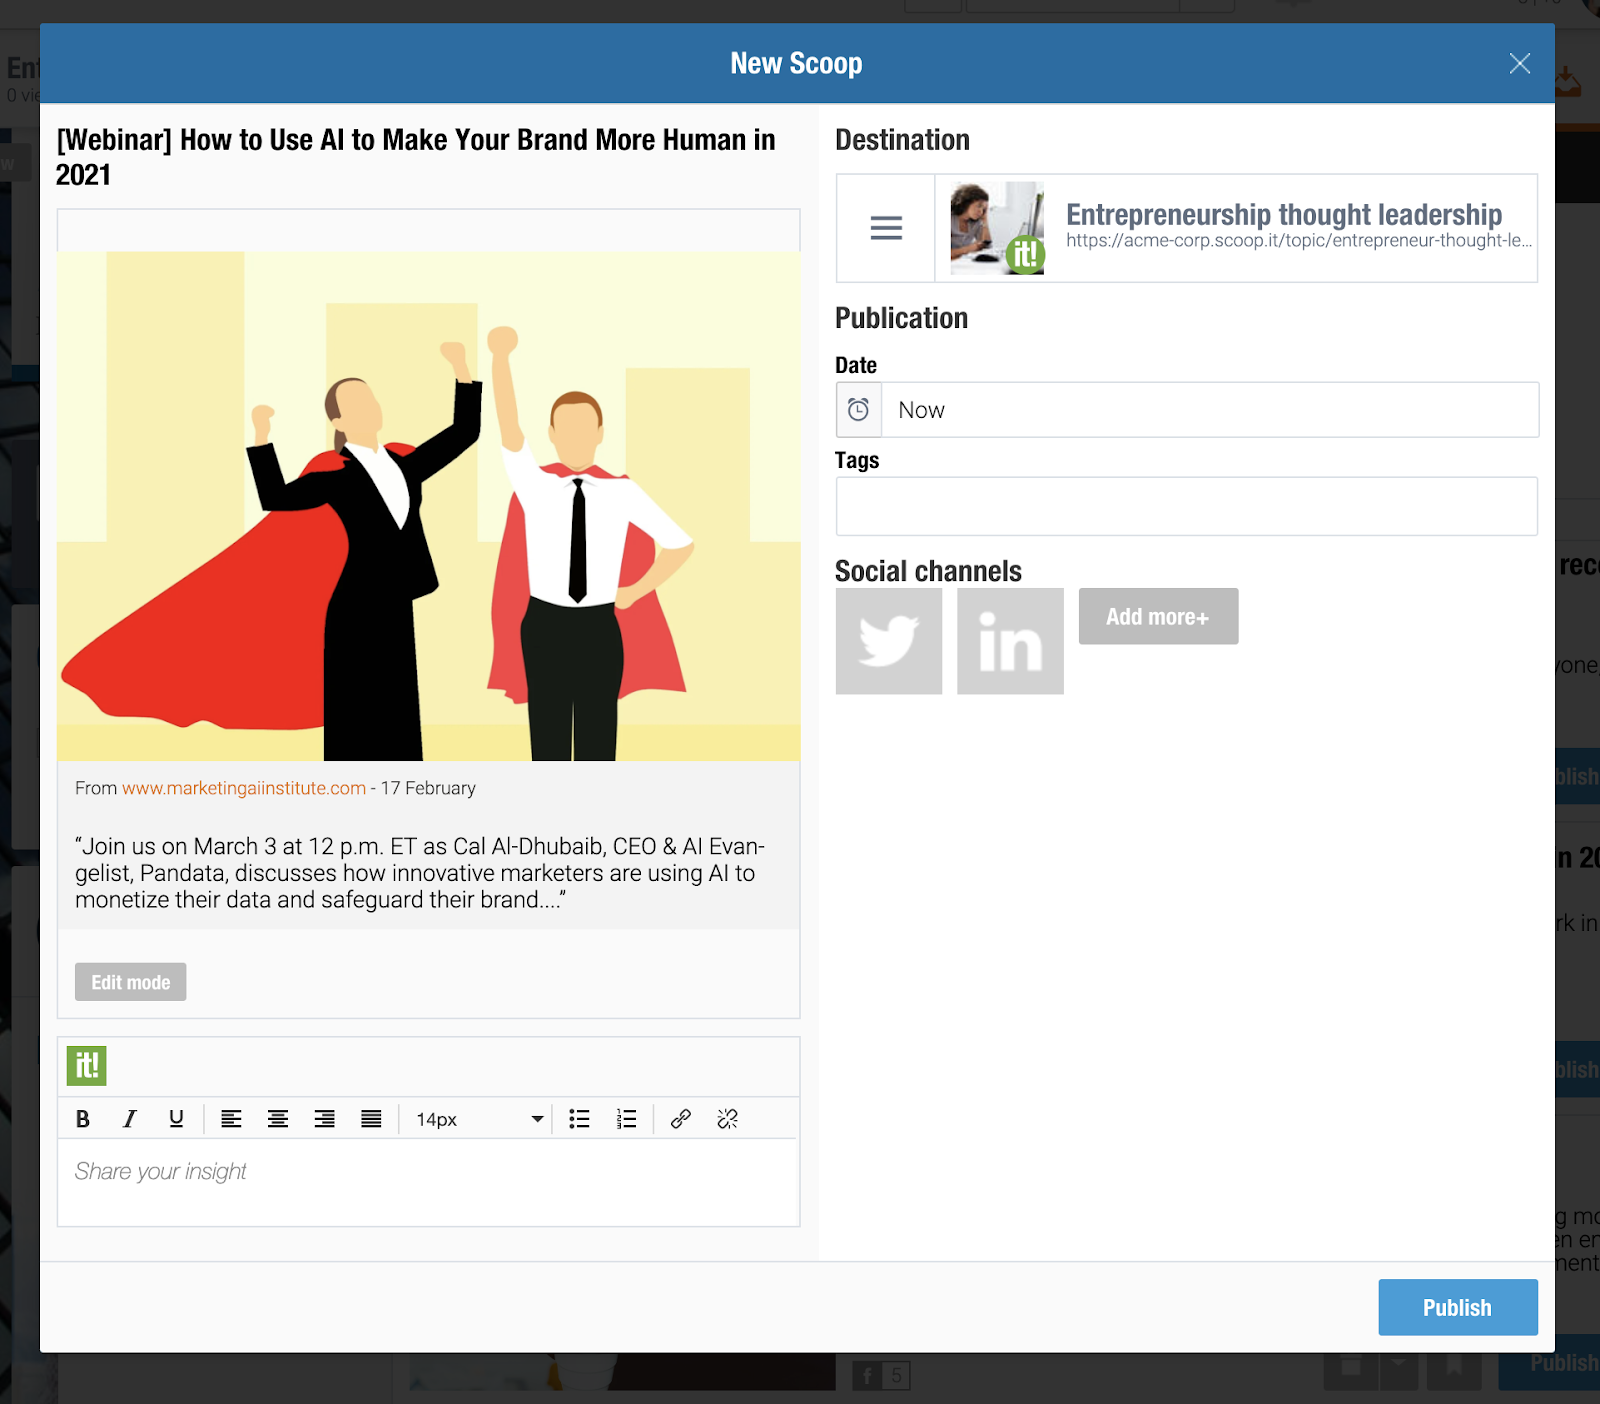
This window enables you to:
Edit the title and description of this piece of content. When you click ‘Edit mode’, you can rewrite the title and the description, as well as reformat the description, add links, bullet points, emphasize certain points, and more.
Enrich your curated content with insights. Have something to say about what you’re sharing? Do you agree, disagree, or have additional information that will make it more valuable? Use the ‘Share your insight’ field to do so.
Select the topic you’re curating to. The three-line menu icon below Destination lets you select the topic you want to add this piece to.
Schedule for later. If you’re curating a lot of content all at once, you may want to stagger it throughout the week. The clock icon signifies the option to schedule your content for a later date and time.
Tag your content. Tagging allows you to make your content searchable and easy to navigate.
Share on your social channels. Click on Add more+ to connect any social channels you want: Twitter, LinkedIn, Facebook Page, LinkedIn Company Page, Buffer, Pinterest, Yammer, or Tumblr. Each time you scoop a piece of content, you can tick the ones you want to share on.
Best ways to add third-party content to your content hubs
Here are four easy ways to surface the best content on any topic that matters to you and add it to your content hubs quickly and efficiently using the ‘Publish’ button in all of them.
1. My research content
You can set up customized searches for any topics, questions, and formats that are currently relevant to you. You can also save these searches if they’re always relevant rather than seasonal.
Here’s an example. Let’s say your target audience uses HubSpot’s sales and marketing platform, and you want to find content about HubSpot that didn’t come from HubSpot.
In this search engine, you can set this up by excluding HubSpot’s domain. Here’s what that looks like and the results you’d get:

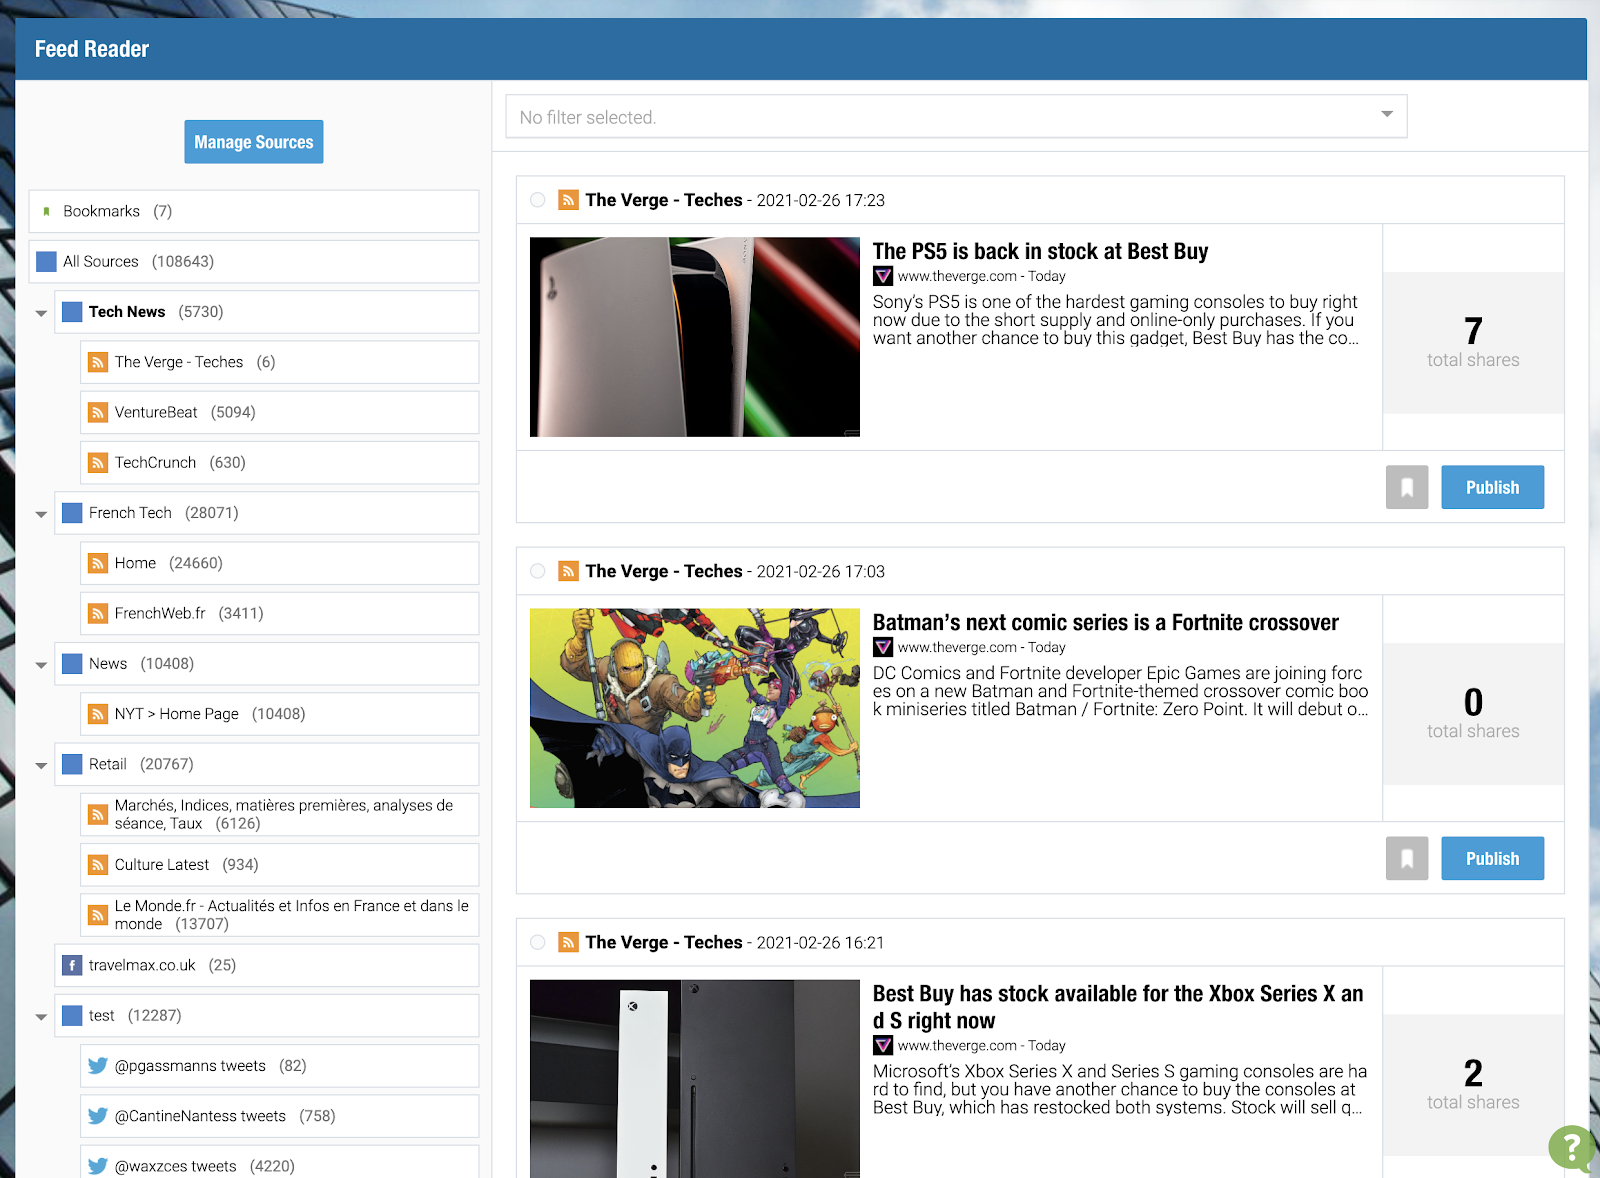
2. Feed reader
Another great way to surface excellent content is by using the feed reader. This is a Scoop.it feature that lets you set up your own customized feed of content. You can add:
- RSS feeds
- Tweets from a Twitter user
- Tweets from a Twitter list
- Videos from a YouTube channel
You can even group these sources into groupings. For example, you may have a group of sources like company executives, news outlets, leading industry blogs… Your options are endless.
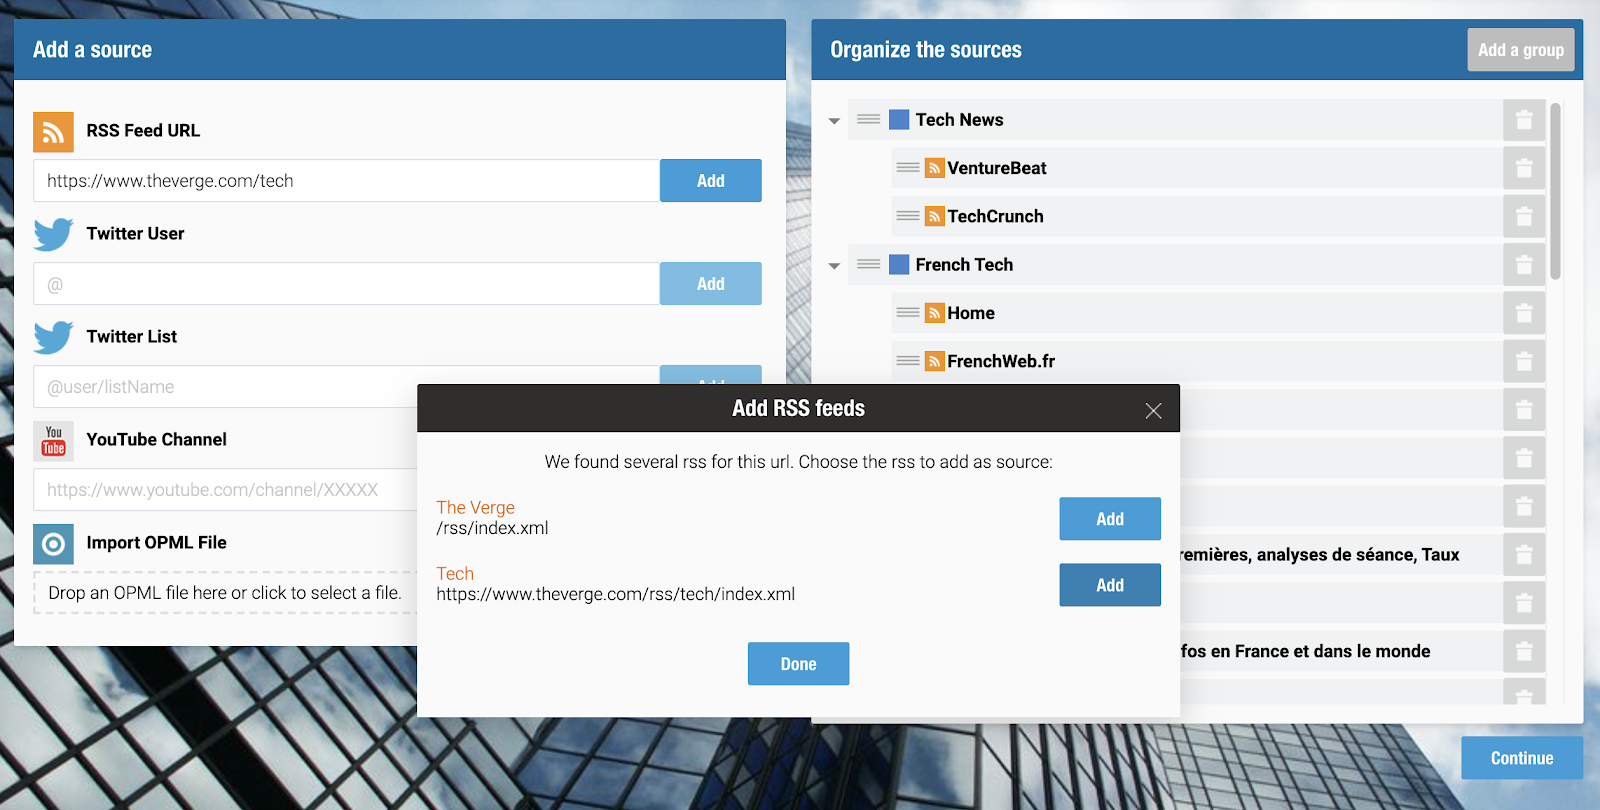
You can even add specific sections from a news site so you only get news on a specific topic int your feed (e.g. tech news rather than all news). Just paste a link into the RSS feed URL section and you’ll get a chance to choose the best feed URL:
3. Suggestions inside your topic
If you want a simple, but powerful suggestion engine right inside your Scoop.it topic, this is the feature for you.
When you open your topic, you can click ‘Suggestions’ at the top right corner. This will surface content recommendations based on any keywords you enter and additional filters on the side.
Filters include:
- Maximum age of suggested content
- Keyword in title or URL only
- Sorting filter (by relevance, freshness, or popularity)
- Content type/format
Here’s a quick demo:
4. Scoop.it Bookmarklet
If you want to curate content you come across as you browse the web, the Scoop.it Bookmarklet will make it easy.
Simply add it to your browser by bookmarking this URL and then replace the bookmarked URL with the code you’ll find on the page:
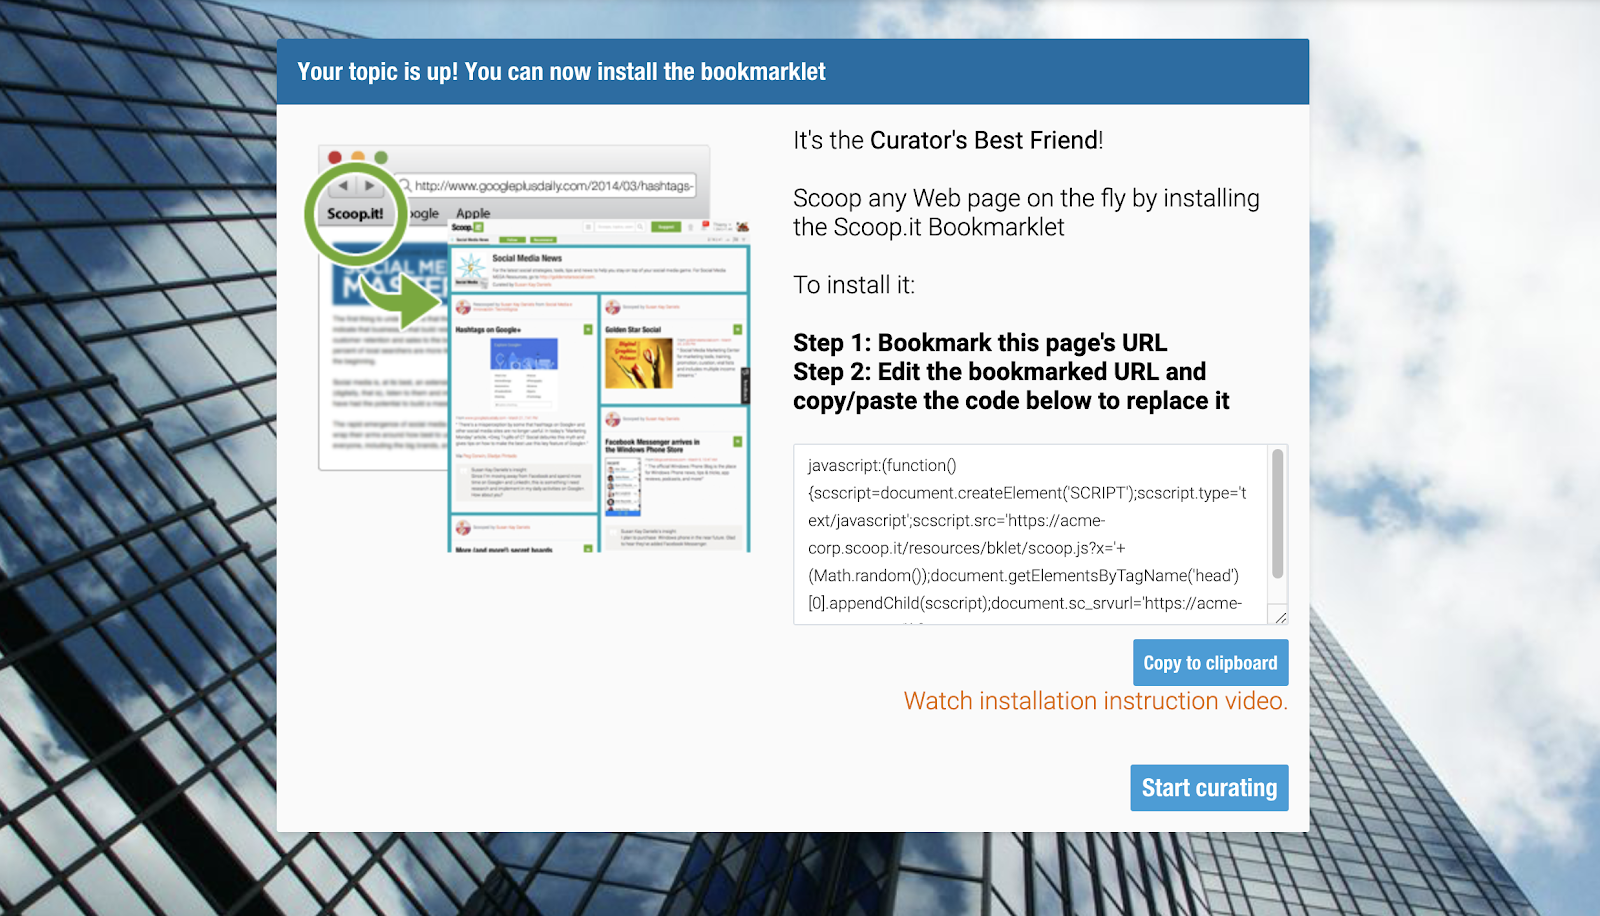
Then, whenever you find yourself with a piece of content you want to add to a content hub, you simply click the bookmark. You’ll then be able to add your insights, tags, and categories and add the piece to your Scoop.it.
The content you bookmark this way can include everything from articles and thought leadership through to newsletters, internal content and emails, and social media posts.
Add your own resources to your content hubs
You can use all of the above methods to add your own public content to your content hubs. But you can do something else: add private content, like documents, images, videos, and presentations that aren’t publicly available through an online link.
These options are available at the top of your topic pages:
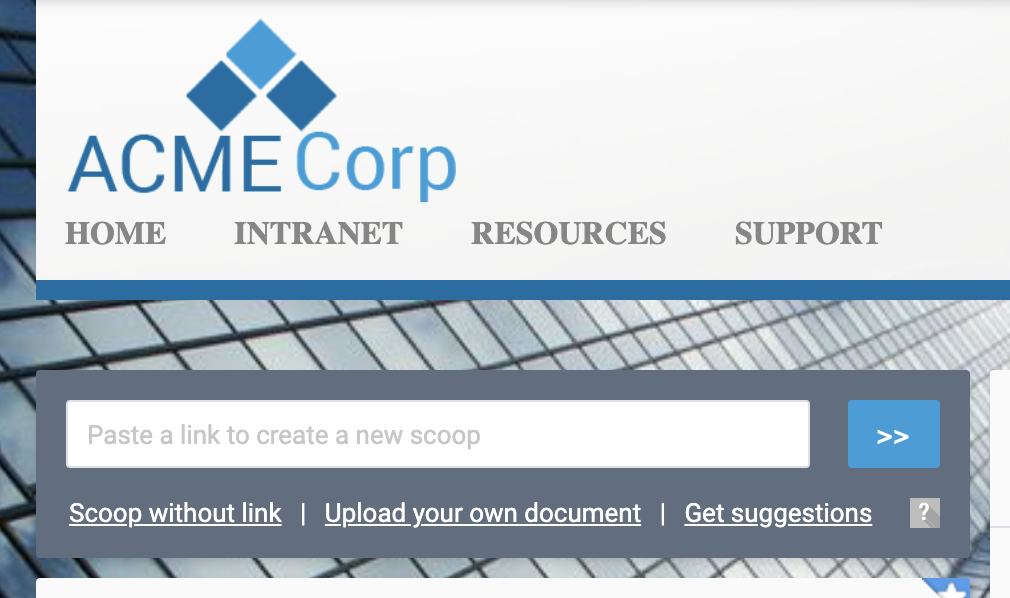
1. Scoop without link
The ‘Scoop without link’ option will populate a modal you’ve already seen. Use it to add any textual information you want to add to your content hub. Add a title, description, insights, time of publication, and tags if relevant.
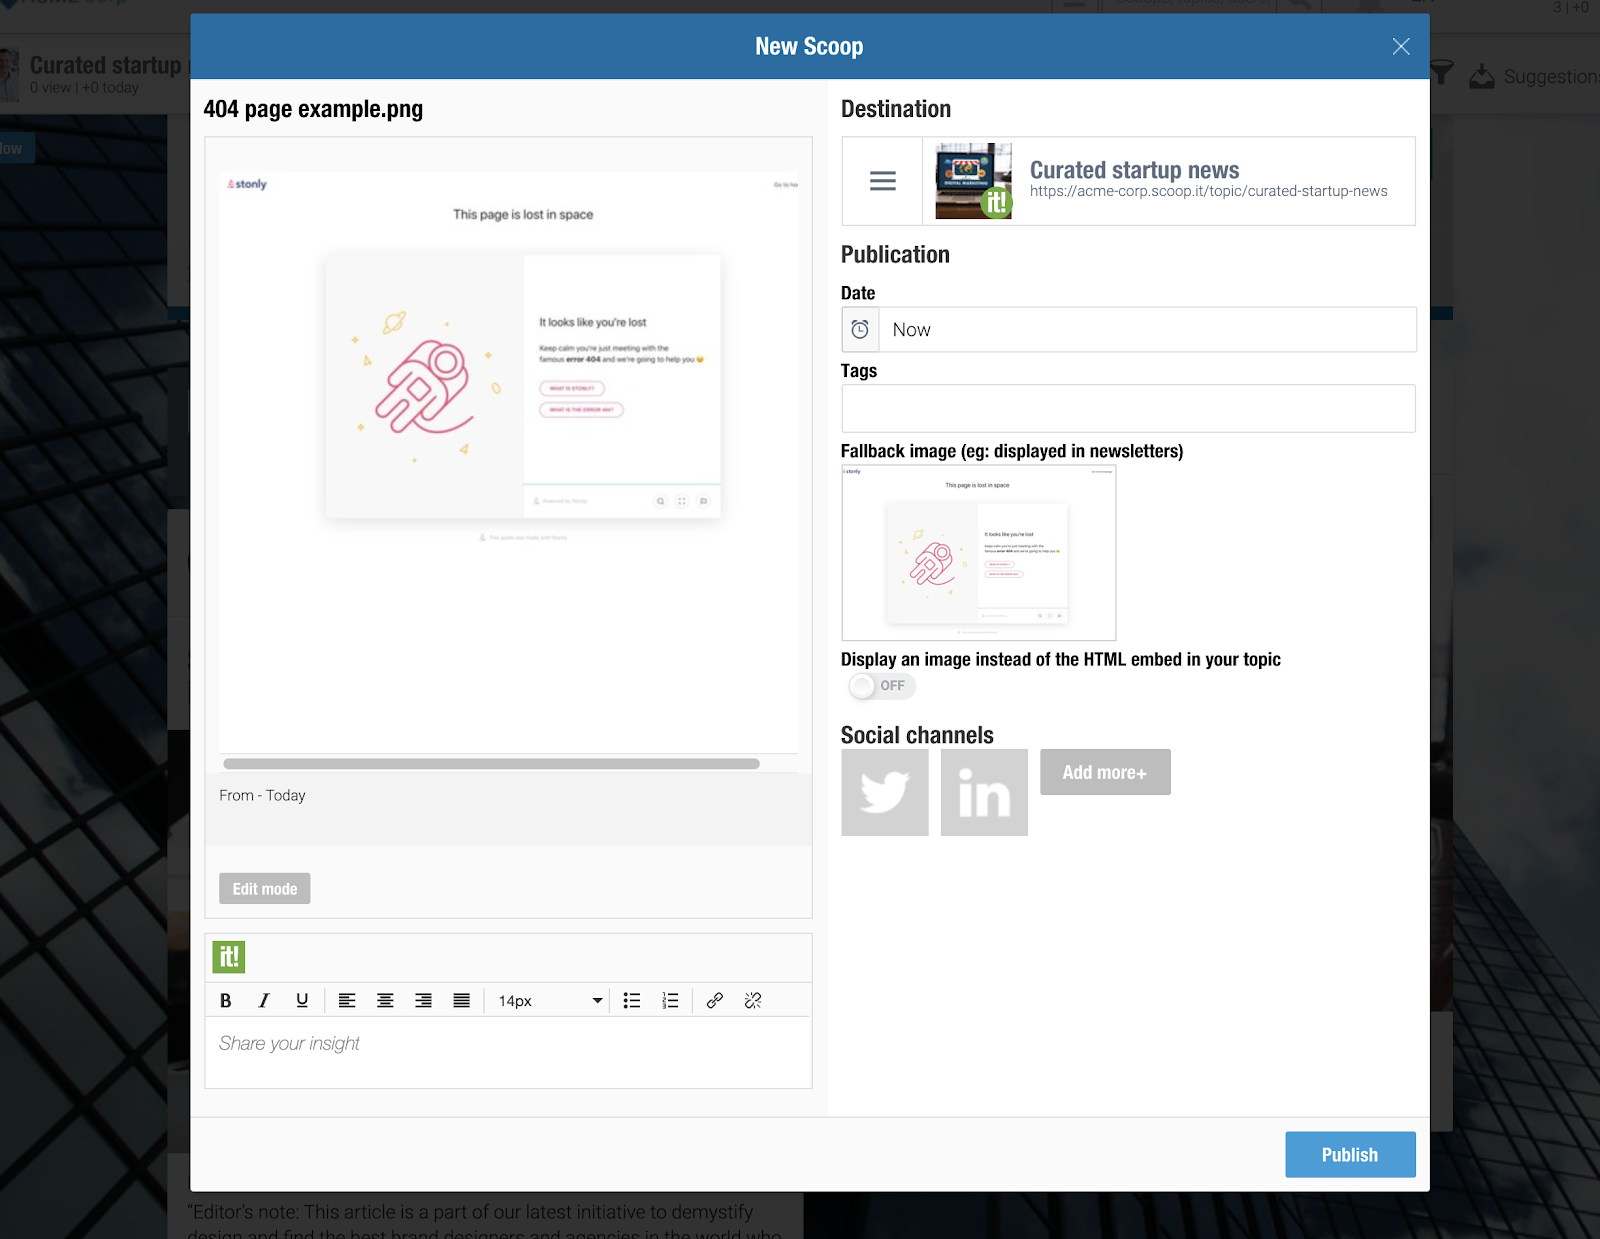
2. Upload your own document
When you upload your own document, such as an image, you’ll go through a similar process of editing it and preparing it for your content hub.
In this example, we have an example of a 404 page. You can change the title and make all the usual updates. You can also change the fallback image if you want to have an alternative option for thumbnails in newsletters and similar scenarios.
It’s time to organize and curate the best content
If you followed along, the only thing that’s left to do is start clicking ‘Publish’ on all the pieces of content you’ve found.
Need a refresher on content hubs? Check part 1 again. Jump to part 3 for all the distribution steps you need to get this content in front of the right people.
Want to try this process out? Get your Scoop.it demo today.


 (1 votes, average: 1.00 out of 5)