Are you using Wix to run your website, and you’d like to add a lightbox popup to get new leads and boost sales?
If you’re new to creating websites and need a simple solution, Wix is an excellent option. But as you get more serious about growing your leads, you may want to invest in more advanced tools to use with your Wix site.
That’s why, in today’s post, we’re excited to show you how to create a Wix lightbox popup that’s easy to make and highly effective.
Before we start, though, let’s take a closer look at Wix and why you’d want to add a lightbox popup to your site in the first place.
Why You Need a Wix Lightbox Popup
Over that past few years, Wix has become an increasingly popular website builder. It’s easy to use, intuitive, and allows people with limited tech skills to create stunning websites in a matter of minutes.
But if you’re using Wix for your online business, you’ll still need all the classic marketing tools–a lightbox popup included.
Lightbox popups can be an excellent way to:
- Greet new customers
- Redirect traffic to popular pages (to boost page views)
- Increase sales with product suggestions
- Reduce shopping cart abandonment
- Grow your email list
And more.
Now, you’re probably wondering, “Doesn’t Wix have ready-to-use lightbox popups? Why wouldn’t I just use those?”
In short, yes. Wix does have lightbox popups that you can use natively with the platform. But that doesn’t make it the best tool for the job.
The fact is that the native popups Wix offers are limited in terms of their functionality. Many targeting rules that make the difference between an annoying popup and an engaging one simply aren’t offered.
What you need is a Wix lightbox popup that has advanced features but is still just as easy to create, display, and track.
That’s where OptinMonster comes on the scene:
OptinMonster is the world’s #1 lead generation software. Our campaigns are just as easy to modify and install as the choices offered on Wix, but with one crucial difference: we have more campaign types, templates, integrations, and targeting rules that you can use to get more leads and grow your business.
These are important aspects to consider when adding a popup to your Wix site. That’s because your popup’s conversion rate will largely depend on how personalized the campaign is for the users’ experience (UX).
Showing a generic popup to your entire audience can alienate large segments of your site’s traffic. But with OptinMonster, you can show the right message to the right people at just the right time in their customer journey.
Oh, and there’s zero coding or tech skills required. That means you can have stunning lightbox popups on your Wix site in a matter of minutes.
Here’s the popup we’ll build in today’s tutorial:
This simple popup took less than 3 minutes to create and embeds easily onto a Wix site.
Want to learn more about how we work? Check out this helpful resource: Is OptinMonster Worth It? An Extensive Review.
Ready to get started? Let’s dive into the tutorial.
How to Make a Wix Lightbox Popup
Step 1: Choose Your Campaign Type and Template
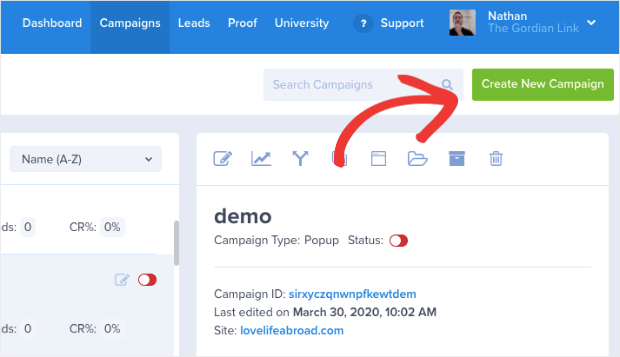
Once you’ve signed up for your risk-free OptinMonster account, you’ll be in your dashboard. Click Create New Campaign in the upper right-hand corner of the screen:
Then, you’ll need to select your campaign type. We have many different options to choose from, all of which will work great on your Wix site, but for today we’ll go with a Popup:
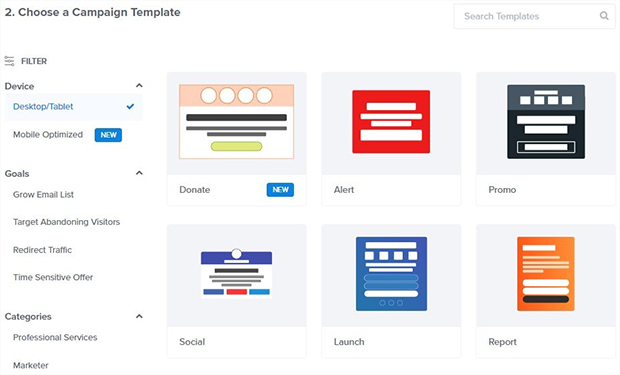
Now you’ll select your template:
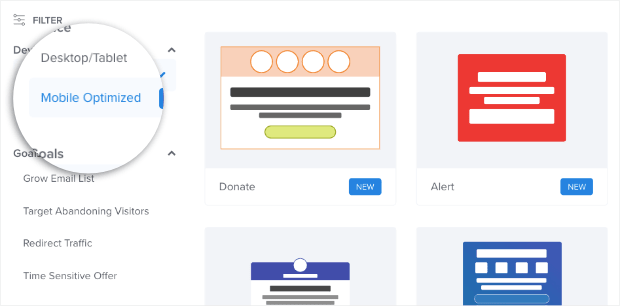
We have over 50 pre-built templates that look great across all devices. You can even filter your template options to create a mobile-optimized lightbox popup if you know that most of your visitors come from their smartphone:
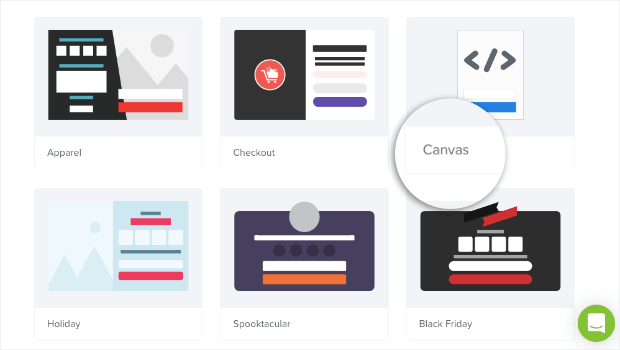
And if you’d prefer to build a template from scratch, that’s no problem. Simply use our Canvas template:
This lets you create a custom Wix lightbox popup that’s 100% unique to your brand. That said, you can still design this blank template in a matter of minutes with zero coding skills required.
Today, we’ll choose the Basic template:
This is an excellent option for people who are just starting out designing popups to capture leads. It’s minimalistic in design but leaves plenty of room for compelling and persuasive copy.
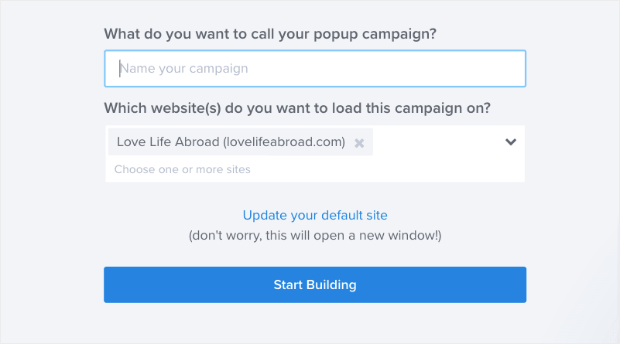
Then you’ll be prompted to name your campaign, choose the website you want to use it for, and click Start Building:
Once you’ve done that, you’re ready to start designing your campaign.
Step 2: Design Your Wix Lightbox Popup
As we mentioned, one of the benefits of Wix’s site-building platform is that it’s so user-friendly. Their editor is intuitive and doesn’t require a lot of tech skills to get started.
OptinMonster falls in that same boat.
You can easily modify any of your templates with OptinMonster’s campaign editor. We won’t be able to get into all of your customization options today. Frankly, there would be too much to cover for one post.
But there are a few things you need to know to create a stunning popup for your Wix site.
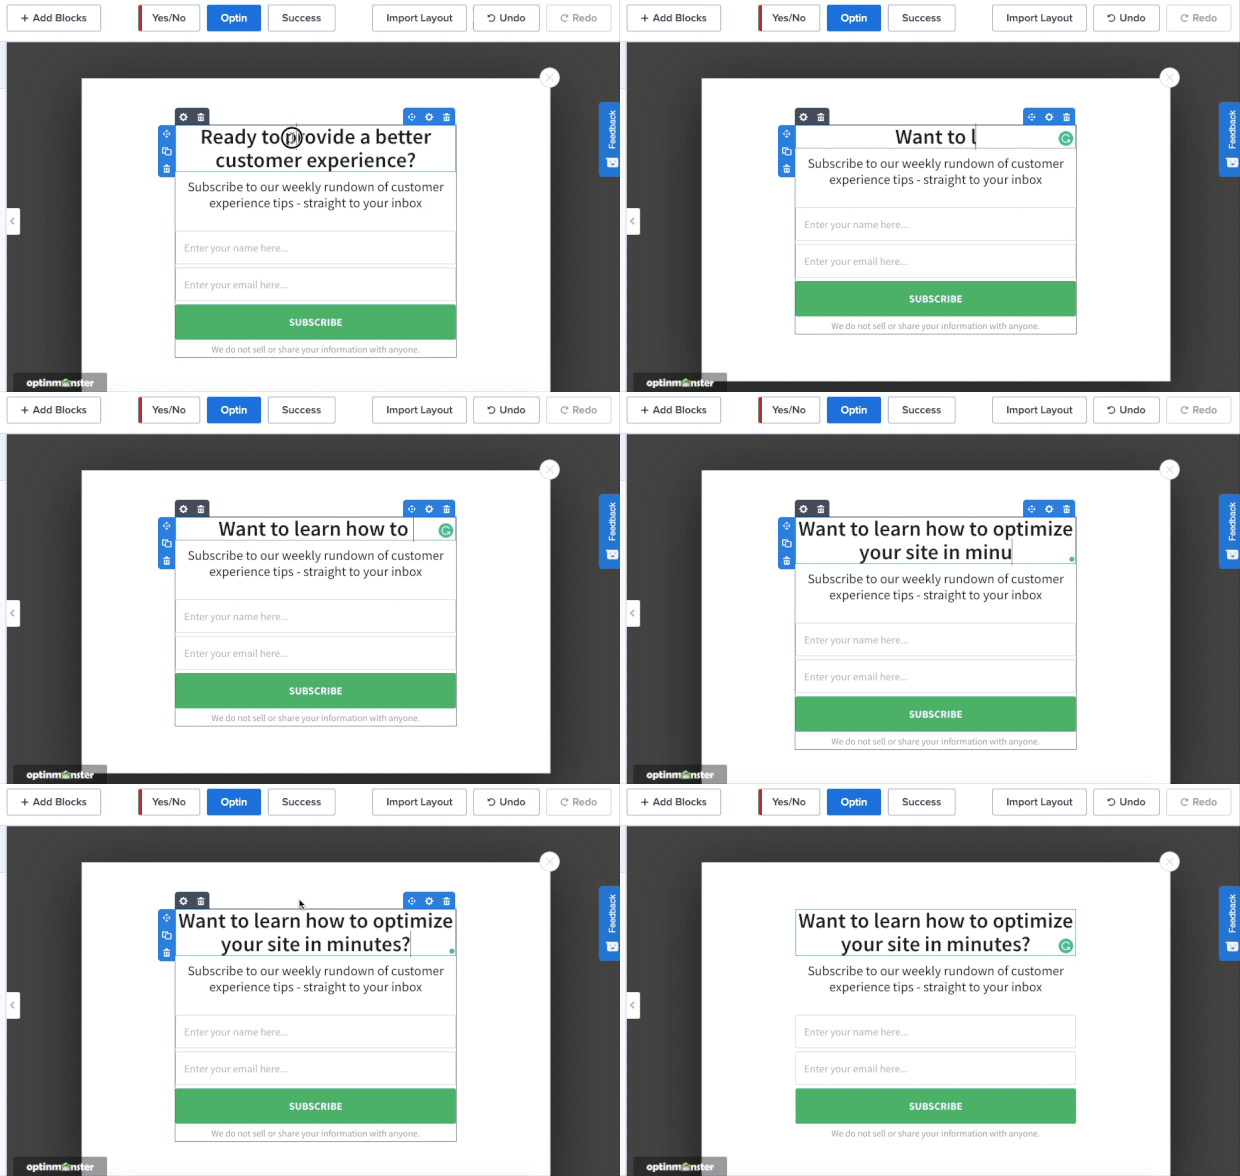
First, you can use our inline editor to make changes directly to the text in your campaign:
This lets you change the font, style, color, line-height, and much more. With our inline text editor, you can customize your popup’s message to effectively speak to your audience.
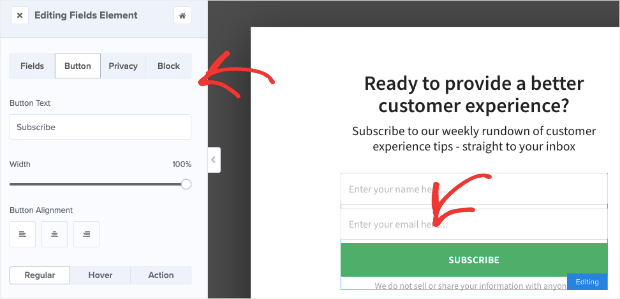
Next, you can change any other aspect of your campaign by clicking on it in the editor. Then, the editing tools will appear on the left-hand side.
With this template, for example, we may want to change parts of the optin form that asks for the user’s email address. To do so, we’d simply click on what we want to change and see the tools appear on the left:
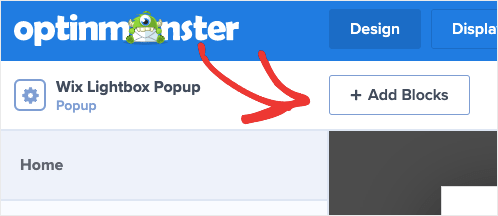
If you want to add something new to your campaign, that’s no problem at all. Simply click + Add Block at the top of your editor menu:
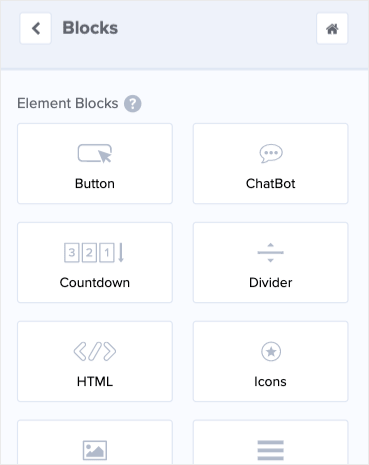
On your left-hand side, you’ll see a menu with the block options you can add, such as:
- Button
- ChatBot
- Countdown timer
- Divider
- And more
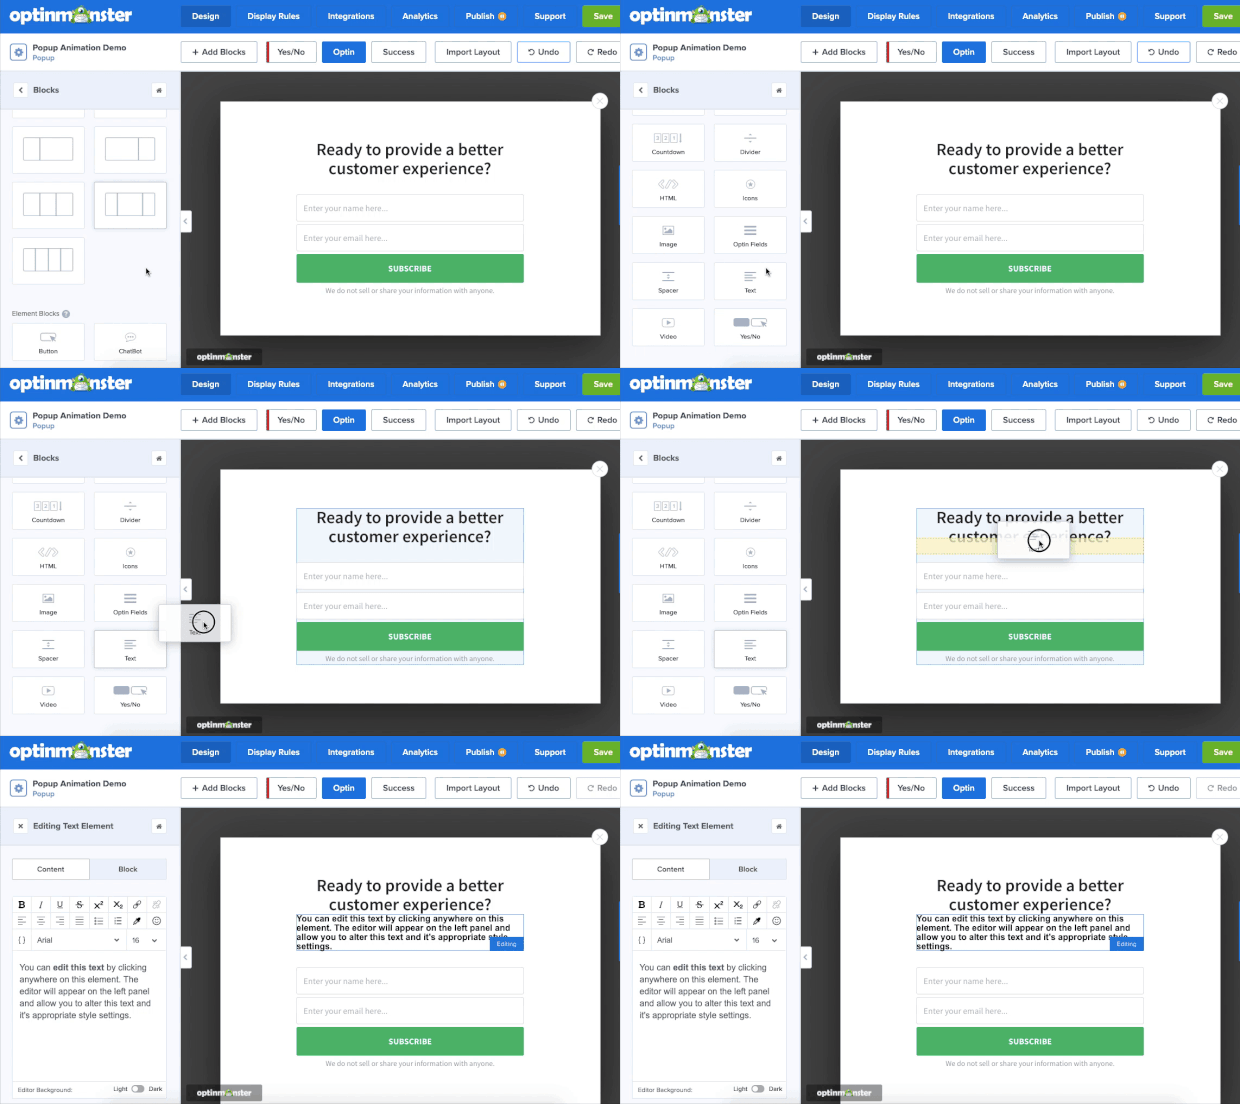
When you’ve found the block that you want to add to your Wix lightbox popup, drag and drop it into place:
Then you can modify your new block in the menu on the left-hand side.
Again, modifying your Wix popup is incredibly easy with OptinMonster. Here’s the popup we built for today’s tutorial:
This only took us a few minutes to set up and will look great on any Wix site.
Once you’ve designed the perfect campaign for your brand, voice, and message, it’s time to set your display rules.
Step 3: Set Your Display Rules
Like we said earlier, one of the biggest advantages of using OptinMonster for your popups are the display rules.
We give you tons of options to personalized your campaigns to get the right message to the right people at just the right time in their customer journey.
We do this in two ways: targets and triggers.
Targets use your visitor’s profile or characteristics to determine if the campaign should appear. That would be like where the user is located, what device they’re using, or what content they’re currently browsing.
Triggers, on the other hand, rely on a user’s behavior to determine if a campaign should appear. That would be things like when a user is leaving their browser page (Exit-Intent® Technology), how far down they scroll through the content, or clicking on a specific button or link (MonsterLinks™).
To set your targeting or trigger rules, click on Display Rules at the top of your editor menu:
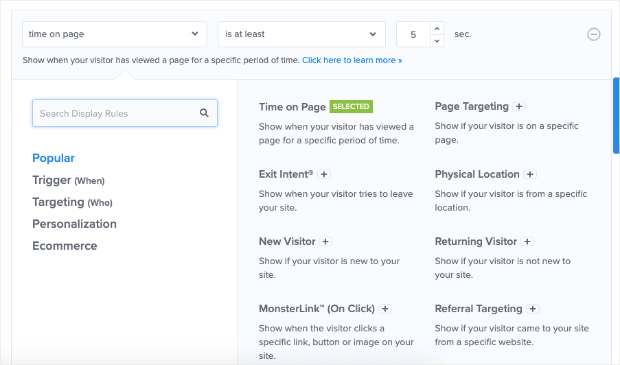
By default, all OptinMonster campaigns will have two display rules set:
- Time on page is 5 seconds
- Will display on any page
You can change this by clicking on the first rule (time on page). That will pull up the editing menu:
Today, let’s set a simple rule for an exit-intent popup. This means that your Wix lightbox popup will appear whenever someone is trying to leave their browser page.
This is an incredibly effective trigger. Just read some of the following success stories that show how powerful exit-intent popups can be:
- Crossrope Exploded Their Email List by 900% With Exit-Intent Popups
- How Rich Page Increased Conversions by 316% Using Exit-Intent Optins
- How Bonjour Lisbonne Used Exit-Intent to Double Their Email List
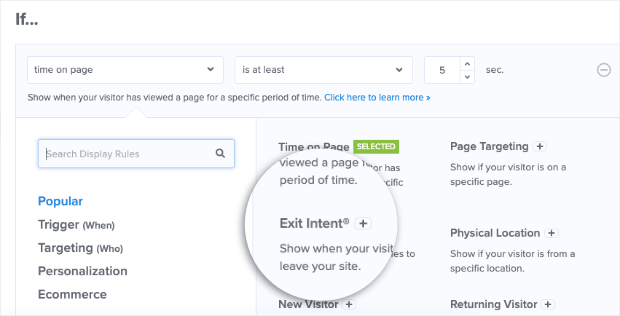
You can have similar success by quickly setting up this trigger for your Wix lightbox popup. To do so, locate and click Exit-Intent® in your display rules menu:
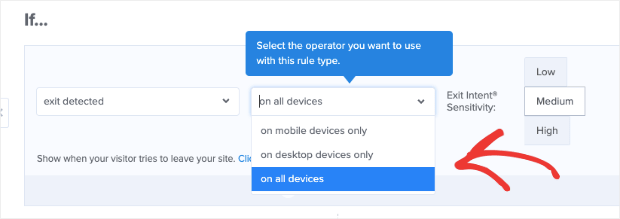
Then you’ll need to decide which devices you want to use Exit-Intent® Technology for:
- Desktop only
- Mobile only
- On all devices
Today, we’ll choose on all devices:
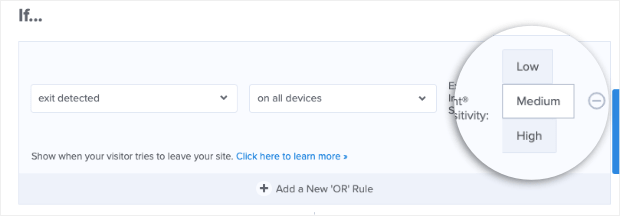
Finally, you need to set your Exit Intent® Sensitivity:
But you should know that the sensitivity level you choose will impact when your popup displays on mobile devices.
Low and Medium sensitivity create a scroll up trigger, whereas High sensitivity creates a back button trigger.
For more information on how this works, check out this helpful post: How to Create Mobile Exit-Intent Popups That Convert.
You can add as many targets and triggers as you’d like to create a personalized popup experience. Showing the right message at the right time in a customer’s journey is the best way to increase conversions on your site.
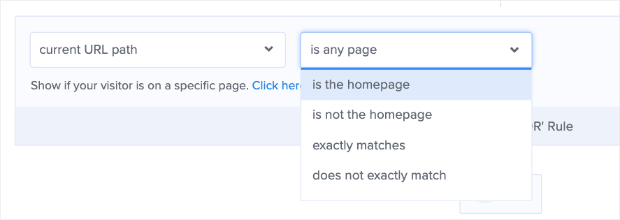
Today, we’ll leave the second rule (will appear on any page) as is. But you can easily change this too. You can make your Wix popup appear on:
- The homepage
- Pages that are NOT the homepage
- Specific URL paths
- And more
In other words, you can make your Wix lightbox popup appear wherever, whenever, and to whomever you want on your site.
It’s this kind of advanced functionality that makes OptinMonster a much more effective tool for lightbox popups than what Wix offers natively.
When you’ve created your display rules, it’s time to integrate the popup contact form with your email service provider.
Step 4: Integrate OptinMonster With Your ESP
One of the most popular use cases for a lightbox popup is to grow your email list and generate new leads.
That means you need a tool that allows you to connect seamlessly with your email service provider (ESP). OptinMonster definitely fits the bill.
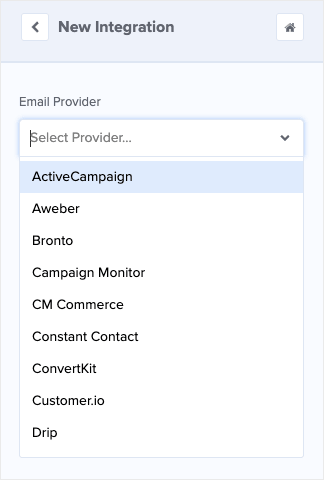
We integrate with over 30 of the most popular ESPs on the market. To connect OptinMonster with your ESP, click Integrations at the top of your editor menu:
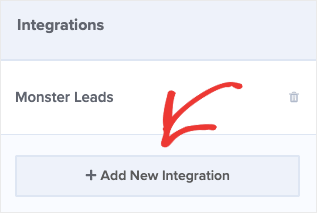
Then click + Add Integration in the left-hand side menu:
And select your ESP from the drop-down menu:
Once you’ve selected your ESP, you’ll simply need to add a few details like your account name and your email account’s API key. The exact process will vary depending on your ESP, but all of the options can be connected within a matter of minutes.
Don’t see your ESP on the list? No worries. Check out this article on how to connect OptinMonster to any ESP.
Now it’s time for the final step: embedding your OptinMonster popup on your Wix site and publishing the campaign.
Step 5: Embed and Publish Your Wix Lightbox Popup
Click Publish at the top of your OptinMonster editor:
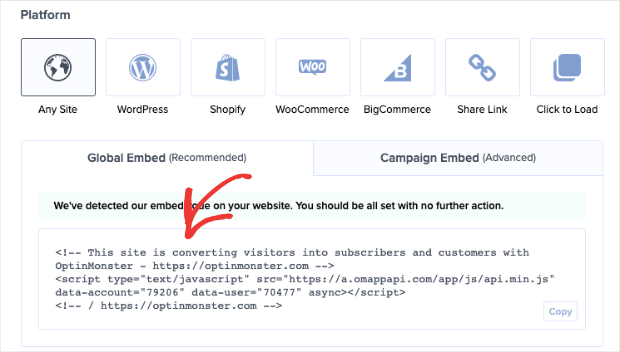
Scroll down the page until you see your campaign’s embed code:
Copy the embed code. Then head over to your Wix dashboard.
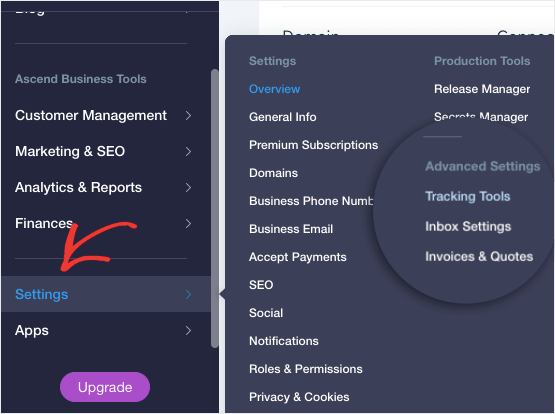
In the left-hand side menu, click Settings » Advanced Settings » Tracking:
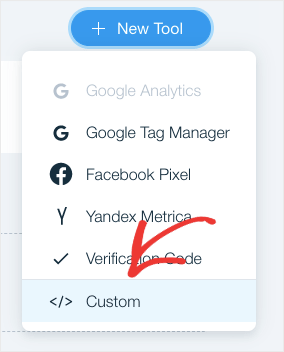
In the upper right-hand corner, click +New Tool » Custom
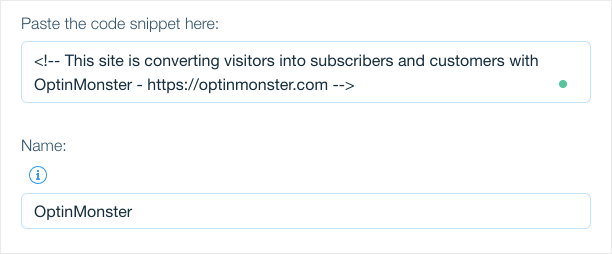
Now a new window will appear. Copy your OptinMonster embed code where indicated and name your customer code:
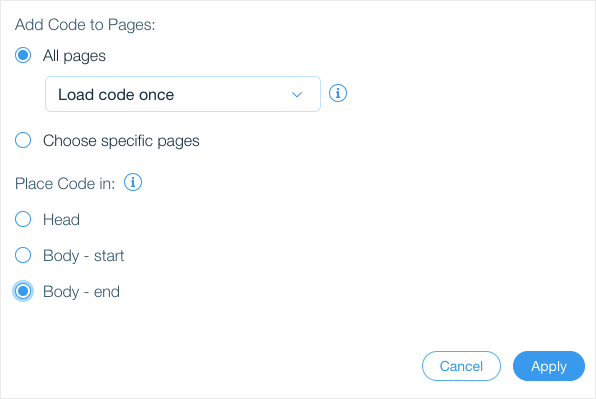
Then, just below, make sure that your code will appear on all pages and that your code goes into Body – end:
Click Apply when you’re finished.
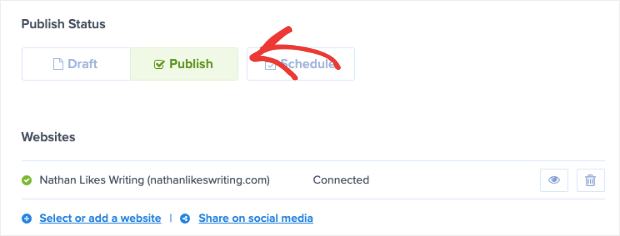
Head back to your OptinMonster dashboard and change your popup’s setting to Published:
And that’s it! Your Wix lightbox popup is now live on your site.
- How to Run a Successful Email Marketing Campaign
- Email Marketing for Beginners: A Step by Step Guide
- How to Create an Effective Email Autoresponder Series
- Wix Email Capture: 5 Ways to Grow Your Mailing List
These posts have everything you need to grow and monetize your email list.
Ready to get new subscribers and make more sales? Get started with OptinMonster now!
Disclosure: Our content is reader-supported. This means if you click on some of our links, then we may earn a commission. We only recommend products that we believe will add value to our readers.
