Are you using Elementor for your site and want to add a button that triggers a popup?
Elementor has become one of the most popular page builders on WordPress. It’s easy to use and doesn’t require any technical knowledge or coding skills to get started.
But, sometimes, you may want to add certain features to your site that Elementor doesn’t natively support. One of these features includes adding a popup that appears when users click a button or link.
That’s why, today, we’re going to teach you how to make an Elementor popup that’s triggered by a clickable link.
But first, let’s talk about why clickable popups are so important in the first place.
Why Have an Elementor Popup Triggered by a Click
You’re probably familiar with traditional popups from your own web-browsing experience: you visit a site and, after you’ve entered, a popup appears with a notification or form to fill out.
Depending on how personalized these popups are, they can be an effective way of growing your email list, distributing feedback forms, boosting sales, and more.
But there’s another strategy that’s even more effective at engaging users and often have high conversion rates: clickable links or buttons that trigger the popup campaign.
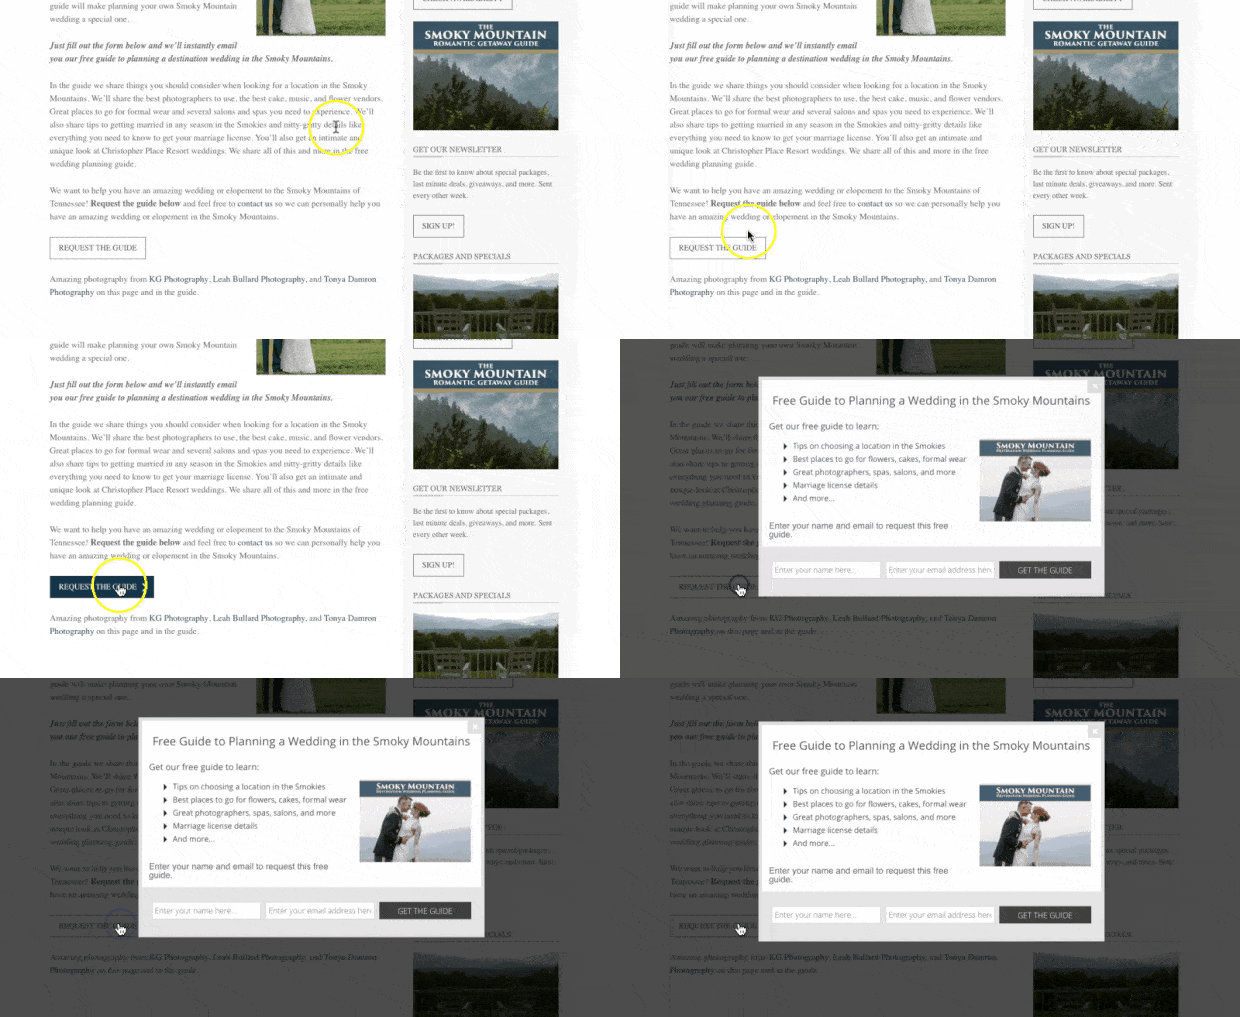
In this scenario, your user browses your site. Then, they see a button with a strong call to action (CTA). When they click the button, the popup appears. That looks something like this:
But what makes this clickable trigger work so well? It all comes down to something known as the Zeignarik effect.
The Zeignarik effect is a psychological principle that suggests people (including online consumers) are more likely to finish a process once they’ve started it.
And this is what makes clickable popups so powerful.
Because in most optin campaigns that you’ll see online, the popup appears unexpectedly on the screen. But with a clickable popup trigger, it’s actually the user who starts the process. As a result, they’ll be more likely to finish it by opting in.
Another great thing about these popups is that they’re more likely to be seen by warmer leads. That’s because people who click the button are already showing an interest in whatever information or offer is on your Elementor popup.
That means you’re growing your list or showing your promotional deals to people who are primed to optin.
But now the real question comes into play: how do you create a popup that appears from a button click if you’re using Elementor as your page builder?
For that, there’s no easier tool than OptinMonster:
OptinMonster is the best solution for creating a clickable popup with Elementor. Out of the many powerful triggers we offer, MonsterLinks™ are what drive clickable popups.
With MonsterLinks™, you instantly have an embeddable code for your popup campaign that can be inserted into any link or button. That means you can create stunning popup campaigns in a matter of minutes with our drag and drop builder.
Then you can embed these popups onto your site in just a few seconds.
This includes adding a clickable popup button or link with Elementor. In fact, here’s the Elementor popup we built for today’s demo:
This took less than 5 minutes to create, design, and embed on our site’s Elementor page.
But if you’ve worked with Elementor in the past, you’re probably familiar with their built-in popup builder. Which begs the question: why would you use OptinMonster for Elementor instead of Elementor’s popup builder?
That’s easy.
While Elementor’s popup builder is a good tool for basic campaigns, OptinMonster has so many more advanced targeting rules and features that can’t be ignored.
At the end of the day, we offer more ways to personalize your site’s popups to your user’s experience (UX). This level of personalization leads to higher conversion rates across your sites and more sales for your company.
Of the many advanced features OptinMonster offers, here are just a few that aren’t included in Elementor’s popup builder:
- Cookie Retargeting which helps you retarget your popup campaigns to boost conversions
- OnSite Follow Up Campaigns® which tracks how users interact with other campaigns on your site to determine whether your popup will appear
- AdBlock Detection which helps you show your campaign to users with adblockers enabled on their browser
And many more. The bottom line is that Elementor is primarily a page builder for WordPress that has a popup builder on the side.
OptinMonster, on the other hand, focuses exclusively on getting you the highest conversions possible through optin campaigns. It’s the only thing we do which is why we do it best.
Ready to see it in action? Just click below to start with your risk-free OptinMonster account.
Now, let’s dive into the tutorial!
How to Make a Clickable Elementor Popup
Before you start, you’ll need to connect your OptinMonster account with your WordPress site. Fortunately, that couldn’t be easier with OptinMonster’s WordPress plugin.
Check out this post to learn how to download and activate the OptinMonster plugin to connect your account.
From there, all of your campaigns can be controlled from either your OptinMonster dashboard or from your WordPress admin dashboard.
Once you’ve connected your site, you’ll be ready to get started.
Step 1: Select Your Campaign Type and Template
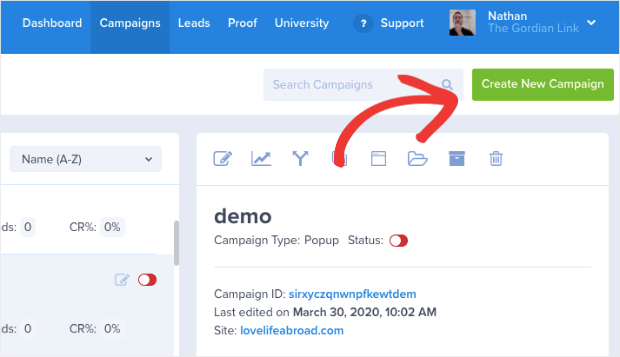
When you’ve finished signing up, head over to your OptinMonster dashboard. In the top right-hand corner of the screen, click Create New Campaign:
Then you’ll need to choose your campaign type. For today’s tutorial, we’ll select a Popup campaign:
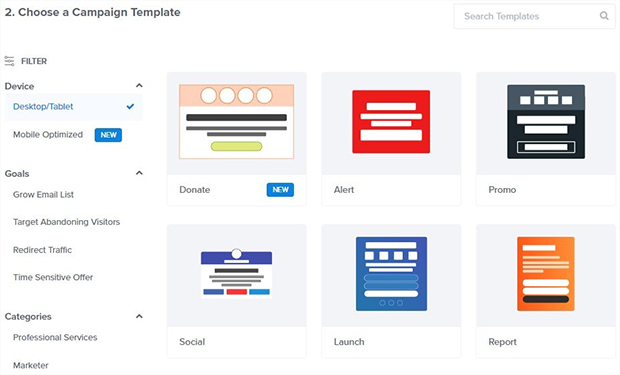
Now it’s time to select your template:
OptinMonster has over 50 pre-built templates to choose from. This means you can create stunning popups in just a matter of minutes with no coding skills required.
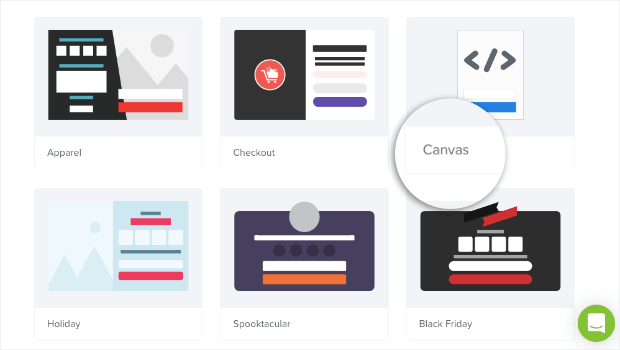
And if you want something 100% unique to your brand, you can always choose our Canvas template:
This is a blank template that allows you to build your Elementor popup from scratch. But, like all of our campaigns, you still don’t need any technical skills to get started.
That’s because, as you’ll see in a moment, our drag and drop builder makes designing your popup a breeze.
Today, we’ll go with the Basic template:
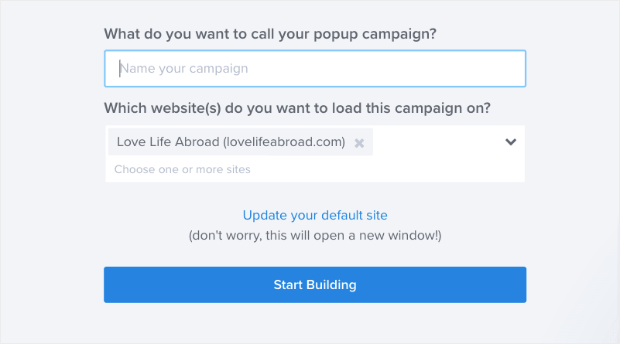
When you’ve chosen the template that will work best for your website, you’ll need to name your campaign, assign it to your site, and click Start Building:
Then it’ll be time to start designing your Elementor popup.
Step 2: Design Your Popup
Now you’re in your OptinMonster editor. As you’ll see, designing your campaign is easy!
We won’t get into all the ways you can modify your campaign. Frankly, there are too many customization options to cover in one post.
If you’re new to using OptinMonster or need a quick refresher, we highly recommend checking out this helpful resource on how to build your first campaign.
For today, you only need to know the basics.
All of our campaigns are made up of element blocks or “blocks” for short. These include things like:
- Text blocks
- Image blocks
- Optin field blocks (where you ask for a name and email address)
- Button blocks
- And much more
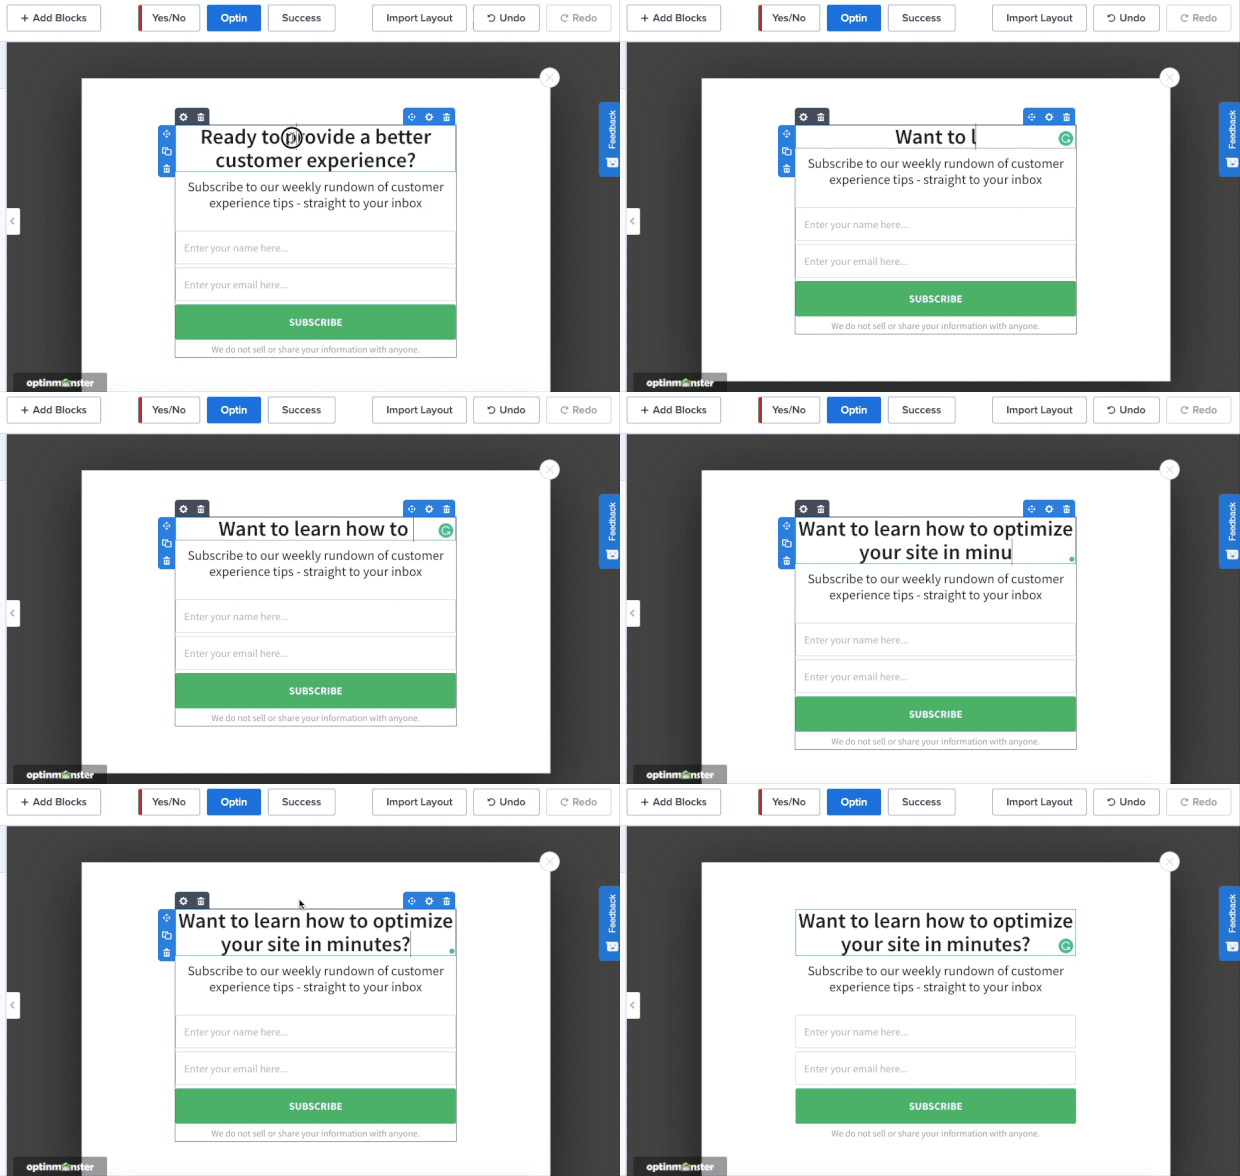
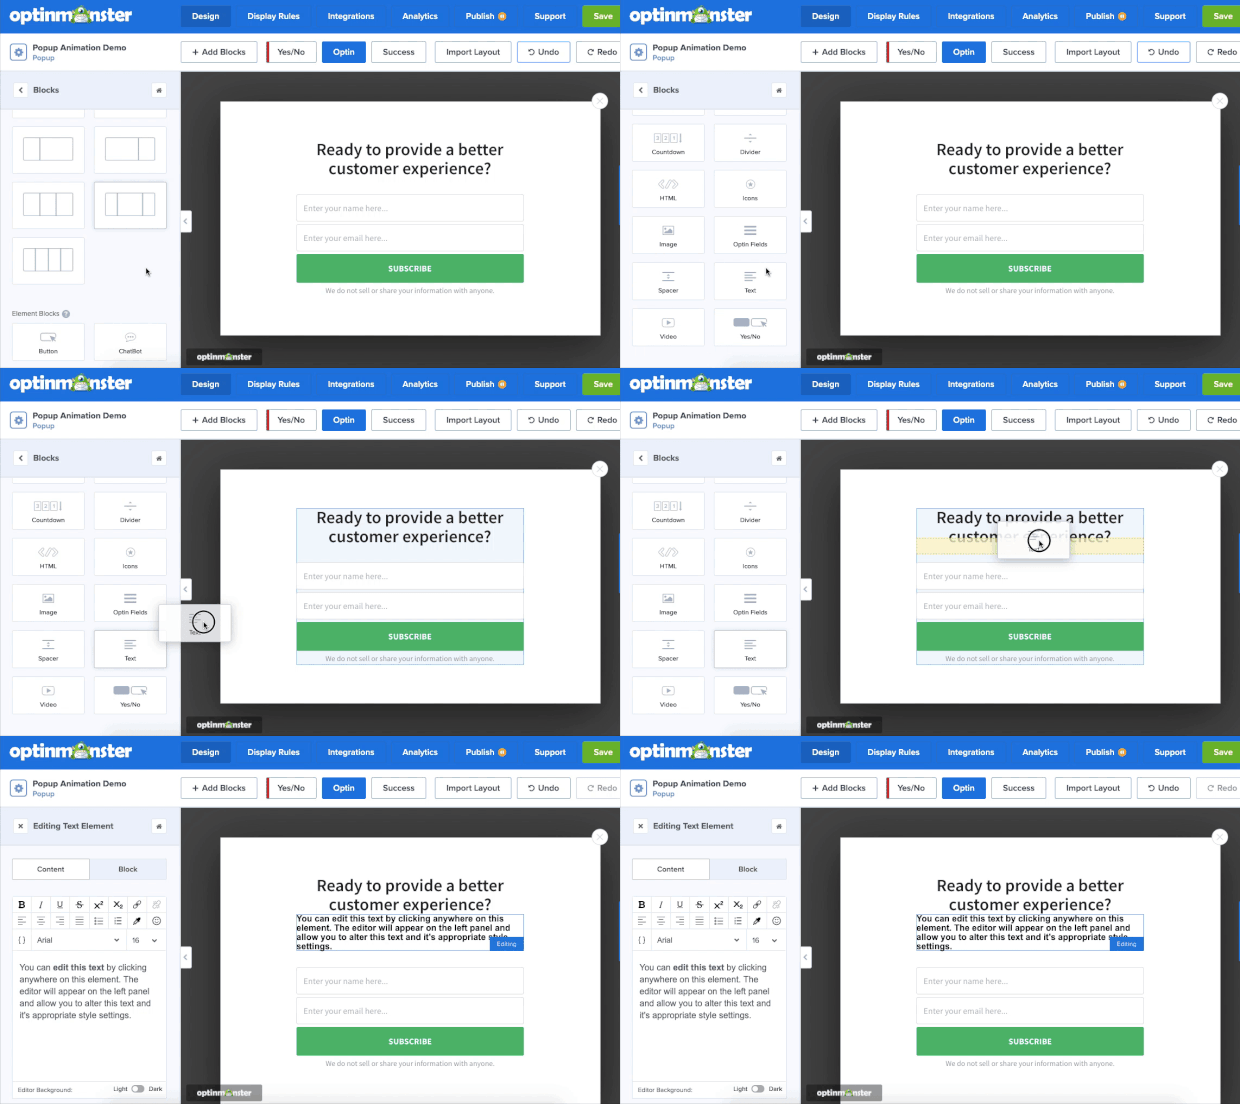
You can change the text block in your Elementor popup by using our inline text editor. That means you can click on the text you want to modify and change it directly in the editor:
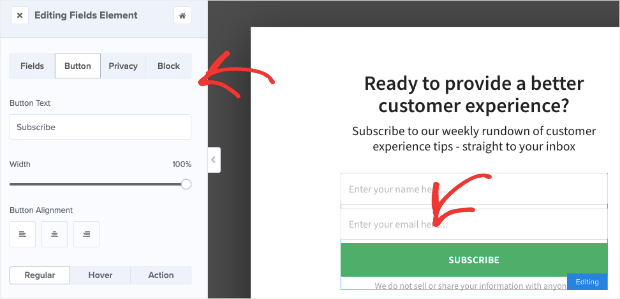
And if you want to change other aspects of your popup, you just need to click on it in your OptinMonster editor. Then the editing tools will appear on the left-hand side:
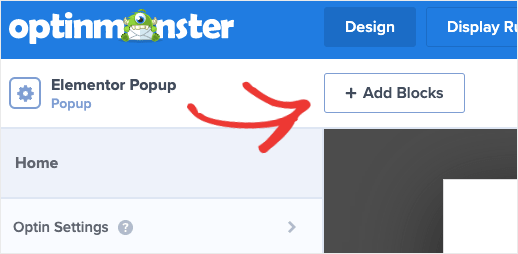
And if you think something is missing from your campaign, you can easily add a new block. Simply click + Add Blocks at the top of your editor menu:
Then select the block you want to add from the left-hand menu to drag and drop it into place on your campaign:
Again, designing your OptinMonster campaign is super easy, even if you have no technical skills at all.
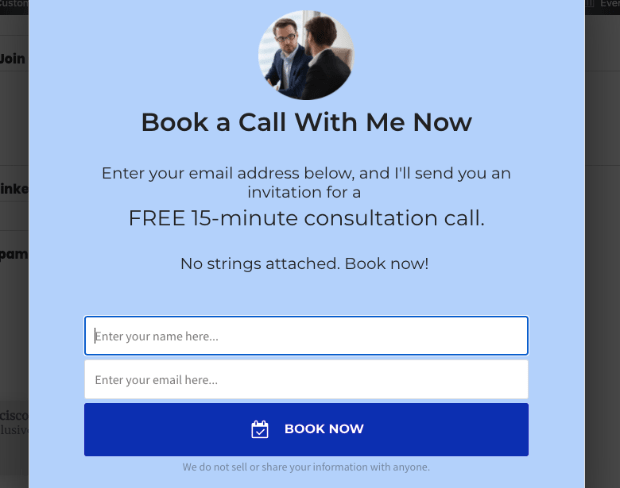
Here’s the popup we created for today’s tutorial:
This took us less than 5 minutes to design and can be embedded into any Element link or button in just a few minutes.
And on that note, let’s get into how to create your MonsterLink™.
Step 3: Create and Embed Your MonsterLink™
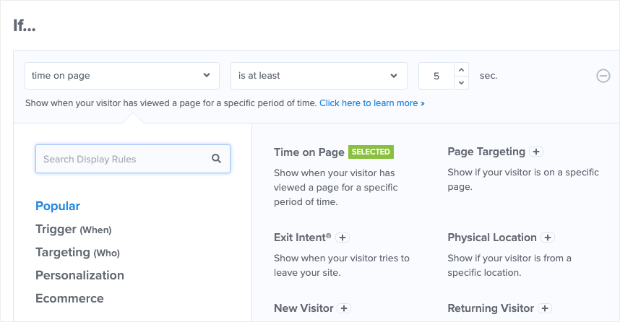
At the top of your editor menu, click Display Rules:
By default, all of our campaigns have 2 display rules set:
- Time on page is 5 seconds
- The campaign will appear on every page of your site
To change this, click on the first rule to bring up the display rule menu:
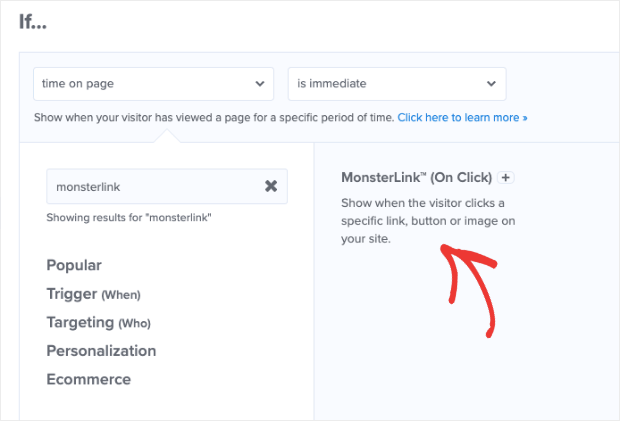
In the search bar, type MonsterLink™. When the option appears, click on it in the display rules menu:
And that’s it! Your MonsterLink™ will be automatically generated. All you need to do is click Copy MonsterLink™ Code:
This will give you the embeddable HTML link that looks like this:
<a href=”https://app.monstercampaigns.com/c/y7snphtfpicxdcx3zpc2/” target=”_blank” rel=”noopener noreferrer”>Subscribe Now!</a>
But if you’re building your site with Elementor, you won’t need the full HTML. Instead, you’ll simply need the URL for your clickable popup.
You can grab the URL from the HTML (it’s everything between the quotation marks, starting with “https://“):
https://app.monstercampaigns.com/c/y7snphtfpicxdcx3zpc2/
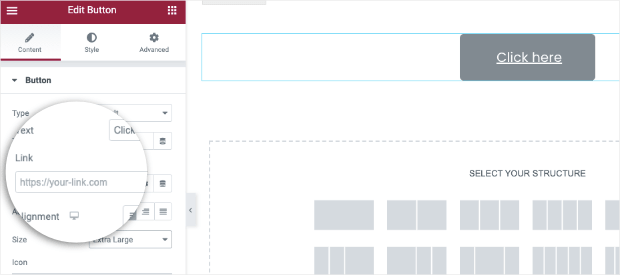
Now head over to your WordPress site and open the page you’re building with Elementor. You can then add this URL to your text or button like you would with any URL:
And just like that, your Elementor page will have a clickable popup once your OptinMonster campaign is published.
But first, you may want to add your email service provider if you’re using this campaign to grow your email list.
Step 4: Integrate With Your ESP (optional)
In many cases, you may use your Elementor popup to grow your contact list and improve your email marketing strategy.
If so, head to Integrations at the top of your OptinMonster editing menu:
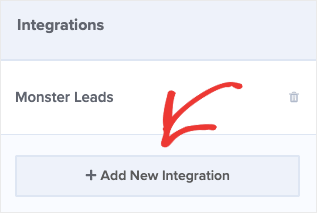
Then, on the left-hand side, click Add New Integration:
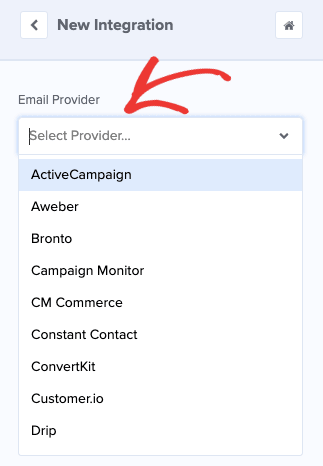
And select your email service provider from the drop-down menu:
Then it’s just a matter of adding your API key and connecting your ESP. The exact steps will vary depending on which platform you use, but all of them can be connected in just a minute or two.
Don’t see your ESP on the list? That’s no problem. Check out this helpful article on how to connect OptinMonster with any ESP.
All that’s left is to publish your campaign.
Step 5: Publish Your Campaign
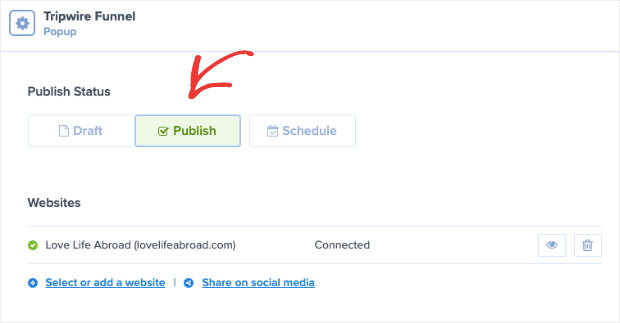
When you’re happy with your Elementor popup’s design, and you’ve integrated it with your ESP, click Publish at the top of your editor menu:
Now change the status of your campaign from Draft to Published:
And that’s it! Your Elementor popup is now ready to go.
Here’s what our Elementor popup looks like in action:
Again, the entire process took less than 5 minutes to create, design, and embed the campaign.
If you published your campaign but get a message that your site isn’t connected yet, that’s no problem. Head back to the start of this tutorial to learn how to connect OptinMonster with your WordPress site.
We hope you found this tutorial helpful. If you’re using your Elementor popup to grow your email list, then you might find the following resources helpful:
- How to Run a Successful Email Marketing Campaign
- Email Marketing for Beginners: A Step by Step Guide
- How to Create an Effective Email Autoresponder Series
These articles will have everything you need to learn the best strategies for growing and monetizing your email list.
Ready to get started? Click here to start your risk-free OptinMonster account today!
Disclosure: Our content is reader-supported. This means if you click on some of our links, then we may earn a commission. We only recommend products that we believe will add value to our readers.
