Do you want to convert more visitors into subscribers using inline forms on your site?
Inline forms grab the attention of your readers and gets them to signup for email newsletters or other marketing campaigns.
This tutorial will show you how to add inline forms seamlessly inside pages and posts to target visitors who are already engaged in your content.
Let’s dive right into the tutorial.
The Best Way to Create Responsive Inline Forms
Inline forms let you insert effective calls to action (CTAs) anywhere on your website, including your site’s content like blog posts, documentation pages, and so on.
This encourages readers to take action, like signing up for newsletters, registering for a webinar, checking out a demo, and much more.
The great thing about inline forms is that it gives readers better direction to take the next steps to become subscribers.
There are a few tools you can use to create inline forms, but the best is hands down OptinMonster.
OptinMonster is by far the best lead generation tool on the market.
It lets you create stunning inline forms in a matter of minutes. You can then add these forms across your website to maximize the number of subscribers you get.
OptinMonster comes with 50+ beautiful templates to suit different marketing goals. And it comes with a codeless drag and drop builder to easily customize your campaigns’ design.
This makes all of our inline forms totally unique to your site.
Every form is responsive, which means it’ll look great on any device the reader is using, including mobile.
And you can do it all without any coding or CSS knowledge or experience.
Other inline form tools may require CSS to style the form or embed it on your site, but not OptinMonster. Everything can be done in a few simple clicks.
Plus, OptinMonster comes with really powerful features that help you maximize engagement. These include:
- Content locking to blur out content below the campaign and grant access only when the visitor signs up
- Targeting rules to display form to the right people at the right time
- Success messages to confirm subscriptions
- Seamless integrations with popular email service providers (ESPs)
- A/B testing and analytics to optimize results
OptinMonster works on any website, so you can build inline forms for WordPress, Drupal, Shopify, Joomla!, Magento, and even HTML sites.
Aside from inline forms, OptinMonster lets you create all kinds of lead generation campaigns such as popups, floating bars, slide-ins, gamified wheels, and much more.
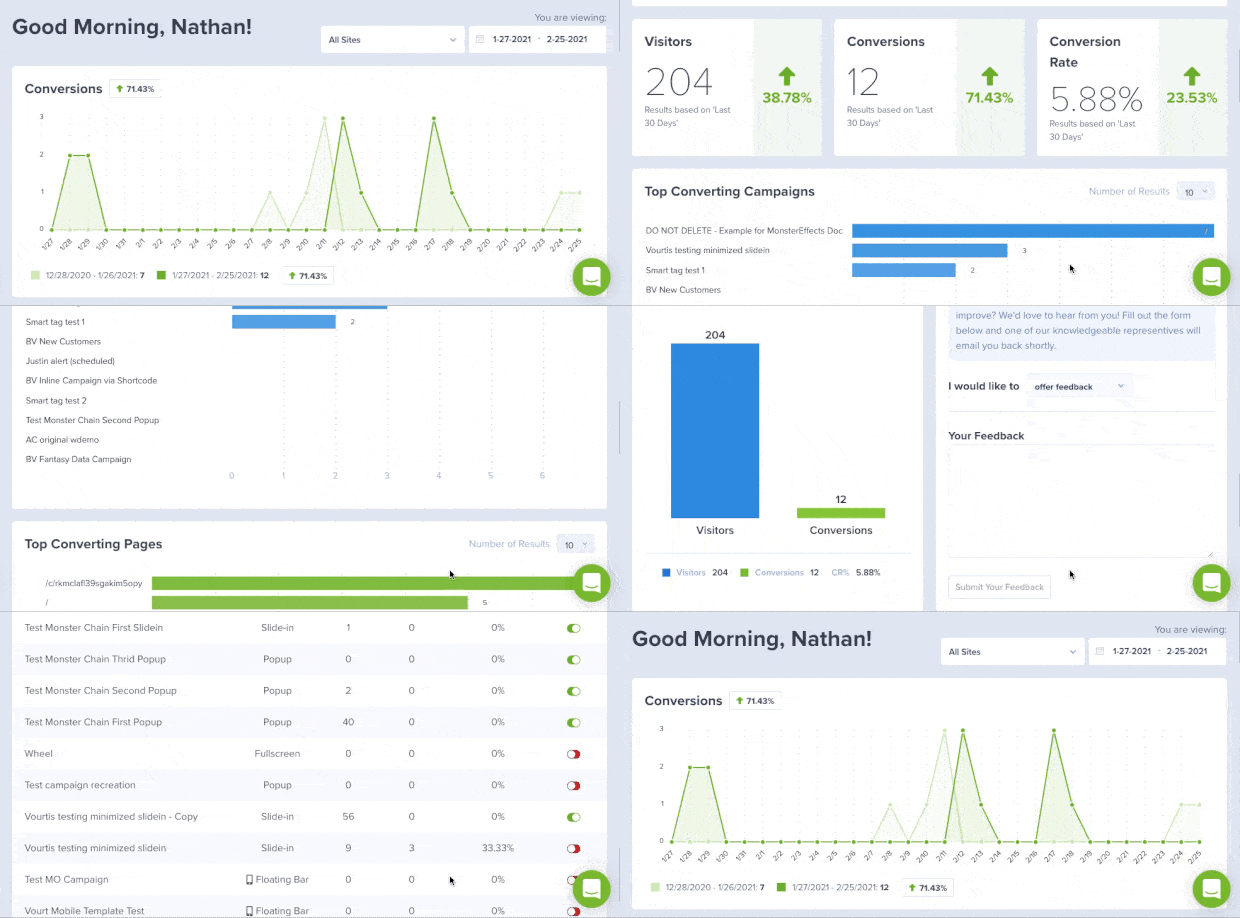
To top it all off, OptinMonster lets you track the performance of your campaigns.
That way you can see exactly how many people signed up and converted through the campaign. If you have an eCommerce site, you can even see how much money your campaigns make for you.
Not totally convinced? Take a look at how Lilach Bullock converts 57% of visitors using OptinMonster’s inline campaigns.
Or how Whole Whale increased conversions by 100% with content locking.
Ready to create your own high-converting inline form? Then sign up for your 100% risk-free account right away by clicking below:
Now let’s look at how to create a beautiful inline form with OptinMonster.
Creating an Inline Form in Under 10 Minutes
In this tutorial, we’ll show you how to create an OptinMonster inline campaign that you can add to your pages, blog posts, sidebar, and footer.
We’ll also show you how to connect it to your email account, so all your new leads will automatically be added to your contact list.
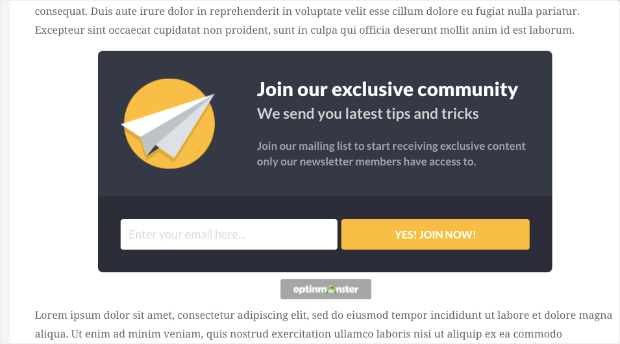
Here’s a sample of the campaign we’ll be creating:
Keep in mind that OptinMonster has 50+ templates, and you can even start from scratch to create your own campaign design.
In other words, feel free to find a template that fits your brand’s style. You’ll still be able to follow along with this inline form setup.
Ready to get started? Let’s dive into the tutorial.
Step 1: Signing up for OptinMonster
The first thing you’ll want to do is sign up for your 100% risk-free OptinMonster account.
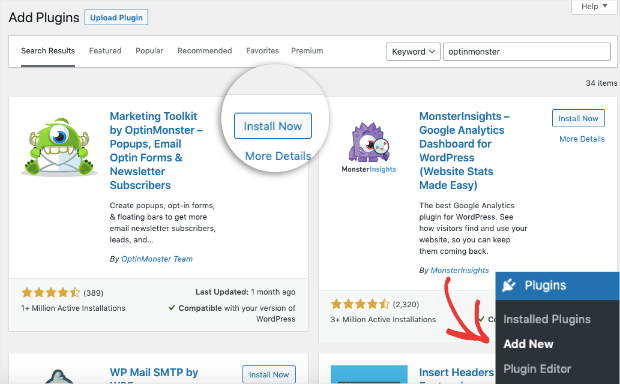
Adding OptinMonster to any website is super simple. If you’re using WordPress, you can install the OptinMonster plugin on your site.
For all other websites, follow this guide to add OptinMonster to any site.
Once you sign up, you can access the OptinMonster dashboard where you can build your inline form.
Step 2: Creating an Inline Form with OptinMonster
In the OptinMonster dashboard, you can get started by clicking on the Create New Campaign button.
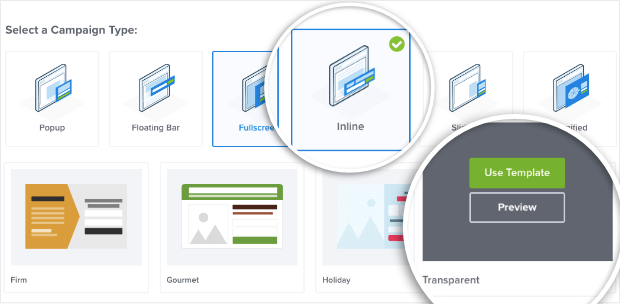
This will open up a page where you can select the Inline campaign type. Next, you can explore the templates by hovering over them and seeing a preview.
To create our sample campaign, we’re going to use the Transparent template today.
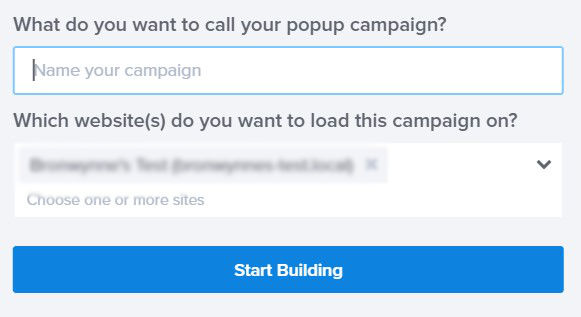
When you select a template, Optinmonster will ask you to name your campaign so you can find it easily in the list of campaigns you create.
Once you click on the ‘Start Building’ button, OptinMonster’s campaign builder will open up where you can customize the inline form using the drag and drop builder.
Step 3: Customizing the Inline Form
OptinMonster’s campaign builder is incredibly easy to use. You’ll see a preview of the template you selected, which you can edit directly.
Keep in mind that OptinMonster’s templates are designed to look great and function out of the box, so you won’t have to do much when it comes to designing. However, you might want to make a few changes to the template to better match your marketing goals.
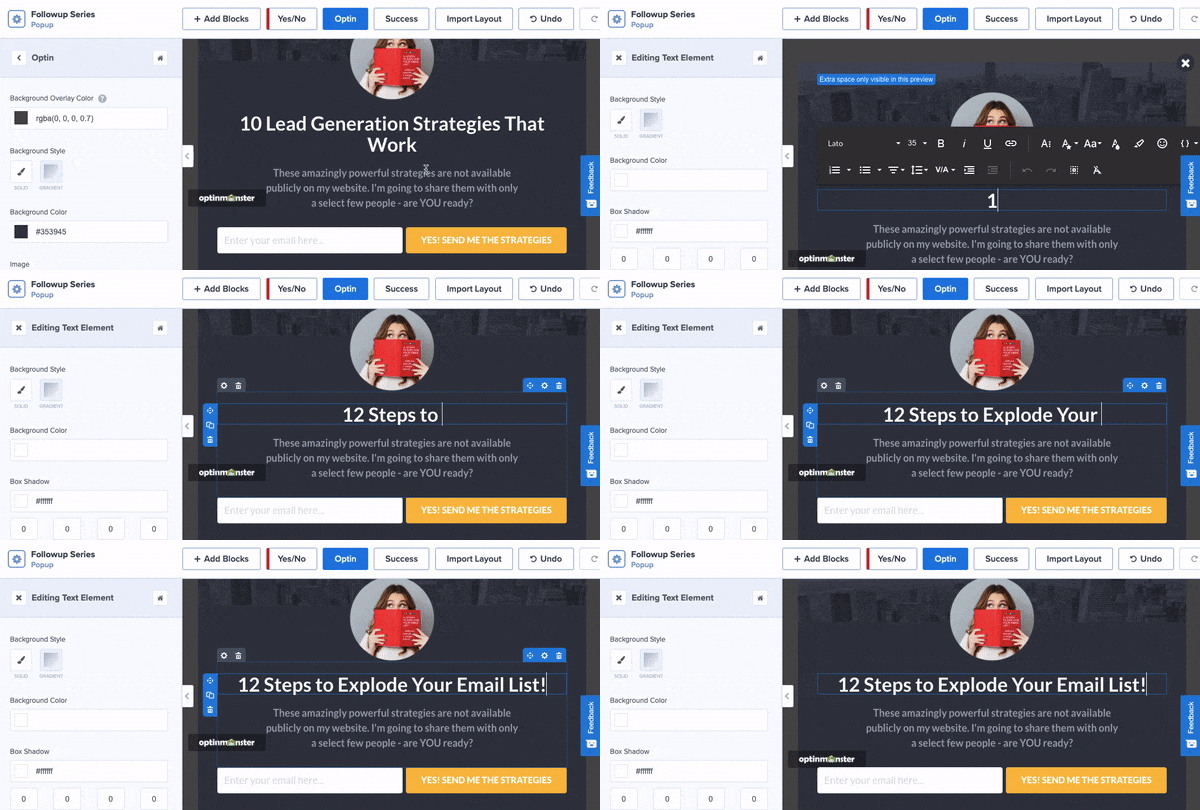
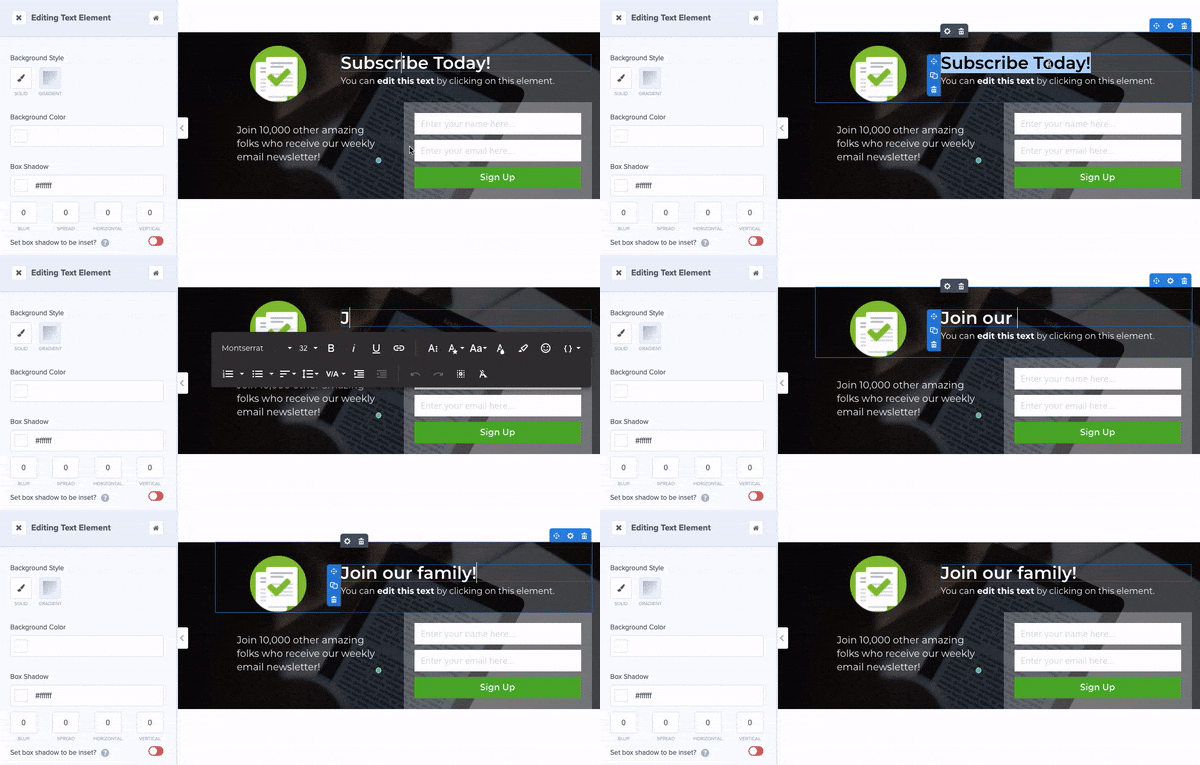
To get started, you can select the existing text in the campaign and simply replace it with your own.
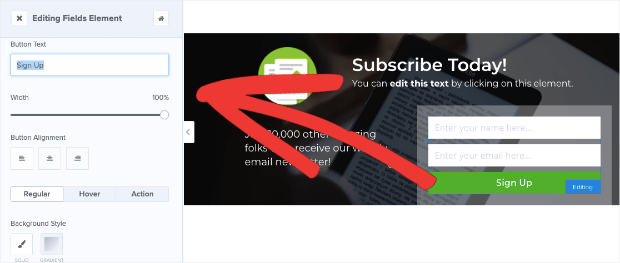
And to get more people to sign up, you’ll want to display a CTA button that matches your message. When you select the button, you’ll see options to change it in the left-hand side column.
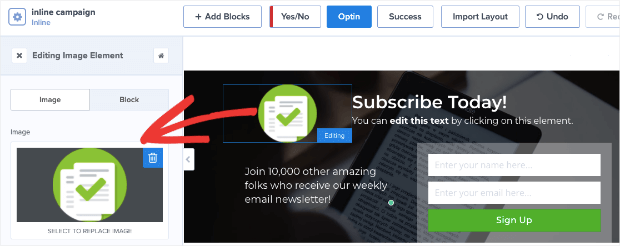
You can also change the color, style, alignment, and more. In the same way, you could add your logo or upload an image of your choice:
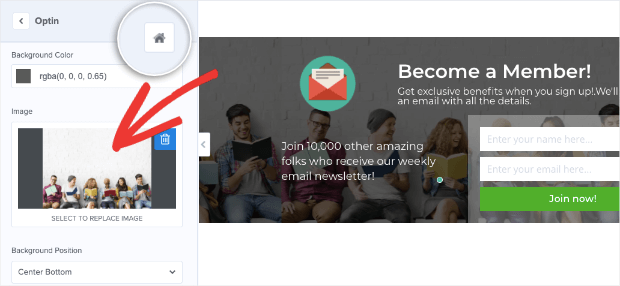
OptinMonster also lets you customize the background.
Using the home menu, navigate to Optin Settings » Optin View Styles tab. Here, you’ll find options to upload an image or use the color palette to change the background to a solid or gradient color.
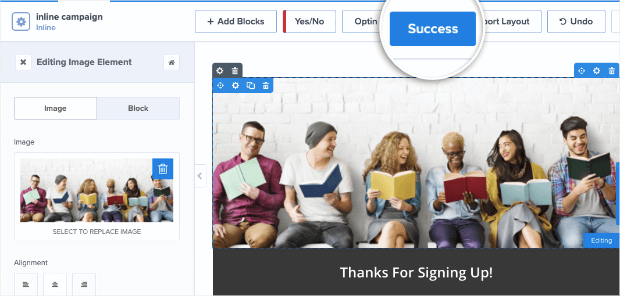
Finally, switch to the Success tab to customize the confirmation message. This will appear to visitors as soon as they submit the form.
You can change the image, colors, and text here to match the design of your inline form.
And with that, your inline form design is ready. Next, we want to show you OptinMonster’s inline form settings that let you do much more with your form.
Step 4: Configuring Inline Form Options
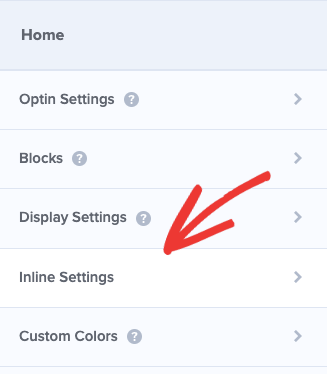
In the campaign builder, using the home menu, navigate to the Inline Settings tab.
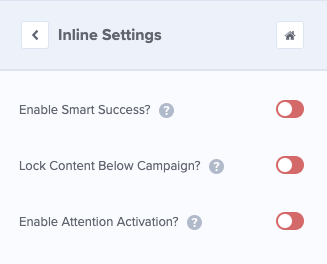
- Enable Smart Success: If a visitor has already opted in through another campaign, the success view will be shown. This will make sure those who have subscribed don’t see repeated campaigns.
- Lock Content Below Campaign: Blocks or blurs out any content below the form until the visitor unlocks it by subscribing.
- Enable Attention Activation: Fades out the rest of the page and highlights the campaign when the user scrolls 100% of the form into view.
Learn more about content locking by checking out the following detailed guide: How to Lock Content in WordPress for Premium Subscribers.
If you want a simple inline form, you can leave these settings turned off.
The next step in creating an OptinMonster campaign is to set up display rules that help you target your visitors according to their behavior, activity, where they’re located, and more.
Since we’re working with an inline form, you won’t need to configure any display rules. The form will appear where you embed it on your site.
However, when you’re creating other OptinMonster campaigns, like popups, slide-ins, and more, you can create display rules that will determine when, where, and to whom they appear.
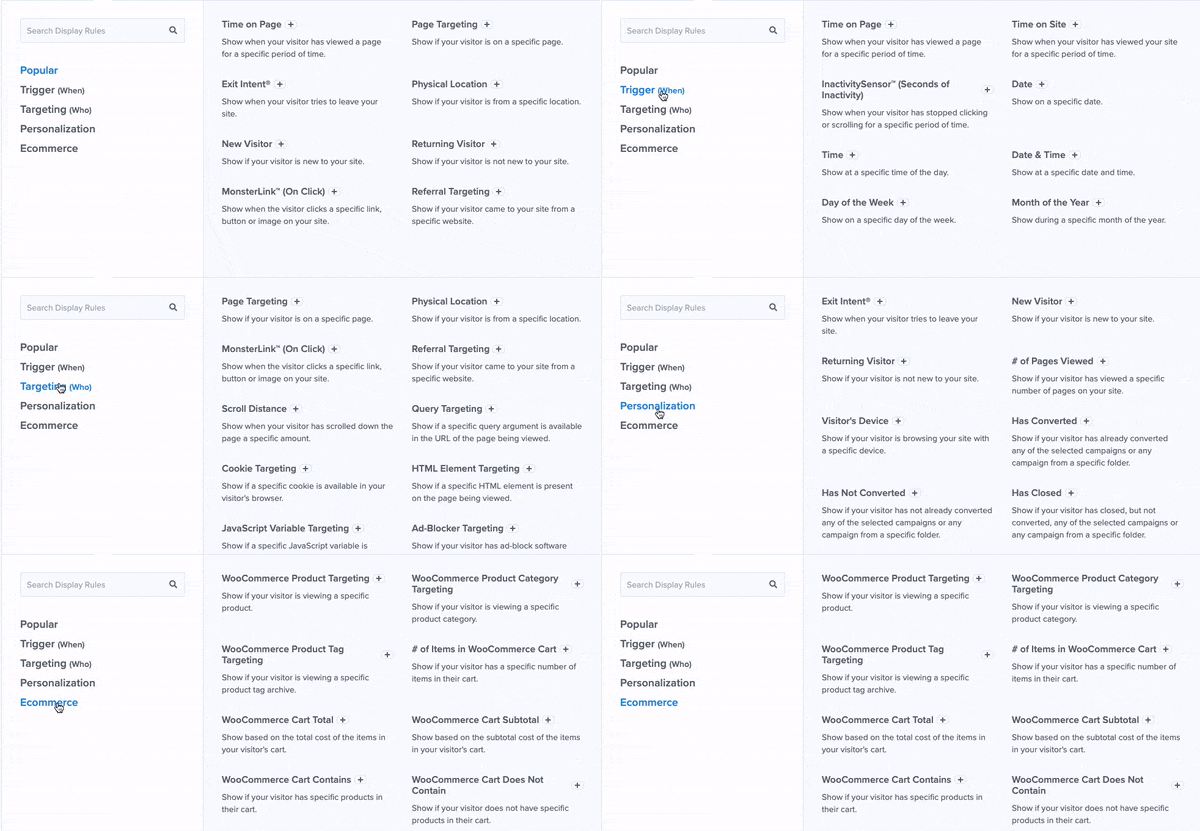
In the Display Rules tab, you’ll see targeting options like:
- Exit-Intent® Technology: Recover abandoning users as they’re actively leaving your website.
- OnSite® Retargeting: Keep users engaged by showing new campaigns to returning visitors.
- Geolocation: Customize the customer experience by targeting users based on their physical location.
These are just a few examples of OptinMonster’s targeting rules, though there are many others.
But again, for today’s tutorial, you’ll simply need to embed your inline form in your posts or pages, where you’d like them to appear.
Next, we’ll show you how to integrate the campaign with your email account.
Step 5: Connecting to Your Email Account
OptinMonster lets you connect your inline form to your email service provider (ESP). This means all new leads will be automatically added to your email list. You can then trigger emails to be sent as soon as a person signs up.
This lets you automate the process of sending subscribers the lead magnets you promised, welcome emails, webinar and event links, or confirmation emails.
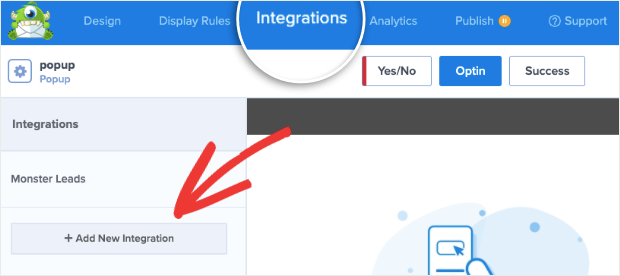
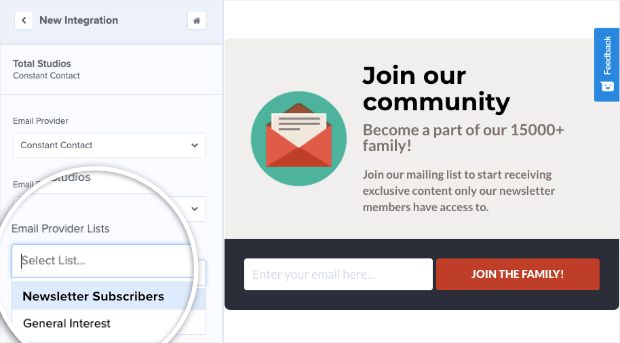
Inside the Integration page, you’ll see an option to Add New Integration.
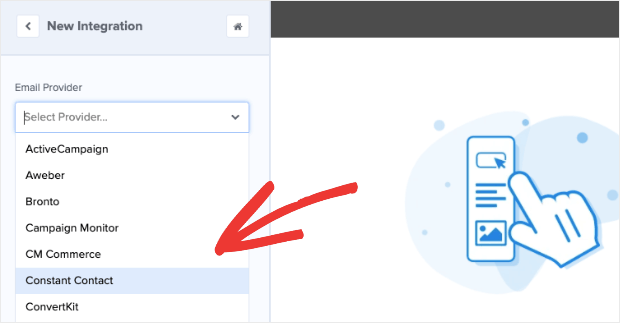
When you click on this button, you’ll get a drop-down menu of all the ESPs available.
OptinMonster integrates with a long list of email service providers including Constant Contact, Mailchimp, AWeber, Brevo (formerly Sendinblue), and ActiveCampaign.
Simply choose your ESP and follow the onscreen instructions to sign in to your account and make the connection.
Depending on your ESP, you’ll see more options to add the leads to a separate email list so you can segment your audience right from the start.
With that, your OptinMonster inline form is integrated with your email account.
You can go ahead and add the inline form to your site.
Step 6: Publishing OptinMonster Campaign
OptinMonster makes it really easy to add the inline form to your site without any coding knowledge required.
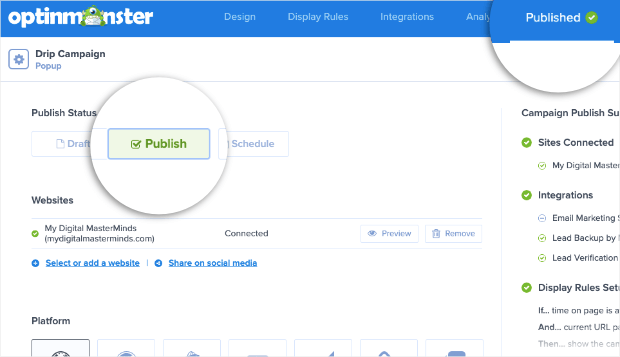
First, switch to the Publish tab in the OptinMonster campaign builder and set the status to ‘Publish’ here.
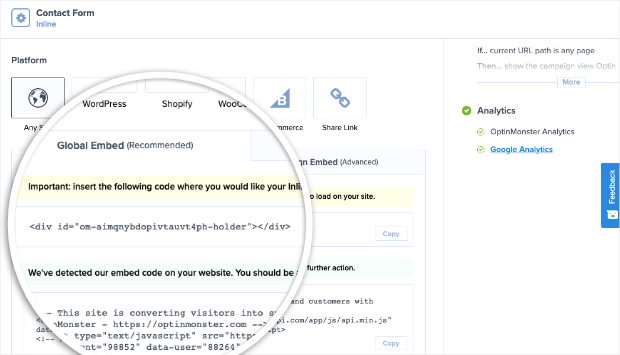
On the same page, you’ll see a campaign embed code like this:
Copy this code and paste it on your website where you want the inline form to appear.
If you’re using WordPress, you can skip this method and use the built-in widget to add the form at the click of a button.
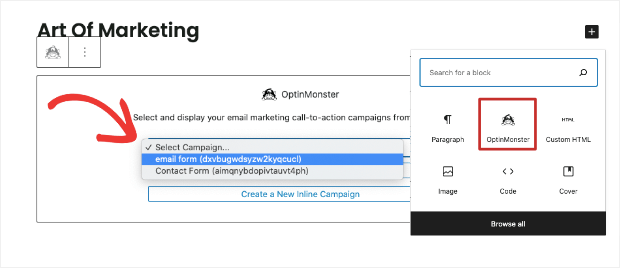
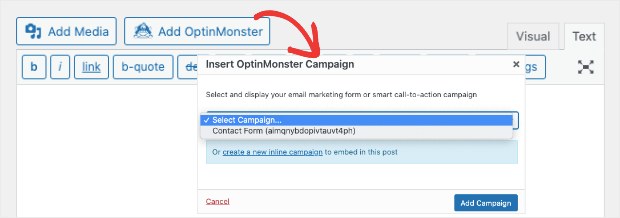
To add the campaign to a post or page using the block editor, you can select the OptinMonster block and choose your campaign:
The OptinMonster widget is available in all popular page builders like Elementor and Beaver Builder. There’s also an OptinMonster button inside the Classic editor.
You can select your campaign, and the form will automatically be added to your page or post.
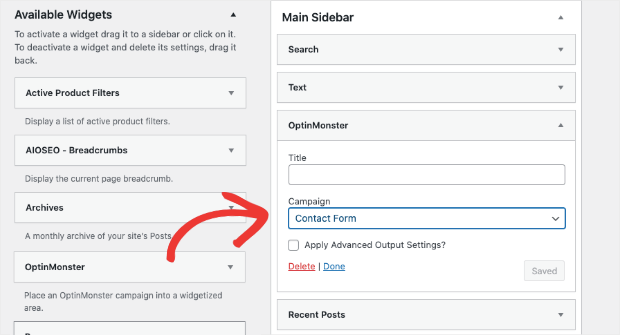
If you want to add the inline form to a WordPress sidebar, navigate to the Appearance » Widgets tab. Then drag and drop the OptinMonster widget into your sidebar menu and select the inline form.
Once you save and publish your page or sidebar, you can visit your site and see your inline form in action.
With that, you’ve learned to create stunning inline forms that you can add anywhere on your site. OptinMonster also gives you more control over how your form works, so you can grow your list FASTER.
Now that you know how easy it is to create high-converting inline forms, check out how else OptinMonster can help you grow your list and make more money in this detailed guide: How to Make More Money With OptinMonster (in ANY Business).
And that’s all we have for you today. If you haven’t signed up for OptinMonster yet, what are you waiting for?
Get your 100% risk-free OptinMonster account now by clicking below:
We hope you found this tutorial helpful in creating a beautiful and functional inline form. We also have a few other resources that you should definitely check out:
- How to Get More Blog Followers: 14 Proven Ways to Increase your Readers
- How to Create an Effective Email Autoresponder Series
- Spam Email Signups: 3 Ways to Protect Your Email List
These posts will help you get more subscribers, improve your email marketing efforts, and reach your marketing goals faster.
Disclosure: Our content is reader-supported. This means if you click on some of our links, then we may earn a commission. We only recommend products that we believe will add value to our readers.
